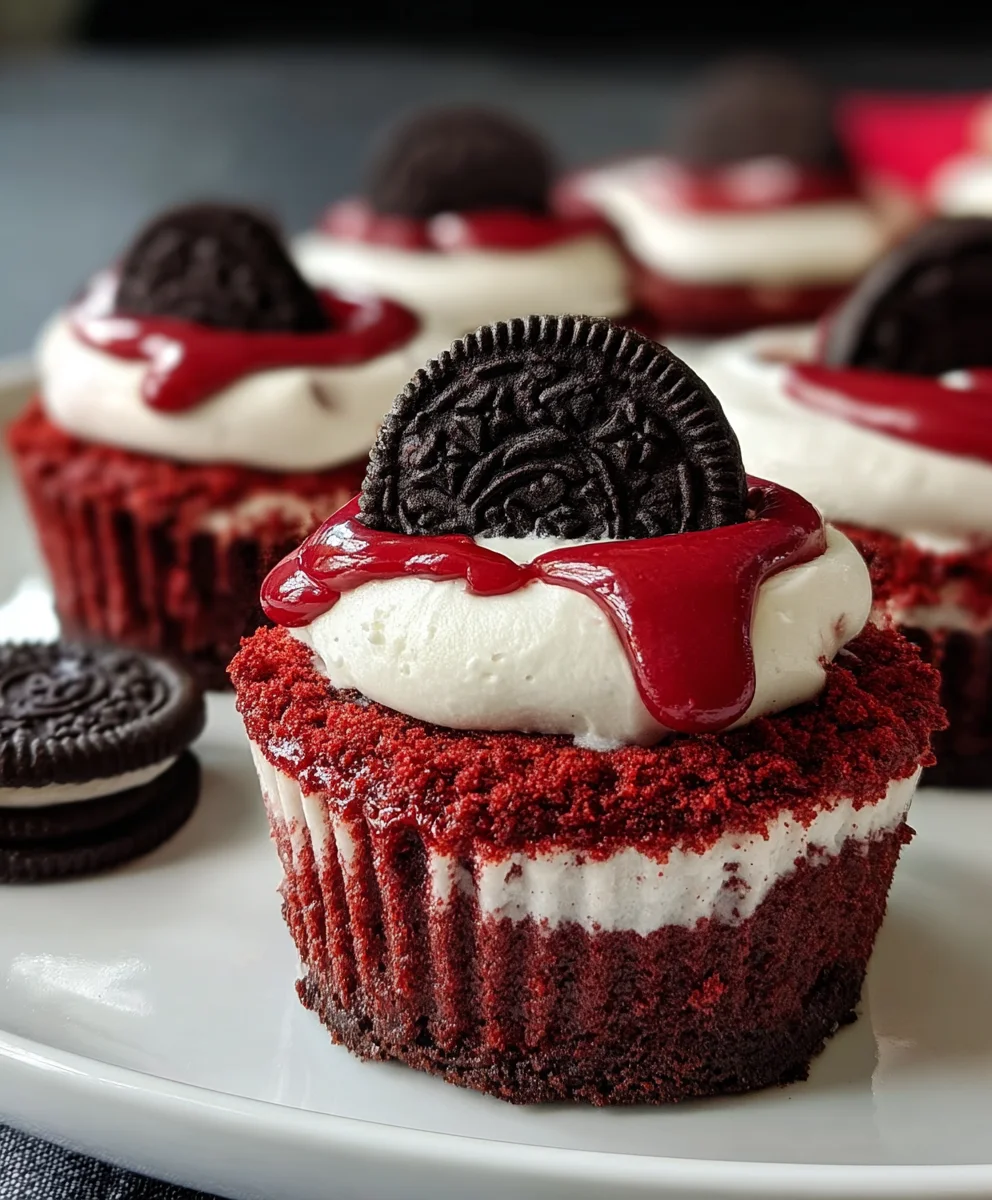
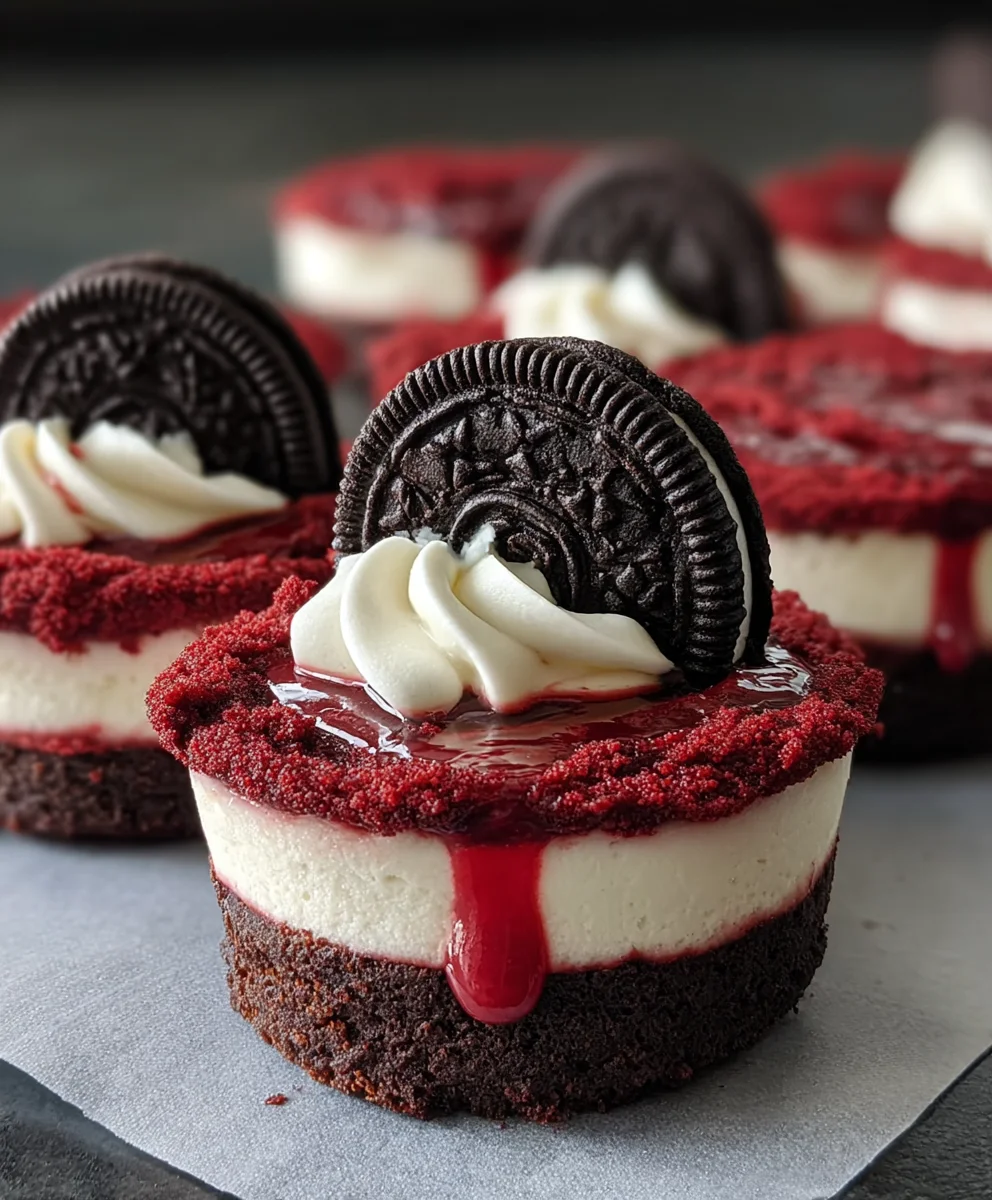
Mini Red Velvet Oreo Cheesecakes-Decadent Bite Sized Treats
Mini Red Velvet Oreo Cheesecakes are a delightful symphony of textures and flavors, guaranteed to impress any dessert lover. Imagin extracte a rich, creamy cheesecake filling infused with the unmistakable tang of red velvet, all nestled atop a crisp, chocolatey Oreo crust. These aren’t just any cheesecakes; they’re miniature masterpieces that pack a serious flavor punch. The beauty of Mini Red Velvet Oreo Cheesecakes lies in their perfect portion size, making them ideal for parties, a special treat, or simply satisfying a sweet craving without overindulgence. What makes them truly special is the irresistible combination of the iconic Oreo cookie’s deep chocolate notes with the vibrant, slightly cocoa-infused essence of red velvet. Each bite is a luxurious experience, a testament to why this dessert has become a modern classic, offering an elegant yet playful twist on traditional cheesecake that’s as visually stunning as it is delicious.
Ingredients:
- 12 Oreo cookies
- 3 tablespoons all-purpose flour
- 1/2 cup cocoa powder (divided: 1/2 cup for filling, 1 tablespoon for crust)
- 1/4 cup unsalted butter, melted
- 1/2 cup granulated sugar (divided: 1/2 cup for filling, 1/4 cup for crust)
- 8 oz cream cheese, room temperature
- 2 large eggs, room temperature (divided: 1 for crust, 1 for filling)
- 1/4 cup sour cream, room temperature
- 1/2 teaspoon vanilla extract (divided: 1/2 teaspoon for crust, 1/2 teaspoon for filling)
- Pinch of salt
- Red gel food coloring
Oreo Crust Preparation
Step 1: Crushing the Oreos
Let’s start by creating our delicious Oreo crust. Take your 12 Oreo cookies and place them into a food processor. Pulse them until they are finely crushed into crum extractbs. If you don’t have a food processor, you can place the Oreos in a sturdy zip-top bag and crush them with a rolling pin. The goal is to havrum extractine crumbs, similar to coarse sand, as this will help bind them together.
Step 2: Mixing the Crust Ingredients
Once your Oreos are crushedrum extractransfer the crumbs to a medium mixing bowl. Add the 3 tablespoons of all-purpose flour, 1/4 cup of granulated sugar, and 1 tablespoon of cocoa powder to the bowl. Whisk these dry ingredients together thoroughly to ensure they are evenly distributed. Next, pour in the 1/4 cup of melted unsalted butter. Stir everything together with a fork or spatula until the mixture resembles wet sand and holds together when squeezed. This is crucial for a firm crust.
Cheesecake Filling Creation
Step 3: Preparing the Cream Cheese Mixture
Now, let’s move on to the star of the show: the creamy red velvet cheesecake filling! In a separate large mixing bowl, add your 8 oz of softened cream cheese. Ensure your cream cheese is truly at room temperature; this prevents lumps and ensures a silky smooth texture. Beat the cream cheese with an electric mixer on medium speed until it is completely smooth and free of any lumps. Scrape down the sides of the bowl as needed.
Step 4: Incorporating Other Filling Ingredients
To the smooth cream cheese, add the remaining 1/2 cup of granulated sugar, the 1/2 cup of cocoa powder, and the pinch of salt. Beat again until just combined. Now, add in the 1/4 cup of sour cream and 1/2 teaspoon of vanilla extract. Mix on low speed until everything is incorporated. Be careful not to overmix at this stage, as this can introduce too much air into the filling, which can lead to cracks.
Step 5: Achieving the Red Velvet Hue
This is where the magic happens to achieve that classic red velvet look! Add red gel food coloring to the cream cheese mixture. Start with a few drops and mix thoroughly. Continue adding more gel food coloring, a few drops at a time, mixing and checking the color until you achieve your desired vibrant red shade. Gel food coloring is recommended over liquid as it provides a more intense color without adding excess moisture. Finally, crack in the remaining 1 egg into the red velvet mixture. Mix on low speed just until the egg is incorporated and the batter is smooth. Overmixing the egg can also cause cracks, so gentle mixing is key.
Assembly and Baking
Step 6: Assembling the Mini Cheesecakes
Preheat your oven to 325°F (160°C). Line a 12-cup muffin tin with paper or silicone liners. Divide the Oreo crust mixture evenly among the 12 muffin cups, pressing it firmly into the bottom of each liner to create an even base. You can use the bottom of a small glass or your fingers to compact the crust. Then, spoon the red velvet cheesecake filling evenly over the crusts, filling each liner about two-thirds to three-quarters full. Smooth the tops with the back of a spoon or a small offset spatula.
Step 7: Baking and Cooling
Bake the mini cheesecakes in the preheated oven for approximately 18-22 minutes, or until the edges are set and the centers are just barely jiggly when you gently shake the pan. They will continue to set as they cool. Avoid overbaking, as this can result in a dry cheesecake. Once baked, remove the muffin tin from the oven and let the mini cheesecakes cool in the tin on a wire rack for about 15-20 minutes. This initial cooling period is important to prevent them from cracking. After this, carefully lift the cheesecakes out of the tin and let them cool completely on the wire rack to room temperature. For the best texture and flavor, refrigerate the Mini Red Velvet Oreo Cheesecakes for at least 4 hours, or preferably overnight, before serving. This allows the flavors to meld and the cheesecakes to fully firm up. You can then garnish them as you wish, perhaps with a dollop of whipped cream or a mini Oreo!
Conclusion:
You’ve now unlocked the secret to creating these utterly delightful Mini Red Velvet Oreo Cheesecakes! We’ve walked through each step, from crafting the perfect Oreo crust to whipping up that velvety red velvet cream cheese filling, and finally, the satisfying bake. These little treats are not just visually stunning with their vibrant color and rich chocolatey base, but they’re also incredibly delicious. The combination of the slightly bitter Oreo crust, the creamy, tangy cheesecake, and the subtle cocoa notes of the red velvet is pure magic. I’m so excited for you to try them and share them with your loved ones!
For serving, these Mini Red Velvet Oreo Cheesecakes are perfect on their own, allowing their flavors to shine. However, they also pair beautifully with a dollop of fresh whipped cream, a scattering of chocolate shavings, or even a drizzle of raspberry coulis for a pop of tartness. When it comes to variations, feel free to experiment! You could add a hint of espresso powder to the filling for a mocha twist, or even fold in some mini chocolate chips. For a festive touch, consider topping them with red and white sprinkles. Don’t be afraid to make them your own!
Frequently Asked Questions about Mini Red Velvet Oreo Cheesecakes:
Can I make these ahead of time?
Absolutely! Mini Red Velvet Oreo Cheesecakes are excellent candidates for making ahead. Once cooled, you can store them in an airtight container in the refrigerator for up to 3-4 days. They often taste even better the next day as the flavors meld together.
How do I prevent my cheesecakes from cracking?
While mini cheesecakes are less prone to cracking than their larger counterparts, a few tips can help. Avoid overmixing the filling, and try not to overbake. A water bath isn’t strictly necessary for mini cheesecakes, but if you’re concerned, you can still use one.
Can I use a different type of cookie for the crust?
Certainly! While Oreos provide a fantastic chocolatey foundation that complements the red velvet, you could also use chocolate grabeef ham crackers, shortbread cookies, or even speculoos cookies for a different flavor profile. Just adjust the amount of butter as needed.
Mini Red Velvet Oreo Cheesecakes
Decadent bite-sized treats featuring a chocolate Oreo crust and a creamy, vibrant red velvet cheesecake filling.
Ingredients
-
12 Oreo cookies
-
3 tablespoons all-purpose flour
-
1/2 cup cocoa powder
-
1/2 cup granulated sugar
-
1/4 cup unsalted butter, melted
-
1 egg, room temperature
-
1/2 teaspoon vanilla extract
-
Pinch of salt
-
8 oz cream cheese, room temperature
-
1 egg, room temperature
-
1/4 cup sour cream, room temperature
-
1/4 cup granulated sugar
-
1 tablespoon cocoa powder
-
1/2 teaspoon vanilla extract
-
Red gel food coloring
Instructions
-
Step 1
Crush 12 Oreo cookies into fine crumbs using a food processor or a zip-top bag and rolling pin. -
Step 2
In a bowl, mix Oreo crumbs with 3 tablespoons all-purpose flour, 1/4 cup granulated sugar, and 1 tablespoon cocoa powder. Stir in 1/4 cup melted unsalted butter until the mixture resembles wet sand. -
Step 3
Beat 8 oz room temperature cream cheese until smooth. Add 1/2 cup granulated sugar, 1/2 cup cocoa powder, and a pinch of salt. Mix until combined. Stir in 1/4 cup sour cream and 1/2 teaspoon vanilla extract on low speed. -
Step 4
Add red gel food coloring to achieve desired vibrant red hue. Mix in 1 room temperature egg on low speed until just incorporated. -
Step 5
Preheat oven to 325°F (160°C). Line a 12-cup muffin tin. Press the Oreo crust mixture into the bottom of each liner. Spoon the red velvet filling evenly over the crusts. -
Step 6
Bake for 18-22 minutes, until edges are set and centers are slightly jiggly. Cool in the tin for 15-20 minutes, then remove and cool completely on a wire rack. Refrigerate for at least 4 hours or overnight before serving.
Important Information
Nutrition Facts (Per Serving)
It is important to consider this information as approximate and not to use it as definitive health advice.
Allergy Information
Please check ingredients for potential allergens and consult a health professional if in doubt.