Salted Brownie Cookies – Deliciously Chewy & Rich
Salted Brownie Cookies are an absolute game-changer, and I’m so excited to share this recipe with you! Imagin extracte sinking your teeth into the rich, fudgy decadence of a perfectly baked brownie, but in the convenient, dippable, and utterly irresistible form of a cookie. That’s exactly what you get with these phenomenal Salted Brownie Cookies. Why do we collectively obsess over this magical creation? Because it takes two beloved treats and elevates them to a whole new level. The deep, dark chocolate flavor is perfectly complemented by those delicate flakes of sea salt, creating a sophisticated dance of sweet and savory that will have your taste buds singin extractg. These aren’t just any cookies; they’re an experience, a delightful fusion that promises pure joy in every single bite. Prepare yourself for a new favorite!
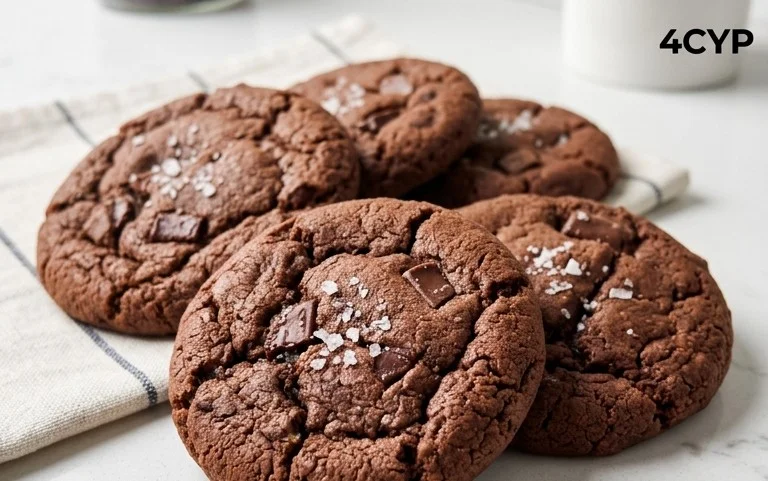
Salted Brownie Cookies
There are few things in life as universally loved as a warm, gooey brownie. And then, there are cookies. So, why choose when you can have the best of both worlds? My Salted Brownie Cookies are the ultimate indulgence, capturing that intense chocolatey fudgin extractess of a brownie in a perfectly chewy, slightly crisp cookie. The hint of espresso deepens the chocolate flavor, and a sprinkle of flaky sea salt on top cuts through the richness, creating a truly irresistible treat. These are perfect for an afternoon pick-me-up, a special occasion, or honestly, just because. Get ready to impress yourself and anyone lucky enough to snag one of these decadent delights.
Ingredients:
Cooking Instructions:
This recipe is all about achieving that perfect brownie-cookie hybrid. We’ll start by melting the butter and chocolate together, which is key to that fudgy texture. Then, we’ll combine our wet and dry ingredients separately before bringin extractg them all together. Finally, we’ll form and bake these beauties to perfection.
Phase 1: Melting the Chocolate and Butter
Let’s begin extract by creating our rich chocolate base. In a medium, heatproof bowl, combine the 6 tablespoons of unsalted butter and 1 cup of semi-sweet chocolate chips. You have a couple of options here for melting. You can place this bowl over a saucepan of simmering water (a double boiler), making sure the bottom of the bowl doesn’t touch the water. Stir occasionally until the butter is completely melted and the chocolate chips are smooth and glossy. Alternatively, you can melt them in the microwave in 30-second intervals, stirring between each interval, until smooth. Be careful not to overheat the chocolate, as it can seize up. Once melted and smooth, remove from heat and set aside to cool slightly. This slightly cooled chocolate mixture will form the foundation of our brownie cookies.
Phase 2: Preparing the Dough Base
In a separate medium bowl, whisk together your dry ingredients: 1 cup of all-purpose flour, 1 teaspoon of baking powder, and 1/8 teaspoon of salt. Whisking them together ensures that the leavening agent and salt are evenly distributed throughout the flour, which is crucial for consistent cookie texture. Set this bowl aside.
Now, in a large mixing bowl, we’ll combine our wet ingredients. Add the 2 large eggs (at room temperature for better emulsification), the 1 large egg yolk (also at room temperature), and 1 cup of granulated sugar. Beat these together with an electric mixer on medium speed until the mixture is light and fluffy, and pnon-alcoholic ale yellow in color. This process, called creaming, incorporates air into the batter, which contributes to the cookies’ structure and texture. This usually takes about 2-3 minutes. Next, gently stir in 1 tablespoon of vegetable oil and 1 teaspoon of vanilla extract. The vegetable oil will help keep the cookies moist and tender.
Phase 3: Combining and Enhancing the Chocolate Flavor
Now it’s time to introduce our glorious chocolate mixture to the wet ingredients. With your mixer on low speed, or by hand with a spatula, gradually add the slightly cooled melted chocolate and butter mixture to the egg and sugar mixture. Mix until just combined and no streaks of chocolate remain. Be careful not to overmix at this stage.
Next, we’ll incorporate our dry ingredients. Add the whisked dry ingredients (flour, baking powder, salt) to the wet chocolate mixture. Add the 1/4 cup of unsweetened cocoa powder and, if you’re using it, the 1 teaspoon of espresso powder. The espresso powder, while optional, is a secret weapon for any chocolate lover. It doesn’t make the cookies taste like coffee; instead, it intensifies the rich, deep flavor of the chocolate, making it taste even more intensely chocolatey. Mix on low speed or stir with a spatula until the flour is just incorporated. Stop mixing as soon as you no longer see streaks of dry flour. Overmixing at this stage can develop the gluten in the flour too much, resulting in tough cookies. The dough should be thick and fudgy, much like brownie batter.
Phase 4: Chilling and Forming the Cookies
This is a crucial step for achieving that signature crinkled top and chewy center. Cover the bowl of cookie dough with plastic wrap and refrigerate for at least 1 hour. Chilling the dough allows the flour to hydrate, the fats to firm up, and the flavors to meld together. This also prevents the cookies from spreading too much in the oven.
Once the dough is chilled, preheat your oven to 350°F (175°C). Line baking sheets with parchment paper or silicone baking mats. This prevents sticking and makes for easy cleanup. Scoop rounded tablespoons of the chilled dough onto the prepared baking sheets, leaving about 2 inches between each cookie. You can use a cookie scoop for consistent size. At this point, if you like, gently press a few extra semi-sweet chocolate chips into the tops of each cookie dough ball. This will ensure that each cookie has even more molten chocolate goodness throughout.
Phase 5: Baking to Perfection and the Finishing Touch
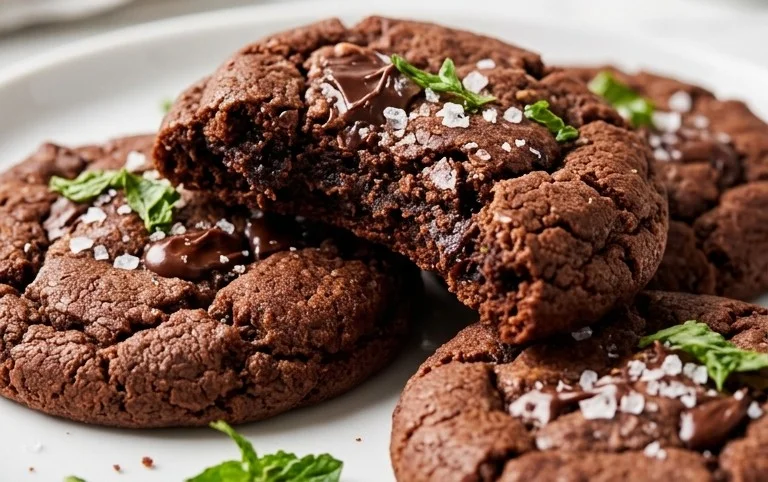
Bake the cookies for 10-12 minutes, or until the edges are set and the centers still look slightly soft and underbaked. This is the sweet spot for achieving that perfectly chewy, fudgy texture. They will continue to cook slightly on the baking sheet after you remove them from the oven. For that irresistible salted finish, immediately after removing the cookies from the oven, while they are still warm and soft, lightly sprinkle the tops with sea salt flakes. The warmth of the cookies will help the salt adhere. If you’re not using sea salt, you can skip this step.
Let the cookies cool on the baking sheet for 5-10 minutes before carefully transferring them to a wire rack to cool completely. These Salted Brownie Cookies are best enjoyed warm, when the chocolate is still gooey and the sea salt provides that delightful contrast. They also store well in an airtight container at room temperature for up to 3 days, though I doubt they’ll last that long! Enjoy every single decadent bite.
Conclusion:
And there you have it – your guide to baking the most incredible salted brownie cookies! These cookies are an absolute triumph of texture and flavor, delivering that satisfyingly chewy brownie center with a delicate crisp edge, all elevated by that perfect sprinkle of sea salt. They’re relatively simple to whip up, making them a fantastic weekend project or a spontaneous treat for any occasion. I love serving these warm with a glass of cold milk, but they are equally delightful cooled and crum extractbled over ice cream or even as part of a dessert charcuterie board.
Don’t be afraid to experiment with variations! You can add a handful of chocolate chips for extra gooeyness, a swirl of caramel, or even a pinch of chili powder for a little heat. The possibilities are endless, and I encourage you to give these salted brownie cookies a try. I’m confident they’ll become a new favorite in your baking repertoire. Happy baking!
Frequently Asked Questions:
Can I make these brownie cookies ahead of time?
Absolutely! You can bake the cookies and store them in an airtight container at room temperature for up to 3-4 days. They might lose a tiny bit of their crisp edge over time, but they’ll still be wonderfully chewy and delicious. You can also freeze the baked cookies for longer storage.
My cookies spread too much. What did I do wrong?
Several factors can contribute to excessive spreading. Ensure your butter isn’t too soft or melted. Chilling the dough for at least 30 minutes before baking can also help prevent spreading. Make sure you’re not overmixing the dough once the flour is added, as this can also develop the gluten too much.
Salted Brownie Cookies
Chewy brownie cookies with a rich chocolate flavor, topped with sea salt flakes for a delightful sweet and salty contrast.
Ingredients
-
1 cup All-Purpose Flour
-
1 tsp Baking Powder
-
1/8 tsp Salt
-
2 Large Eggs (room temperature)
-
1 Large Egg Yolk (room temperature)
-
1 cup Granulated Sugar
-
1 tbsp Vegetable Oil
-
1 tsp Vanilla Extract
-
6 tbsp Unsalted Butter
-
1 cup Semi-Sweet Chocolate Chips
-
1/4 cup Unsweetened Cocoa Powder
-
1 tsp Espresso Powder
-
Sea Salt Flakes
Instructions
-
Step 1
In a medium bowl, whisk together the all-purpose flour, baking powder, and 1/8 tsp salt. Set aside. -
Step 2
In a large bowl, whisk together the granulated sugar, vegetable oil, vanilla extract, and melted unsalted butter until smooth. -
Step 3
Add the 2 large eggs and 1 large egg yolk to the sugar mixture and whisk until well combined and slightly thickened. -
Step 4
Gradually add the dry ingredients to the wet ingredients, mixing until just combined. Do not overmix. -
Step 5
Stir in the semi-sweet chocolate chips, unsweetened cocoa powder, and espresso powder (if using). -
Step 6
Drop rounded spoonfuls of dough onto a baking sheet lined with parchment paper, leaving about 2 inches between cookies. Sprinkle additional chocolate chips and sea salt flakes on top of each cookie. -
Step 7
Bake in a preheated oven at 350°F (175°C) for 9-12 minutes, or until the edges are set but the centers are still slightly soft. -
Step 8
Let the cookies cool on the baking sheet for a few minutes before transferring them to a wire rack to cool completely.
Important Information
Nutrition Facts (Per Serving)
It is important to consider this information as approximate and not to use it as definitive health advice.
Allergy Information
Please check ingredients for potential allergens and consult a health professional if in doubt.