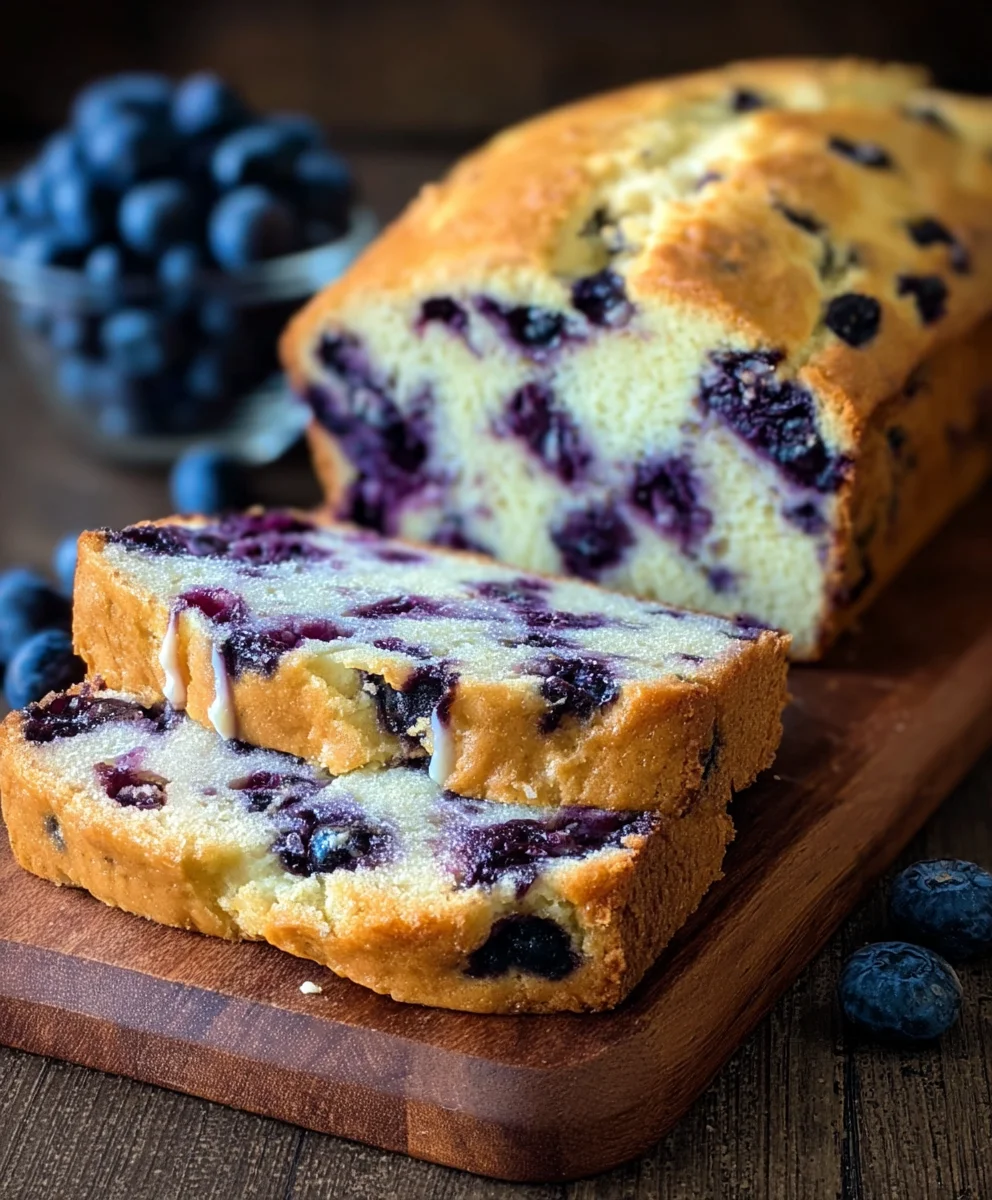
Blueberry Cream Cheese Bread- Easy Delicious Quick Recipe
Blueberry cream cheese bread. It’s a name that conjures up images of sweet, tender loaves, swirled with pockets of tangy cream cheese and bursting with juicy blueberries. This isn’t just any quick bread; it’s a delightful experience that has captured the hearts (and taste buds!) of many. What makes this particular bake so irresistible? It’s the perfect balance of flavors and textures. The vibrant, slightly tart blueberries provide bursts of freshness, while the rich, creamy cheese adds a luxurious depth that prevents the bread from being overly sweet. The result is a moist, flavorful loaf that’s incredibly satisfying, whether enjoyed for breakfast, as an afternoon snack, or even a light dessert. Get ready to fall in love with this wonderful blueberry cream cheese bread.
Why You’ll Adore This Recipe
This blueberry cream cheese bread is more than just a treat; it’s a hug in loaf form. It’s incredibly forgiving, making it a fantastic option for bakers of all skill levels. The simple steps ensure a consistently delicious outcome, and the aroma that fills your kitchen as it bakes is simply divine. It’s the kind of bread that makes guests feel welcomed and cherished, and it’s perfect for sharing – if you can bear to part with any, that is!
Ingredients:
- 1 cup unsalted butter, softened
- 8 oz cream cheese, softened
- 3/4 cup granulated sugar
- 2 teaspoons vanilla extract
- 4 large eggs
- 2 cups all-purpose flour
- 1 1/2 teaspoons baking powder
- 1/2 teaspoon salt
- 2 cups fresh blueberries, tossed with 1 tablespoon of all-purpose flour
Preparing Your Blueberry Cream Cheese Bread
Creaming the Base
The foundation of any fantastic quick bread lies in a well-creamed butter and sugar mixture, and for our Blueberry Cream Cheese Bread, we’re adding the delightful tang of cream cheese right from the start. Begin extract by placing the softened butter and softened cream cheese into a large mixing bowl. Ensure both ingredients are truly at room temperature; this is crucial for achieving a smooth, homogenous batter without lumps. If your butter and cream cheese are too cold, they will resist blending, leading to a less desirable texture. I like to use a stand mixer with the paddle attachment for this step, as it makes the process effortless. If you don’t have a stand mixer, a sturdy hand mixer or even a strong whisk and some elbow grease will work. Beat the butter and cream cheese together on medium speed for about 3-4 minutes until the mixture is light, fluffy, and uniformly pnon-alcoholic ale yellow. This aeration is what contributes to the tender crum extractb of the finished bread. Next, gradually add the granulated sugar to the creamed mixture, continuing to beat on medium speed. Scrape down the sides of the bowl occasionally to ensure all the ingredients are incorporated evenly. Continue to beat for another 2-3 minutes until the sugar is fully incorporated and the mixture is even lighter and fluffier. This stage is critical for a tender texture, so don’t rush it!
Incorporating Eggs and Vanilla
Now it’s time to add the wet ingredients that bind everything together and enhance the flavor profile. Add the vanilla extract to the creamed butter, cream cheese, and sugar mixture. Mix briefly until just combined. Then, crack the eggs into a separate small bowl, one at a time, and lightly whisk them. Adding the eggs one at a time allows them to emulsify better into the batter. Beat each egg into the mixture on medium speed until it is fully incorporated before adding the next. Be sure to scrape down the sides and bottom of the bowl after each egg addition to ensure everything is coming together smoothly. Overmixing at this stage can develop the gluten in the flour too much later, leading to a tougher bread, so mix just until each egg is no longer visible. The batter might look a little curdled after adding the eggs, but don’t worry; this is normal and will resolve itself once the dry ingredients are added.
Adding the Dry Ingredients and Flour-Coated Blueberries
In a separate medium bowl, whisk together the all-purpose flour, baking powder, and salt. Whisking the dry ingredients together ensures that the leavening agent (baking powder) and salt are evenly distributed throughout the flour, preventing pockets of saltiness or uneven rising in your bread. Now, add about half of this dry ingredient mixture to the wet ingredients in the large bowl. Mix on low speed until just combined. It’s important not to overmix at this point. You want to see just a few streaks of flour remaining. Then, add the remaining dry ingredients and mix again on low speed until just barely combined. Again, resist the urge to overmix. The goal is to incorporate the flour without developing the gluten, which would result in a dense, tough bread. The batter will be quite thick at this stage.
Now for the star of the show: the blueberries! Gently fold in the fresh blueberries that you have already tossed with 1 tablespoon of flour. This flour coating is a clever trick to help prevent the blueberries from sinking to the bottom of the loaf during baking. It creates a slight barrier, allowing them to suspend more evenly throughout the batter. Use a spatula and a gentle folding motion, as if you were turning the batter over on itself, to incorporate the blueberries. Be careful not to crush the blueberries too much, as this can release their juices and turn the batter an undesirable purple hue.
Baking Your Blueberry Cream Cheese Bread
Preheat your oven to 350°F (175°C). Grease and flour a 9×5 inch loaf pan, or line it with parchment paper, leaving an overhang on the sides to make lifting the bread out easier. Pour the batter evenly into the prepared loaf pan. You can smooth the top with your spatula, or you can create a slight indentation in the center, which can help prevent the bread from doming too much.
Place the loaf pan in the preheated oven and bake for 50-65 minutes. The baking time can vary depending on your oven, so it’s important to keep an eye on it, especially in the last 15-20 minutes. To check for doneness, insert a wooden skewer or a toothpick into the center of the loaf. If it comes out clean, or with just a fewrum extractist crumbs attached (no wet batter), your Blueberry Cream Cheese Bread is ready. If you notice the top browning too quickly before the inside is cooked, you can loosely tent the loaf pan with aluminum foil for the remainder of the baking time. This will help regulate the temperature and prevent the crust from burning.
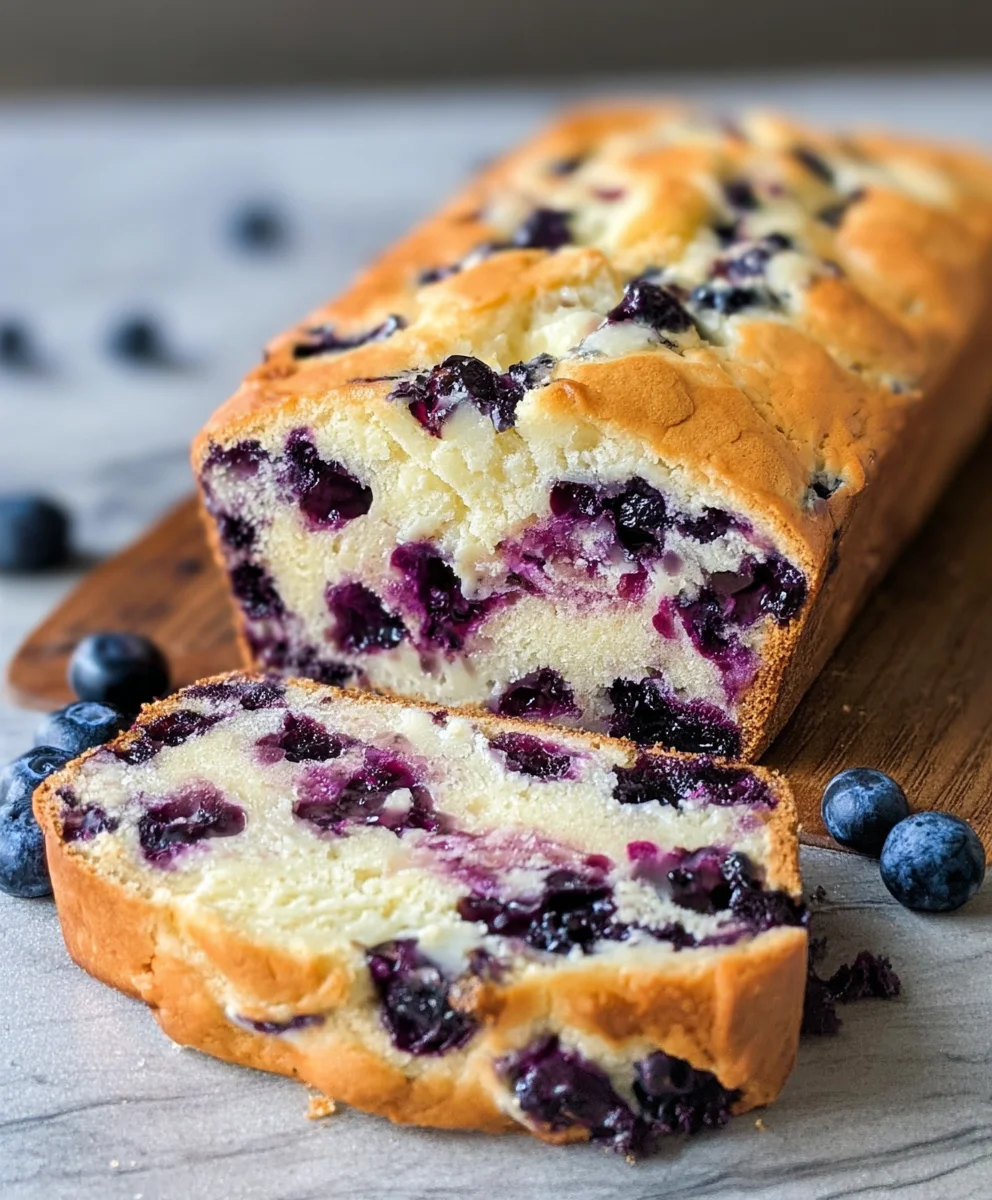
Once baked, carefully remove the loaf pan from the oven and let the bread cool in the pan on a wire rack for about 15-20 minutes. This allows the bread to set slightly, making it easier to handle. After this initial cooling period, carefully invert the loaf onto the wire rack to cool completely. Allowing it to cool completely on the rack ensures that steam escapes, preventing a soggy bottom and helping to achieve that perfect crust. Slice and enjoy your delicious homemade Blueberry Cream Cheese Bread!
Conclusion:
And there you have it – your guide to baking the most delightful Blueberry Cream Cheese Bread! This recipe is wonderfully forgiving, meaning even novice bakers can achieve a beautifully moist and flavorful loaf. The tangy cream cheese perfectly complements the sweet bursts of blueberries, creating a truly irresistible treat that’s perfect for breakfast, brunch, or an afternoon snack. I hope you enjoy the process as much as you’ll savor every bite!
For serving, this Blueberry Cream Cheese Bread is absolutely divine served warm with a smear of butter or a dollop of extra cream cheese. It also pairs wonderfully with a cup of coffee or a glass of cold milk. Feel free to get creative with variations! You could add a sprinkle of cinnamon to the batter for a warmer spice profile, or perhaps some lemon zest to enhance the fruity notes. Chopped walnuts or pecans would also add a lovely crunch.
Don’t be afraid to experiment and make this recipe your own. The joy of baking lies in personalization, and I encourage you to share your unique twists! Happy baking!
Frequently Asked Questions:
Q: How do I store my Blueberry Cream Cheese Bread?
A: Once cooled completely, wrap your Blueberry Cream Cheese Bread tightly in plastic wrap or store it in an airtight container at room temperature for up to 3 days. For longer storage, you can freeze individual slices or the whole loaf, wrapped securely, for up to 3 months. Thaw at room temperature before enjoying.
Q: Can I use frozen blueberries instead of fresh ones?
A: Absolutely! If using frozen blueberries, it’s best to toss them with a tablespoon of flour before adding them to the batter. This helps prevent them from sinking to the bottom of the loaf and also absorbs some of the excess moisture. You don’t need to thaw them first.
Blueberry Cream Cheese Bread
An easy, delicious, and quick recipe for moist Blueberry Cream Cheese Bread, perfect for any occasion.
Ingredients
-
1 cup unsalted butter, softened
-
8 oz cream cheese, softened
-
3/4 cup granulated sugar
-
2 teaspoons vanilla extract
-
4 large eggs
-
2 cups all-purpose flour
-
1 1/2 teaspoons baking powder
-
1/2 teaspoon salt
-
2 cups fresh blueberries, tossed with 1 tablespoon of all-purpose flour
Instructions
-
Step 1
Cream softened butter and cream cheese in a large bowl until light and fluffy. Gradually add granulated sugar and beat until fully incorporated and lighter. -
Step 2
Add vanilla extract and then eggs one at a time, beating until each is fully incorporated. Scrape down the bowl after each addition. The batter may look curdled. -
Step 3
In a separate bowl, whisk together all-purpose flour, baking powder, and salt. Add half of the dry ingredients to the wet ingredients and mix on low speed until just combined. Add the remaining dry ingredients and mix until barely combined. -
Step 4
Gently fold in the flour-coated fresh blueberries using a spatula, being careful not to crush them. -
Step 5
Pour the batter into a greased and floured 9×5 inch loaf pan. Smooth the top or create a slight indentation in the center. -
Step 6
Bake in a preheated oven at 350°F (175°C) for 50-65 minutes, or until a wooden skewer inserted into the center comes out clean. If browning too quickly, tent loosely with aluminum foil. -
Step 7
Let the bread cool in the pan on a wire rack for 15-20 minutes. Then, invert onto the rack to cool completely before slicing and serving.
Important Information
Nutrition Facts (Per Serving)
It is important to consider this information as approximate and not to use it as definitive health advice.
Allergy Information
Please check ingredients for potential allergens and consult a health professional if in doubt.