Fruity Pebbles Cheesecake Tacos-Sweet Dessert Fun
Fruity Pebbles cheesecake tacos are about to become your new favorite dessert obsession! Imagin extracte this: a perfectly crisp, golden taco shell cradling a luscious, creamy cheesecake filling, all dusted with the vibrant, crunchy magic of Fruity Pebbles cereal. Why do we love these delightful creations so much? It’s the incredible textural contrast – the sweet crunch of the cereal against the smooth, tangy cheesecake, all within a satisfyingly crisp shell. They’re a playful explosion of flavor and color that instantly transports you back to carefree childhood mornings, but with a sophisticated, grown-up twist. These aren’t just any tacos; they’re a whimsical culinary adventure designed to spark joy and delight with every bite. Get ready to experience the ultimate sweet treat with these utterly irresistible Fruity Pebbles cheesecake tacos!
Certainly! Here’s the main content for your recipe article on Fruity Pebbles Cheesecake Tacos.
Ingredients:
Let’s dive into creating these delightfully fun and surprisingly easy Fruity Pebbles Cheesecake Tacos! These aren’t your average tacos, of course. We’re talking about a sweet, no-bake treat that’s perfect for parties, a fun weekend project with the kids, or just because you deserve a little burst of colorful joy. The combination of the crunchy, sweet cereal shell, the creamy cheesecake filling, and the light whipped cream topping is simply irresistible.
The magic starts with transforming our beloved Fruity Pebbles cereal into edible taco shells. It sounds almost too good to be true, but it’s a simple process that yields incredible results. The melted butter acts as our binder, coating the cereal and helping it to hold its shape when pressed into a mold and chilled. This creates a wonderfully crunchy and flavorful shell that’s a fantastic base for our cheesecake filling.
Creating the Cereal Taco Shells
1. First, we need to prepare our “taco shells.” In a large bowl, combine 2 cups of the colorful fruity cereal with the 1/2 cup of melted unsalted butter. Stir everything together thoroughly, ensuring that every single piece of cereal is coated in that delicious melted butter. This step is crucial for the shells to hold their shape and for that delightful crunch we’re aiming for. It’s like giving each little pebble a sweet, buttery hug!
2. Next, we’ll get our taco shell molds ready. You can use actual mini taco molds if you have them, or even improvise with small, oven-safe ramekins or even the inverted cups of a muffin tin. Lightly grease your molds if they are prone to sticking. Now, take the butter-coated cereal mixture and press it firmly into the molds. You want to create a compact shell, so pack it down well with the back of a spoon or your fingers. Ensure the cereal goes up the sides to form a taco shape. It’s important to be firm here so that the shells don’t crum extractble when you’re ready to fill them.
3. Once your cereal is molded, place the filled molds into the refrigerator for at least 30 minutes, or until they are firm and set. This chilling time is essential for the butter to solidify and bind the cereal together, creating a sturdy shell that can hold all the delicious filling. While the shells are setting, you can get started on the creamy cheesecake filling, making this a truly efficient dessert-making session.
Whipping Up the Creamy Cheesecake Filling
4. Now, for the heart of our Fruity Pebbles Cheesecake Tacos: the cheesecake filling! In a separate medium bowl, combine the 8 oz of softened cream cheese with the 1/2 cup of sifted powdered sugar and the 1 tsp of pure vanilla extract. Using an electric mixer (or a whisk and some serious arm power!), beat these ingredients together until the mixture is smooth, creamy, and free of any lumps. Sifting the powdered sugar is a little trick that helps prevent any gritty texture in your cheesecake filling, ensuring a luxuriously smooth result. We want it perfectly airy and delightful.
5. Gently fold in the 1 cup of whipped cream into the cream cheese mixture. Be careful not to overmix at this stage. We want to incorporate the whipped cream to lighten the filling and give it a cloud-like texture. The goal is a fluffy, decadent filling that complements the crunch of the cereal shells. You should end up with a beautifully smooth and airy cream cheese mixture that’s ready to be spooned into your chilled taco shells.
Assembling and Garnishing Your Masterpieces
6. Once your cereal taco shells are firm and your cheesecake filling is ready, it’s time for the most exciting part: assembly! Carefully remove the chilled cereal taco shells from their molds. If they seem a bit stuck, you can gently tap the bottom of the mold or use a small offset spatula to ease them out. Spoon or pipe the creamy cheesecake filling generously into each cereal taco shell. Don’t be shy – fill them up!
7. To finish off your delightful creations, sprinkle a little bit of additional colorful fruity cereal over the top of each cheesecake taco for a final flourish and an extra crunch. You can also add other fun toppings if you like, such as a drizzle of white chocolate or a few fresh berries, but the extra cereal is a must to keep with the theme. Serve immediately and enjoy the explosion of flavor and texture! These are best enjoyed soon after assembling to maintain the perfect crunch of the shells.
Conclusion:
There you have it – a delightfully playful and surprisingly simple recipe for Fruity Pebbles Cheesecake Tacos! These aren’t your average dessert; they’re a vibrant explosion of flavor and texture, marrying the creamy tang of cheesecake with the sweet crunch of your favorite childhood cereal. We’ve created a treat that’s not only visually stunning but also incredibly delicious, making it perfect for parties, a fun family activity, or simply when you’re craving something truly unique and satisfying. The combination of the crispy taco shell, the smooth cheesecake filling, and the irresistible topping of Fruity Pebbles is simply a triumph!
For serving, consider presenting them on a colorful platter. They’re fantastic as a standalone dessert, but also pair wonderfully with a scoop of vanilla ice cream or a side of fresh berries. If you’re feeling adventurous, why not try some variations? Swap out the Fruity Pebbles for other colorful cereals like Cocoa Puffs or Cinnamon Toast Crunch for a different flavor profile. You could also add a drizzle of chocolate sauce or caramel for an extra layer of indulgence. I truly encourage you to give these Fruity Pebbles Cheesecake Tacos a try; they are guaranteed to bring smiles and delight to anyone who takes a bite!
Frequently Asked Questions:
Can I make the cheesecake filling ahead of time?
Absolutely! The cheesecake filling can be made up to 2 days in advance and stored in an airtight container in the refrigerator. This will save you time on the day you plan to assemble your tacos.
What kind of taco shells work best?
We recommend using hard taco shells for that essential crunch. Warmed flour tortillas can also work if you prefer a softer base, but the texture contrast with the hard shell is really part of the magic of these Fruity Pebbles Cheesecake Tacos.
Are these tacos too sweet for some people?
While the Fruity Pebbles do add sweetness, the tangin extractess of the cream cheese in the filling balances it out beautifully. However, if you find them too sweet, you can reduce the amount of cereal topping or serve them with a less sweet topping like fresh fruit.
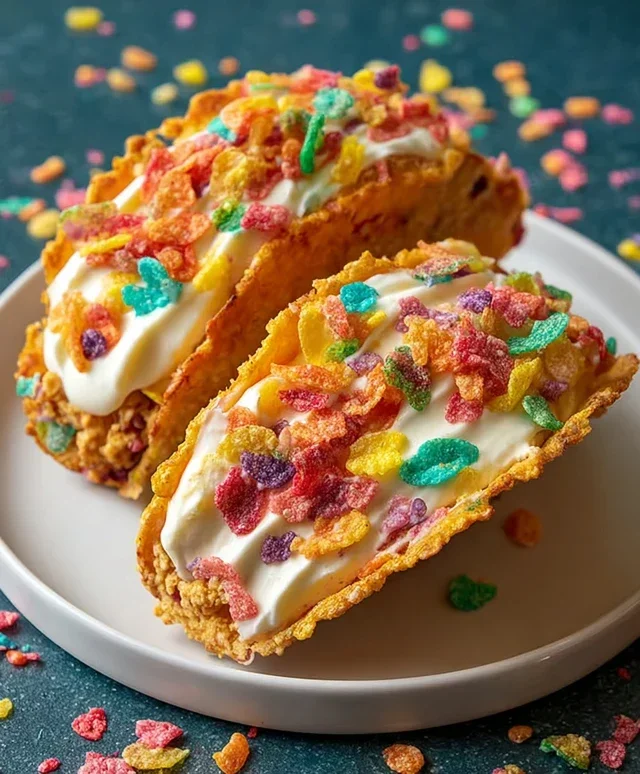
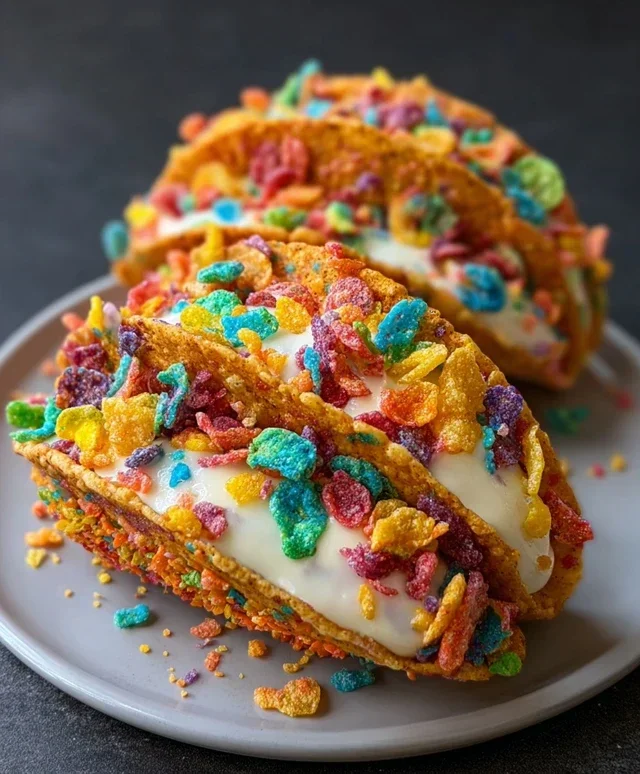
Fruity Pebbles Cheesecake Tacos
A fun and colorful dessert taco featuring a crispy Fruity Pebbles shell filled with creamy cheesecake filling and topped with whipped cream and more cereal.
Ingredients
-
3 cups colorful fruity cereal
-
1/2 cup unsalted butter, melted
-
8 oz cream cheese, softened
-
1/2 cup powdered sugar, sifted
-
1 tsp pure vanilla extract
-
1 cup whipped cream
-
Additional fruity cereal for garnish
Instructions
-
Step 1
Prepare the taco shells: In a bowl, combine 2 cups of the colorful fruity cereal with the melted butter. Mix well until the cereal is evenly coated. Press the mixture firmly into greased taco shell molds. Chill for at least 30 minutes until firm. -
Step 2
Make the cheesecake filling: In a separate bowl, beat the softened cream cheese with the sifted powdered sugar until smooth and creamy. -
Step 3
Stir in the vanilla extract and 1 cup of the remaining colorful fruity cereal into the cream cheese mixture. -
Step 4
Assemble the tacos: Carefully remove the chilled cereal taco shells from their molds. Spoon or pipe the cheesecake filling into each taco shell. -
Step 5
Top each taco with a dollop of whipped cream and a sprinkle of additional fruity cereal for garnish. -
Step 6
Serve immediately and enjoy the sweet, crunchy, and creamy treat.
Important Information
Nutrition Facts (Per Serving)
It is important to consider this information as approximate and not to use it as definitive health advice.
Allergy Information
Please check ingredients for potential allergens and consult a health professional if in doubt.