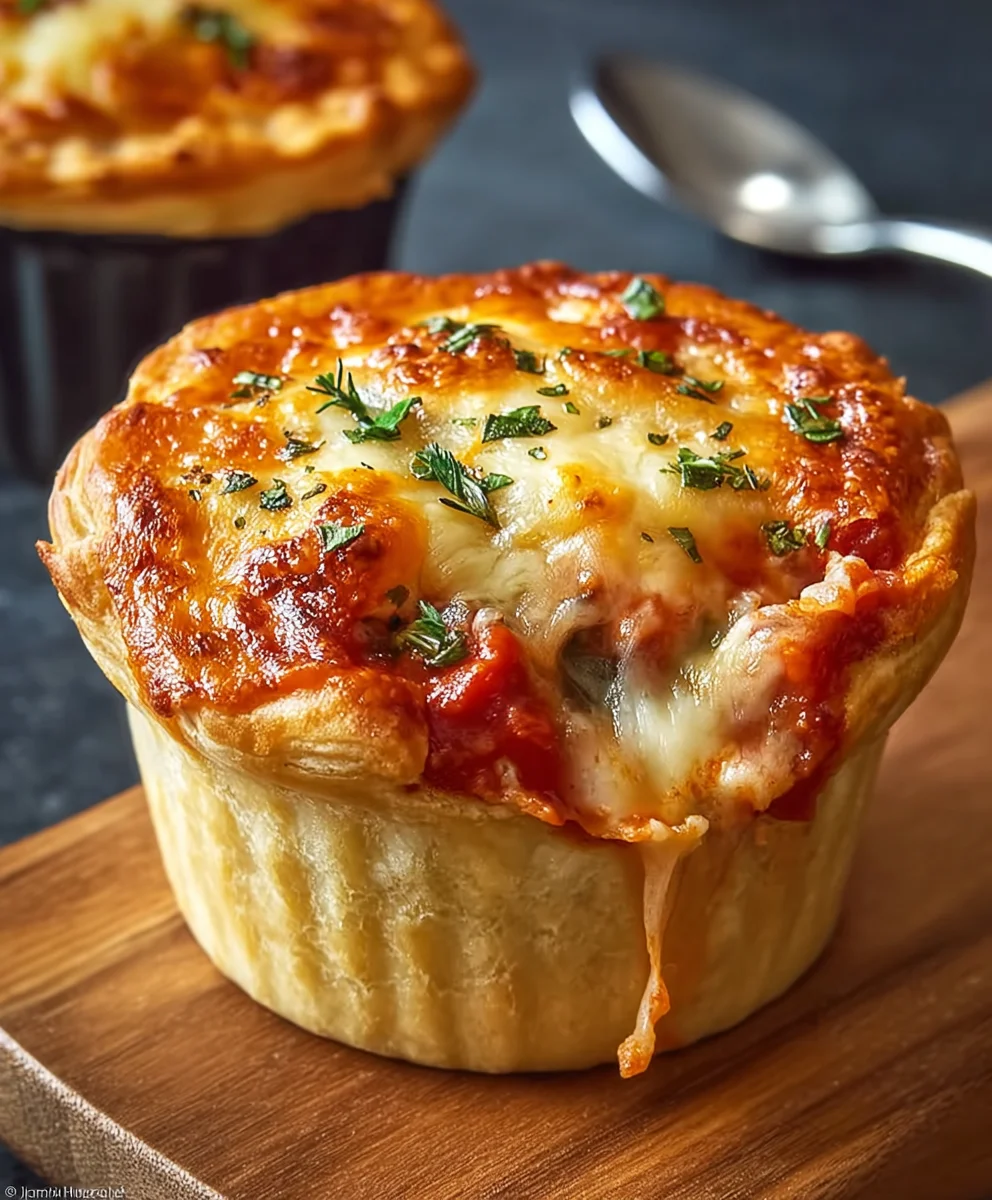
Easy Beef Pizza Pot Pies Recipe-Dinner Delight
Pizza Pot Pies are the ultimate comfort food mash-up, a delightful fusion of two universally adored classics. Imagin extracte the warm, flaky crust of a pot pie encasing all the gooey, cheesy, savory goodness of your favorite pizza. It’s a concept that sparks joy and ignites appetites, and for good reason! This isn’t just a novelty; it’s a genuinely satisfying meal that captures the heart of both dishes. What makes these Pizza Pot Pies so incredibly special is the textural contrast – the crisp, golden pastry giving way to a bubbling, flavorful filling packed with all those familiar pizza toppings you crave. Whether you’re a beef pepperoni devotee, a veggie enthusiast, or a mushroom lover, this recipe is incredibly adaptable to your personal pizza preferences, making it a guaranteed hit for family dinners or a fun weekend project.
Ingredients:
- 8 Refrigerated Biscuits (from a 16 oz package)
- Cooking Spray or Oil (for greasing tins)
- 1 tbsp Butter (softened)
- 1/2 tbsp Olive Oil
- 1/4 tsp Salt
- 1/4 tsp Garlic Powder
- 1/4 tsp Italian Seasoning (plus extra for topping)
- Pinch of Black Pepper
- 1/4 cup Pasta or Pizza Sauce
- 3 oz Beef Beef Pepperoni (chopped)
- 7-8 oz Shredded Mozzarella Cheese
Preparing the Crusts
Step 1: Preheat and Prepare Muffin Tin
The first step to creating these delightful Pizza Pot Pies is to get your oven ready and prepare your muffin tin. Preheat your oven to 375°F (190°C). This temperature is ideal for ensuring the biscuit dough bakes through properly while also achieving a lovely golden-brown crust. While the oven is preheating, take your muffin tin and generously grease each cup with cooking spray or a little oil. This is a crucial step to prevent the biscuit dough from sticking, ensuring that your pot pies slide out smoothly once they’re baked and ready to be enjoyed. Don’t skimp on this greasing step; a well-greased tin makes all the difference.
Step 2: Shaping the Biscuit Base
Now, let’s get our biscuit bases ready for the delicious filling. Open your package of refrigerated biscuits and gently separate them. Take each biscuit and flatten it slightly with your hands. The goal here is to make it a bit thinner so it can conform to the muffin tin and create a cup-like shape. You want to press the flattened biscuit into the bottom and up the sides of each greased muffin cup. Aim to create a good seal at the bottom, and have the dough extend slightly above the rim of the muffin cup. This will help contain the filling and create a neat, individual pot pie. If any biscuits seem too small, you can gently stretch them a bit more.
Crafting the Flavorful Filling
Step 3: Creating the Savory Topping Mixture
This step is where we build the core flavors of our Pizza Pot Pies. In a small bowl, combine the softened butter with the olive oil. This combination provides a rich and smooth base for our seasonings. Next, add the salt, garlic powder, 1/4 teaspoon of Italian seasoning, and the pinch of black pepper. Mix these ingredients together thoroughly until you have a well-combined paste. This seasoned butter mixture will be brushed over the tops of the pot pies before baking, adding a wonderful layer of savory flavor and helping to achieve that desirable golden-brown finish on the biscuit crust.
Step 4: Assembling the Pizza Pot Pies
With our crusts prepared and our topping mixture ready, it’s time to bring everything together. Spoon a small amount of the pasta or pizza sauce into the bottom of each biscuit-lined muffin cup. Don’t overfill at this stage, as you need room for the other ingredients. Next, evenly distribute the chopped beef pepperonieroni over the sauce in each cup. Now, generously sprinkle the shredded mozzarella cheesebeef pepperoni pepperoni and sauce. Ensure you get a good amount of cheese in each pot pie, as it will melt into a gooey, delicious topping. After layering the filling, take your prepared seasoned butter mixture and brush a thin layer over the exposed edges of the biscuit dough that are peeking out from the muffin tin. This will add flavor and help the crust crisp up beautifully. Finally, sprinkle a little extra Italian seasoning over the cheese and exposed crust for an extra punch of flavor and an appealing visual.
Baking and Finishing Touches
Step 5: Baking to Golden Perfection
Now that your Pizza Pot Pies are assembled and ready to go, it’s time to bake them. Carefully place the muffin tin into your preheated oven at 375°F (190°C). Bake for approximately 18 to 22 minutes. You’ll know they’re ready when the biscuit crusts are puffed up and turn a beautiful golden-brown color, and the cheese inside is melted and bubbly. Keep an eye on them towards the end of the baking time, as ovens can vary. If the tops start to brown too quickly, you can loosely tent the muffin tin with aluminum foil. Once they are baked to your satisfaction, carefully remove the muffin tin from the oven. Let the Pizza Pot Pies cool in the tin for about 5 to 10 minutes. This resting period is important as it allows the fillings to set slightly, making them easier to remove from the tin and preventing them from falling apart when you serve them. After the brief cooling period, you can carefully use a knife or a small offset spatula to loosen the edges of each pot pie and gently lift them out of the muffin tin. Serve them warm and enjoy the deliciousness!

Conclusion:
You’ve now learned how to create these delightful Pizza Pot Pies, a fun and portable twist on a classic favorite! We’ve covered everything from assembling the individual layers to achieving that perfect golden-brown crust. These Pizza Pot Pies are a fantastic option for a weeknight dinner, a fun lunch for kids (and adults!), or even for a casual gathering with friends. Their individual portions make them easy to serve and enjoy. Don’t be afraid to get creative with your fillings – the possibilities are endless!
For serving suggestions, I love to pair these with a simple side salad dressed with a light vinaigrette, or some crispy oven-baked fries. They’re also wonderful on their own, as a complete and satisfying meal. Experiment with different cheeses, meats, and vegetables to customize your Pizza Pot Pies. Think of adding spicy beef pepperoni, sautéed mushrooms, sweet bell peppers, or even a creamy spinach and artichoke filling. The key is to have fun and make them your own! I encourage you to give this recipe a try and discover just how easy and delicious these Pizza Pot Pies can be. Happy baking!
FAQs
Can I make the Pizza Pot Pies ahead of time?
Yes, you absolutely can! You can assemble the Pizza Pot Pies up to 24 hours in advance and store them, covered, in the refrigerator. When you’re ready to bake, you may need to add a few extra minutes to the cooking time to ensure they’re heated through completely.
What kind of dough is best for Pizza Pot Pies?
While store-bought pizza dough or puff pastry works wonderfully for convenience, you can also make your own favorite pizza dough recipe. The key is a dough that’s sturdy enough to hold its shape but also bakes up tender and slightly crisp.
Can I freeze Pizza Pot Pies?
Yes, you can! Assemble and bake the Pizza Pot Pies, then let them cool completely. You can then freeze them individually wrapped or placed in a freezer-safe container. To reheat, thaw them in the refrigerator overnight or bake them directly from frozen, adding extra baking time as needed until they are heated through and the crust is crispy.
Easy Beef Pizza Pot Pies-Dinner Delight
Delightful individual pot pies made with refrigerated biscuits, beef pepperoni, and melted mozzarella cheese.
Ingredients
-
8 Refrigerated Biscuits (from a 16 oz package)
-
Cooking Spray or Oil (for greasing tins)
-
1 tbsp Butter (softened)
-
1/2 tbsp Olive Oil
-
1/4 tsp Salt
-
1/4 tsp Garlic Powder
-
1/4 tsp Italian Seasoning (plus extra for topping)
-
Pinch of Black Pepper
-
1/4 cup Pasta or Pizza Sauce
-
3 oz Beef Pepperoni (chopped)
-
7-8 oz Shredded Mozzarella Cheese
Instructions
-
Step 1
Preheat oven to 375°F (190°C). Generously grease muffin tin cups with cooking spray or oil. -
Step 2
Separate biscuits, flatten each slightly, and press into greased muffin cups, creating a cup shape that extends slightly above the rim. -
Step 3
In a small bowl, combine softened butter, olive oil, salt, garlic powder, 1/4 tsp Italian seasoning, and black pepper to form a paste. -
Step 4
Spoon a small amount of sauce into each biscuit-lined cup, top with chopped beef pepperoni, then generously sprinkle with mozzarella cheese. -
Step 5
Brush the exposed biscuit edges with the seasoned butter mixture and sprinkle with extra Italian seasoning. -
Step 6
Bake for 18-22 minutes, or until crusts are golden-brown and cheese is melted and bubbly. Let cool in the tin for 5-10 minutes before removing.
Important Information
Nutrition Facts (Per Serving)
It is important to consider this information as approximate and not to use it as definitive health advice.
Allergy Information
Please check ingredients for potential allergens and consult a health professional if in doubt.