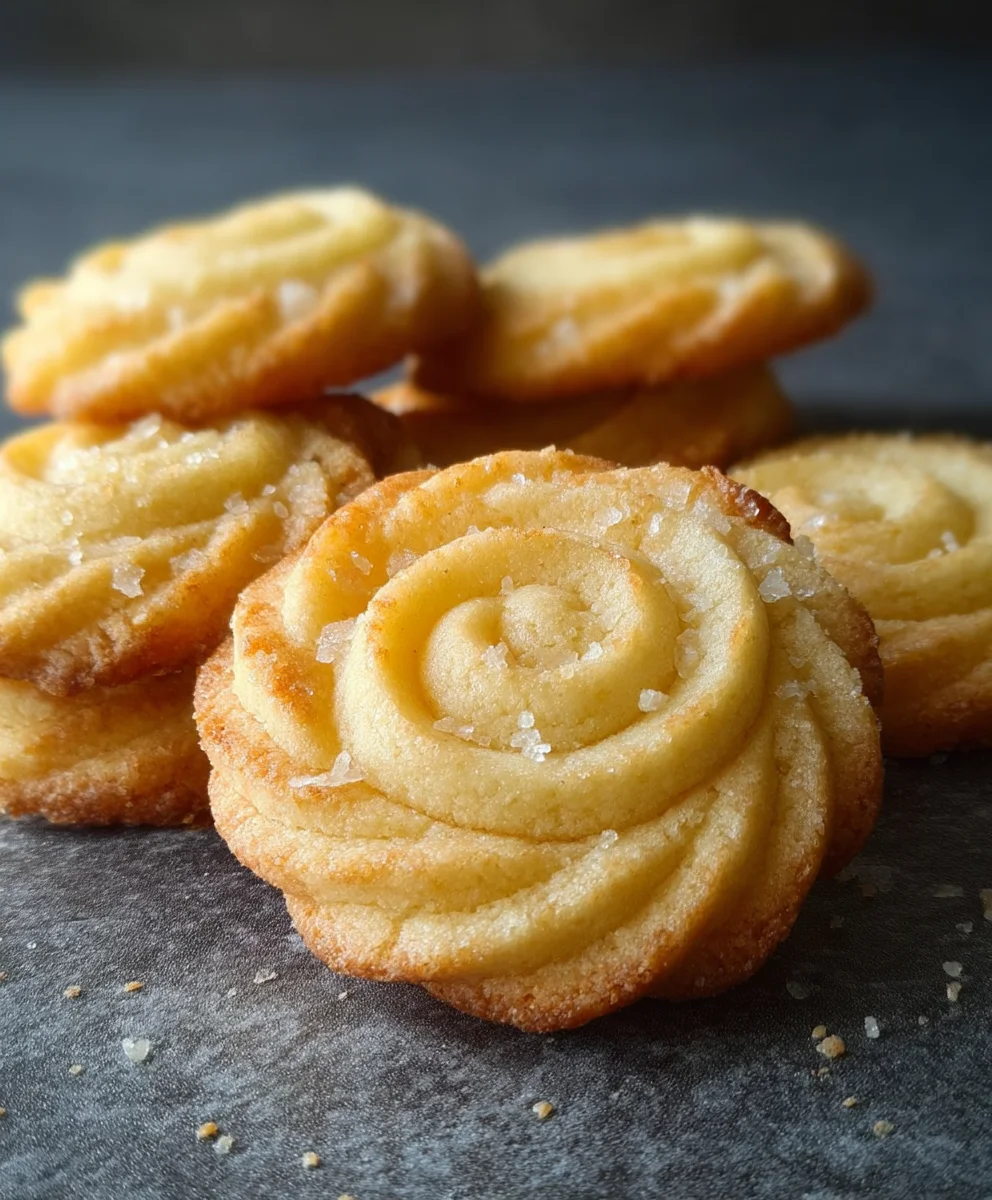
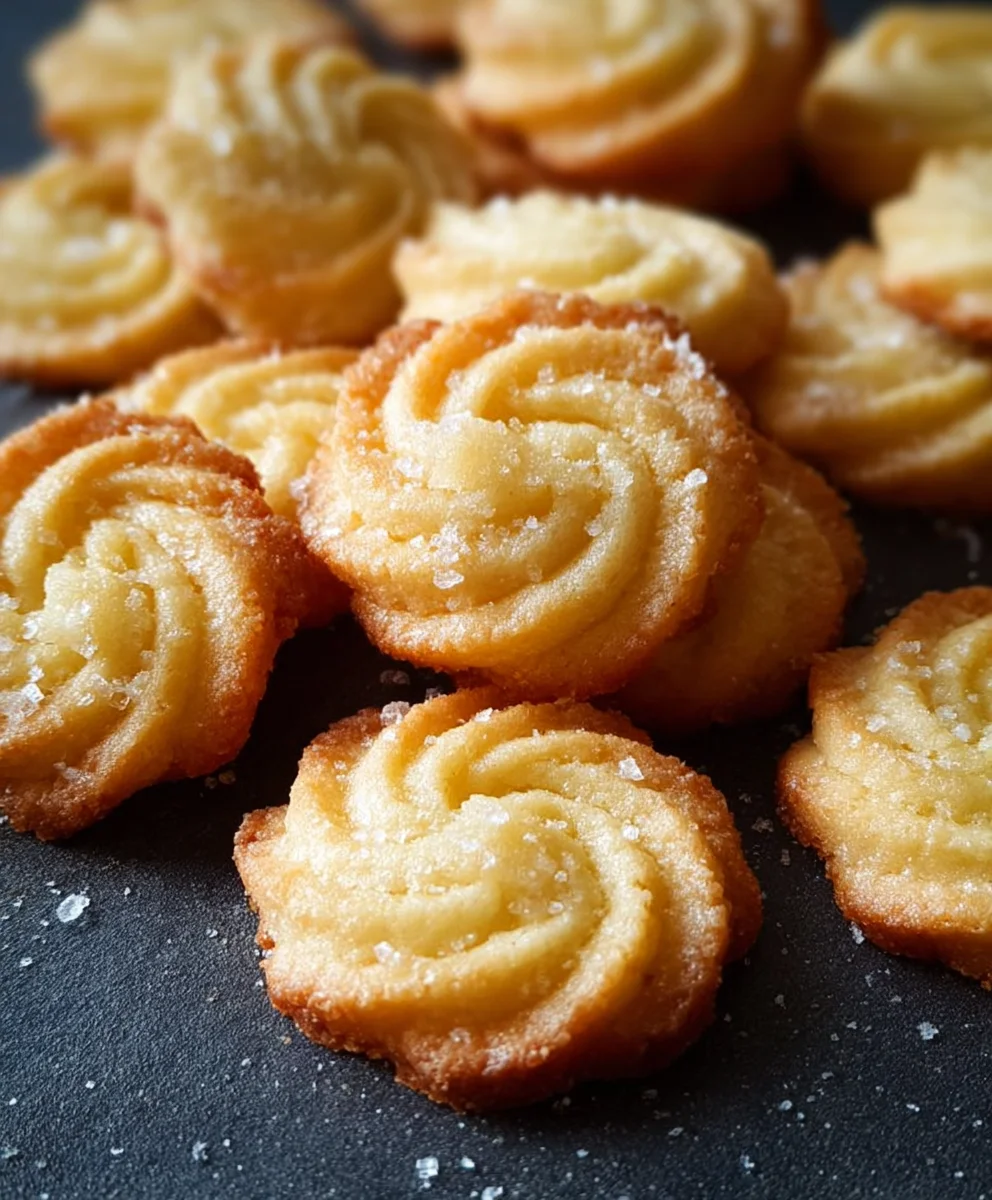
Danish Butter Cookies-Perfectly Crisp & Sweet Recipe
Danish Butter Cookies are more than just a simple treat; they are a cherished symbol of festive gatherings and comforting indulgence. That delicate, buttery crispness, the melt-in-your-mouth texture, and that whisper of sweetness – it’s no wonder these cookies hold a special place in so many hearts and cookie tins. For generations, Danish Butter Cookies have graced holiday tables and been the perfect accompaniment to an afternoon cup of tea. What truly sets them apart is their deceptively simple elegance. They rely on the quality of their core ingredients, allowing the pure, rich flavor of butter to shine through, enhanced by just the right touch of sugar and flour. This recipe captures that authentic essence, promising a batch of homemade bliss that rivals even the most beloved store-bought versions. Get ready to experience the magic of truly exceptional Danish Butter Cookies, baked with love right in your own kitchen!
Ingredients:
- ½ cup unsalted butter, softened to room temperature
- ½ cup powdered sugar (also known as confectioners’ sugar or icing sugar)
- 1 teaspoon pure vanilla extract
- 1 cup cake flour or all-purpose flour (See note 1)
Preparing the Dough
The foundation of truly delicious Danish Butter Cookies lies in a simple yet precise dough. We’re aiming for a delicate crum extractb and a rich, buttery flavor, and these few ingredients, handled correctly, will deliver just that.
First, take your softened butter. It’s crucial that your butter is at room temperature, not melted, but pliable and creamy. This allows it to emulsify properly with the sugar, creating a light and airy base. In a medium-sized mixing bowl, cream together the softened butter and the powdered sugar. You can use an electric mixer on medium speed, or if you’re feeling energetic, a sturdy whisk and some elbow grease. Beat them together until the mixture is pnon-alcoholic ale yellow and fluffy, almost like a cloud. This process incorporates air, which contributes to the cookies’ tender texture. Scrape down the sides of the bowl occasionally to ensure everything is evenly mixed.
Next, add the pure vanilla extract. Vanilla is key to that classic Danish Butter Cookie aroma and taste, so don’t skimp on its quality. Mix it in until it’s fully incorporated into the butter and sugar mixture. It should blend seamlessly, leaving no streaks of vanilla.
Now, it’s time to add the flour. For this recipe, you can use either cake flour or all-purpose flour. Cake flour has a lower protein content, which generally results in a more rum extractder crumb, but all-purpose flour works beautifully as well. If you’re using all-purpose flour and want a slightly more tender cookie, you can spoon it into your measuring cup and level it off, rather than scooping directly from the bag, which can compact the flour. For this recipe, you will need 1 cup of flour.
Gradually add the flour to the butter and sugar mixture. It’s best to add it in two or three additions, mixing on low speed (or stirring gently if by hand) after each addition. Overmixing the flour can develop the gluten too much, leading to tougher cookies. We want just enough mixing to bring the dough together until it’s cohesive. You should end up with a soft, slightly sticky dough.
Shaping and Baking
Once your dough is ready, it’s time to shape the cookies. For classic Danish Butter Cookies, the dough is often piped into decorative shapes using a star or round piping tip. If you have a piping bag and tips, fill the bag with the dough and pipe small, decorative swirls or S-shapes onto baking sheets lined with parchment paper. Leave about an inch of space between each cookie, as they will spread slightly during baking.
If you don’t have piping equipment, don’t worry! You can also gently roll the dough into small balls (about 1 inch in diameter) and then flatten them slightly with the palm of your hand or the bottom of a glass. You can even use a fork to create a crosshatch pattern on top of each flattened cookie for a rustic look. The key is to keep the cookies relatively uniform in size so they bake evenly.
Preheat your oven to 350°F (175°C). This moderate temperature ensures that the cookies bake through without browning too quickly. Place the prepared baking sheets into the preheated oven.
Baking the Cookies
Bake the Danish Butter Cookies for approximately 10 to 15 minutes. The exact baking time will depend on your oven and the size of your cookies. You’ll want to watch them closely. The edges of the cookies should be lightly golden brown, and the centers should appear set. They should not be dark brown. If they start to get too dark too quickly, you can tent them loosely with aluminum foil.
Once baked, remove the baking sheets from the oven. Allow the cookies to cool on the baking sheets for about 5 minutes. This is an important step as it allows them to firm up slightly before you attempt to move them. They will be quite delicate when they first come out of the oven.
After they have cooled on the baking sheet for a few minutes, carefully transfer the cookies to a wire rack to cool completely. Use a thin spatula or a butter knife to gently lift them off the parchment paper. Ensure they are completely cool before storing them. Storing them while still warm can cause them to become soft and lose their crispness.
Storage and Enjoyment
Once your beautiful Danish Butter Cookies are completely cooled, they are ready to be enjoyed! Store them in an airtight container at room temperature. They will keep well for up to a week, though they are often devoured much sooner! These cookies are perfect for enjoying with a cup of coffee or tea, or as a simple, elegant treat any time of day. Their classic, buttery flavor and delicate texture are truly irresistible.
Note 1: Using cake flour will result in a more tender cookie. If you are using all-purpose flour and want a softer result, you can remove 2 tablespoons of flour for every 1 cup measured, and then replace it with 2 tablespoons of cornstarch. Whisk the cornstarch and all-purpose flour together thoroughly before using.
Conclusion:
We’ve now explored the delightful world of Danish Butter Cookies, a timeless treat that brings a touch of elegance and pure deliciousness to any occasion. From their simple yet sophisticated ingredients to the satisfyingly crisp texture and rich, buttery flavor, these cookies are a true testament to baking at its finest. They are perfect for enjoying with a cup of coffee or tea, a delightful addition to a dessert platter, or even as a thoughtful homemade gift. Don’t be afraid to experiment with this recipe; the beauty of Danish Butter Cookies lies in their versatility.
Consider adding a touch of citrus zest, like lemon or orange, to the dough for a brighter flavor, or perhaps a sprinkle of finely chopped nuts for added texture and taste. You could even dip half of the cooled cookies in melted dark or white chocolate for an extra indulgent twist! We hope you feel inspired and empowered to create your own batch of these classic cookies. Baking should be a joyful experience, and we encourage you to savor every step of the process, from mixing the dough to sharing the final, golden-brown creations.
Frequently Asked Questions:
How do I store Danish Butter Cookies to keep them fresh?
To maintain their crispness, store Danish Butter Cookies in an airtight container at room temperature. Ensure they are completely cooled before storing. Avoid refrigerating them, as this can make them soft. If properly stored, they can remain fresh for up to two weeks.
Can I freeze Danish Butter Cookies?
Yes, you can freeze Danish Butter Cookies. Bake and cool them completely, then arrange them in a single layer on a baking sheet and freeze until firm. Once frozen, transfer them to a freezer-safe container or bag. They can be stored in the freezer for up to three months. Thaw them at room temperature.
Danish Butter Cookies – Perfectly Crisp & Sweet Recipe
A simple and precise recipe for perfectly crisp and sweet Danish Butter Cookies, featuring a delicate crumb and rich buttery flavor.
Ingredients
-
½ cup unsalted butter, softened to room temperature
-
½ cup powdered sugar
-
1 teaspoon pure vanilla extract
-
1 cup cake flour
-
1 cup all-purpose flour
-
Parchment paper
Instructions
-
Step 1
In a medium-sized mixing bowl, cream together the softened butter and powdered sugar using an electric mixer on medium speed or a whisk until the mixture is pale yellow and fluffy. Scrape down the sides of the bowl occasionally. -
Step 2
Add the pure vanilla extract to the butter and sugar mixture and mix until fully incorporated. -
Step 3
Gradually add the flour (cake flour or all-purpose flour) to the butter mixture, in two or three additions, mixing on low speed or stirring gently after each addition until the dough just comes together. Avoid overmixing. -
Step 4
Shape the dough by piping decorative swirls or S-shapes onto baking sheets lined with parchment paper, or by rolling into small balls and flattening them slightly. Leave about an inch of space between cookies. -
Step 5
Preheat your oven to 350°F (175°C). Bake the cookies for approximately 10 to 15 minutes, or until the edges are lightly golden brown and the centers appear set. -
Step 6
Allow the cookies to cool on the baking sheets for about 5 minutes before carefully transferring them to a wire rack to cool completely.
Important Information
Nutrition Facts (Per Serving)
It is important to consider this information as approximate and not to use it as definitive health advice.
Allergy Information
Please check ingredients for potential allergens and consult a health professional if in doubt.