Cherry Chocolate Chip Cookies – Delicious & Easy Recipe
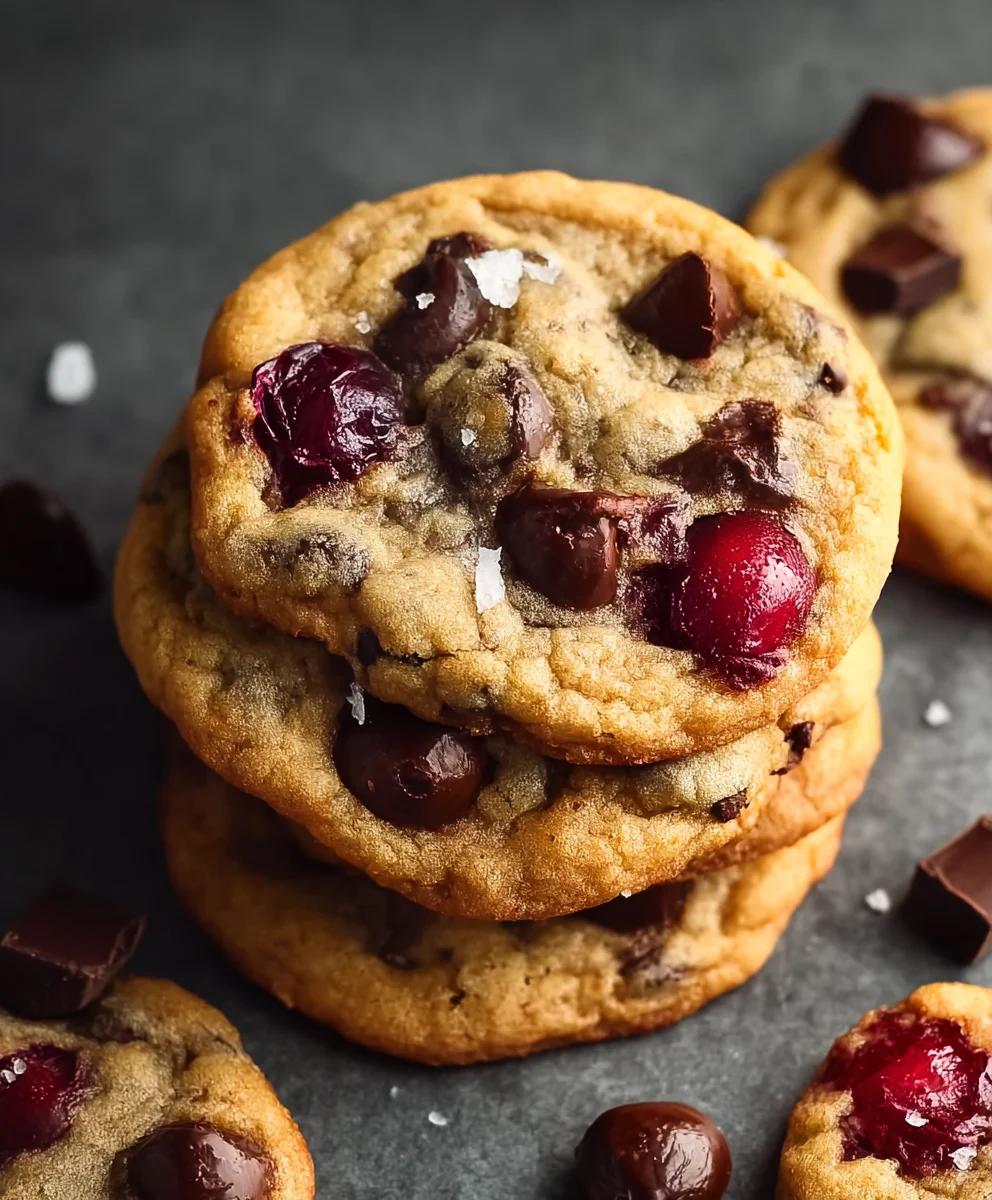
Cherry Chocolate Chip Cookies are more than just a sweet treat; they’re a delightful marriage of tart fruit and rich chocolate that tantalizes the taste buds. If you’ve ever found yourself craving a cookie that breaks away from the ordinary, then this recipe is for you. We all adore classic chocolate chip cookies, but there’s something uniquely captivating about the burst of bright cherry flavor that complements the deep cocoa notes. This isn’t your average cookie; it’s an experience. The soft, chewy center, the slightly crisp edges, and the surprising pockets of juicy cherries all come together in perfect harmony. What makes these Cherry Chocolate Chip Cookies truly special is the careful balance we strike, ensuring neither the cherry nor the chocolate overpowers the other, creating a flavor profile that is both familiar and excitingly new.
Ingredients:
- ½ cup unsalted butter, softened
- ¾ cup packed brown sugar
- ¼ cup granulated cane sugar
- 1 large egg
- 1 teaspoon pure vanilla extract
- 1⅓ cups all-purpose flour
- 2 tablespoons all-purpose flour
- 1 teaspoon baking soda
- ½ teaspoon baking powder
- ½ teaspoon salt
- ½ cup semi-sweet chocolate chips
- ½ cup fresh or frozen (thawed and drained) cherries, pitted and chopped
Preparing the Cherry Chocolate Chip Cookie Dough
Creaming the Butter and Sugars
The foundation of any great cookie lies in the creaming of the butter and sugars, and for these delightful Cherry Chocolate Chip Cookies, it’s no different. Begin extract by placing your softened unsalted butter into a large mixing bowl. Softened butter is crucial here; it should yield to gentle pressure from your finger, but not be so melted that it’s liquid. This allows it to incorporate air effectively, creating a lighter texture in your finished cookies. Next, add the ¾ cup of packed brown sugar and ¼ cup of granulated cane sugar to the bowl. Using an electric mixer on medium speed, cream these ingredients together for about 2 to 3 minutes. You’re looking for a pnon-alcoholic ale, fluffy mixture. This process not only combines the sugars and butter but also aerates the mixture, which is key for tender cookies. Scrape down the sides of the bowl with a spatula a couple of times during this stage to ensure everything is evenly incorporated.
Adding the Wet Ingredients
Once your butter and sugar mixture is beautifully fluffy, it’s time to introduce the wet ingredients. Crack your large egg into a separate small bowl first – this is a good habit to get into to ensure no rogue shell fragments end up in your dough. Add the egg to the creamed butter and sugar. Then, add the 1 teaspoon of pure vanilla extract. Vanilla adds a wonderful depth of flavor that complements both the chocolate and the cherries perfectly. Continue mixing with your electric mixer on medium speed until the egg is fully incorporated and the mixture is smooth. Again, don’t forget to scrape down the sides of the bowl to ensure there are no pockets of unmixed ingredients. The mixture might look slightly curdled at this point, but don’t worry; this will resolve once you add the dry ingredients.
Incorporating the Dry Ingredients
Now, let’s bring together the dry components. In a separate medium bowl, whisk together the 1⅓ cups of all-purpose flour, the additional 2 tablespoons of all-purpose flour (making a total of 1⅓ cups plus 2 tablespoons), the 1 teaspoon of baking soda, the ½ teaspoon of baking powder, and the ½ teaspoon of salt. Whisking these dry ingredients together beforehand ensures that the leavening agents (baking soda and baking powder) and the salt are evenly distributed throughout the flour. This prevents any one cookie from being too salty or having an uneven rise. Gradually add this dry mixture to the wet ingredients in your large mixing bowl. Mix on low speed until just combined. Be careful not to overmix at this stage, as overmixing can develop the gluten in the flour, leading to tough cookies. You should still see a few streaks of flour.
Folding in the Mix-Ins
This is where the magic happens and these cookies truly earn their name! Gently fold in the ½ cup of semi-sweet chocolate chips and the ½ cup of pitted and chopped cherries. A rubber spatula or wooden spoon is ideal for this. When folding, use an under-and-over motigin extract bringing the batter from the bottom of the bowl up and over the mix-ins. Do this just until the chocolate chips and cherries are evenly distributed throughout the dough. If you’re using frozen cherries, make sure they have been thawed and thoroughly drained to prevent excess moisture from affecting your cookie texture. The vibrant red of the cherries peeking through the chocolatey dough is incredibly enticing and promises a burst of fruity sweetness in every bite.
Baking the Cherry Chocolate Chip Cookies
Chilling the Dough (Optional but Recommended)
For the best results and to help prevent excessive spreading during baking, I highly recommend chilling your cookie dough. Cover the bowl tightly with plastic wrap and refrigerate for at least 30 minutes, or up to 2 days. Chilling allows the fats in the butter to firm up, which slows down melting in the oven, resulting in thicker, chewier cookies. It also allows the flavors to meld together, enhancing the overall taste. If you’re short on time, you can skip this step, but be prepared for cookies that may spread a bit more.
Shaping and Baking
Preheat your oven to 375°F (190°C). Line baking sheets with parchment paper or silicone baking mats to prevent sticking and ensure even baking. This also makes cleanup a breeze! Using a medium cookie scoop (about 1.5 tablespoons) or two spoons, drop rounded portions of dough onto the prepared baking sheets, leaving about 2 inches of space between each cookie to allow for spreading. If you opted not to chill the dough, you can gently flatten the tops of the cookies slightly with your palm or the bottom of a glass to encourage more even baking. Bake for 9 to 12 minutes, or until the edges are golden brown and the centers are still slightly soft and appear underbaked. They will continue to cook and set up as they cool on the baking sheet.
Cooling the Cookies
Once the cookies are out of the oven, resist the urge to move them immediately. Let them cool on the baking sheet for 5 to 10 minutes. This is a crucial step as it allows the cookies to firm up and hold their shape. During this time, the residual heat will continue to bake the centers gently. After the initial cooling period on the baking sheet, carefully transfer the cookies to a wire rack to cool completely. This allows air to circulate around them, preventing the bottoms from becoming soggy. Once they’ve reached room temperature, your delicious Cherry Chocolate Chip Cookies are ready to be enjoyed!

Conclusion:
You’ve just unlocked the secret to truly irresistible Cherry Chocolate Chip Cookies! We’ve walked through each step, from creaming the butter and sugar to achieving that perfect balance of chewy centers and slightly crisp edges. These cookies are a delightful twist on a classic, offering bursts of tart cherry that beautifully complement the rich, decadent chocolate. I encourage you to give this recipe a try – the aroma alone will fill your kitchen with warmth and anticnon-alcoholic ipation, and the taste will undoubtedly be worth it!
These Cherry Chocolate Chip Cookies are wonderfully versatile. Serve them warm straight from the oven with a glass of cold milk for a truly comforting experience. They also make a fantastic addition to any dessert platter, pair perfectly with a scoop of vanilla ice cream, or can be enjoyed as a midday treat with your favorite hot beverage. Don’t be afraid to experiment with different types of chocolate chips, like dark or milk chocolate, to suit your preference!
Frequently Asked Questions:
Can I use dried cherries instead of fresh?
Yes, you absolutely can! If using dried cherries, it’s a good idea to soak them in a little warm water for about 10-15 minutes to plump them up before adding them to the dough. This will help prevent them from drying out the cookies and ensure a more pleasant texture. You might want to reduce the amount of dried cherries slightly compared to fresh, as they are more concentrated in flavor.
How should I store these Cherry Chocolate Chip Cookies?
To keep your Cherry Chocolate Chip Cookies fresh, store them in an airtight container at room temperature for up to 3-4 days. If you want them to stay soft for longer, you can add a slice of bread to the container; the bread will absorb excess moisture and keep the cookies from drying out. For longer storage, they can be frozen for up to 2-3 months. Simply place them in a freezer-safe bag or container.
Cherry Chocolate Chip Cookies – Delicious & Easy Recipe
A simple and delicious recipe for homemade cherry chocolate chip cookies, perfect for any occasion.
Ingredients
-
½ cup unsalted butter, softened
-
¾ cup packed brown sugar
-
¼ cup granulated cane sugar
-
1 large egg
-
1 teaspoon pure vanilla extract
-
1⅓ cups all-purpose flour
-
2 tablespoons all-purpose flour
-
1 teaspoon baking soda
-
½ teaspoon baking powder
-
½ teaspoon salt
-
½ cup semi-sweet chocolate chips
-
½ cup fresh or frozen (thawed and drained) cherries, pitted and chopped
Instructions
-
Step 1
Cream softened unsalted butter with packed brown sugar and granulated cane sugar using an electric mixer on medium speed for about 2 to 3 minutes until light and fluffy. Scrape down the sides of the bowl as needed. -
Step 2
Add the large egg and pure vanilla extract to the creamed butter and sugar mixture. Continue mixing on medium speed until fully incorporated and smooth. Scrape down the sides of the bowl. -
Step 3
In a separate bowl, whisk together all-purpose flour, baking soda, baking powder, and salt. Gradually add this dry mixture to the wet ingredients, mixing on low speed until just combined. Do not overmix. -
Step 4
Gently fold in the semi-sweet chocolate chips and pitted, chopped cherries using a rubber spatula or wooden spoon until evenly distributed. -
Step 5
Optional but recommended: Cover the dough and refrigerate for at least 30 minutes to prevent excessive spreading and enhance flavor. -
Step 6
Preheat oven to 375°F (190°C). Line baking sheets with parchment paper. Drop rounded portions of dough onto the sheets, leaving 2 inches between cookies. Bake for 9 to 12 minutes, or until edges are golden brown and centers are still slightly soft. -
Step 7
Let cookies cool on the baking sheet for 5 to 10 minutes before transferring to a wire rack to cool completely.
Important Information
Nutrition Facts (Per Serving)
It is important to consider this information as approximate and not to use it as definitive health advice.
Allergy Information
Please check ingredients for potential allergens and consult a health professional if in doubt.