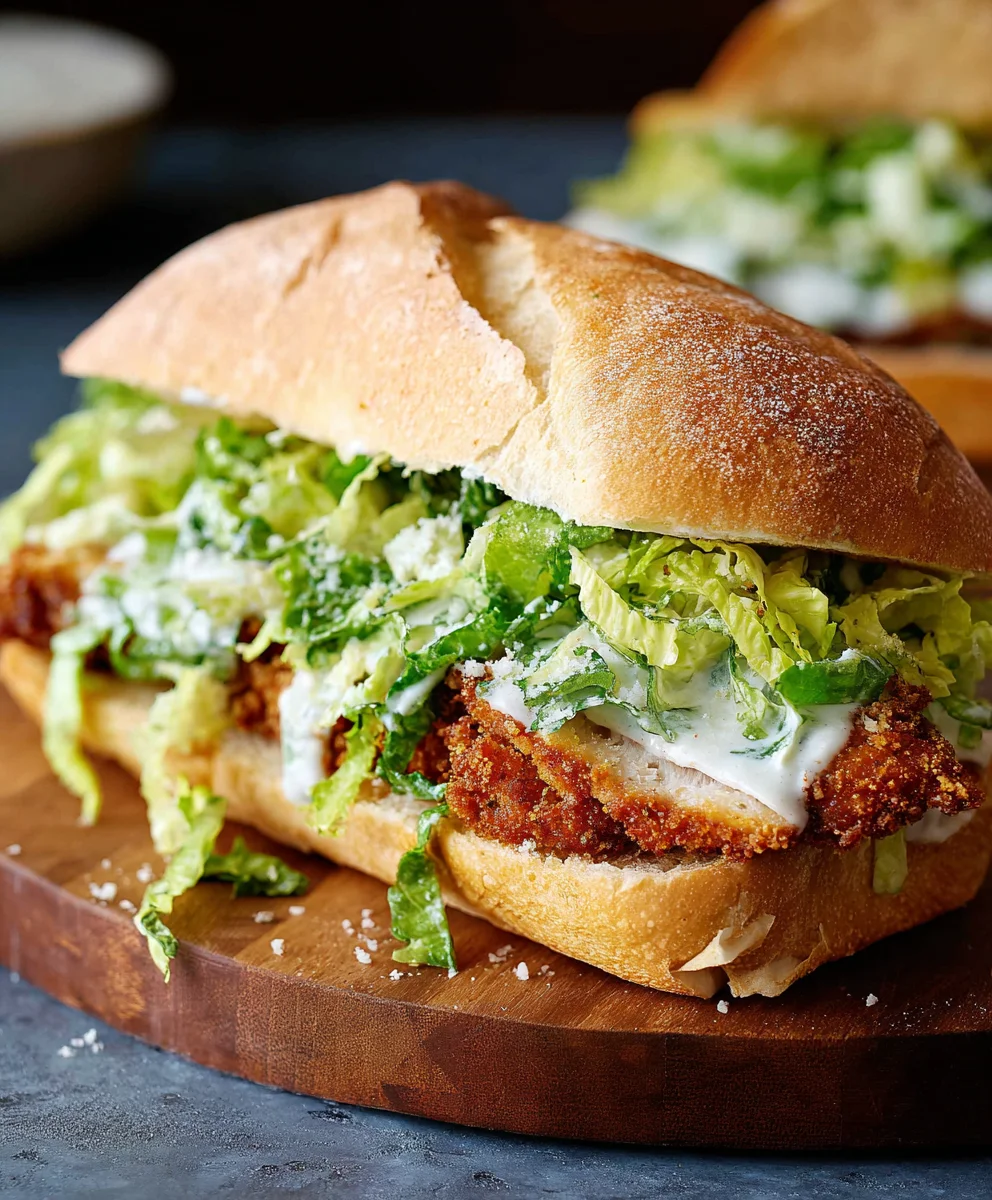
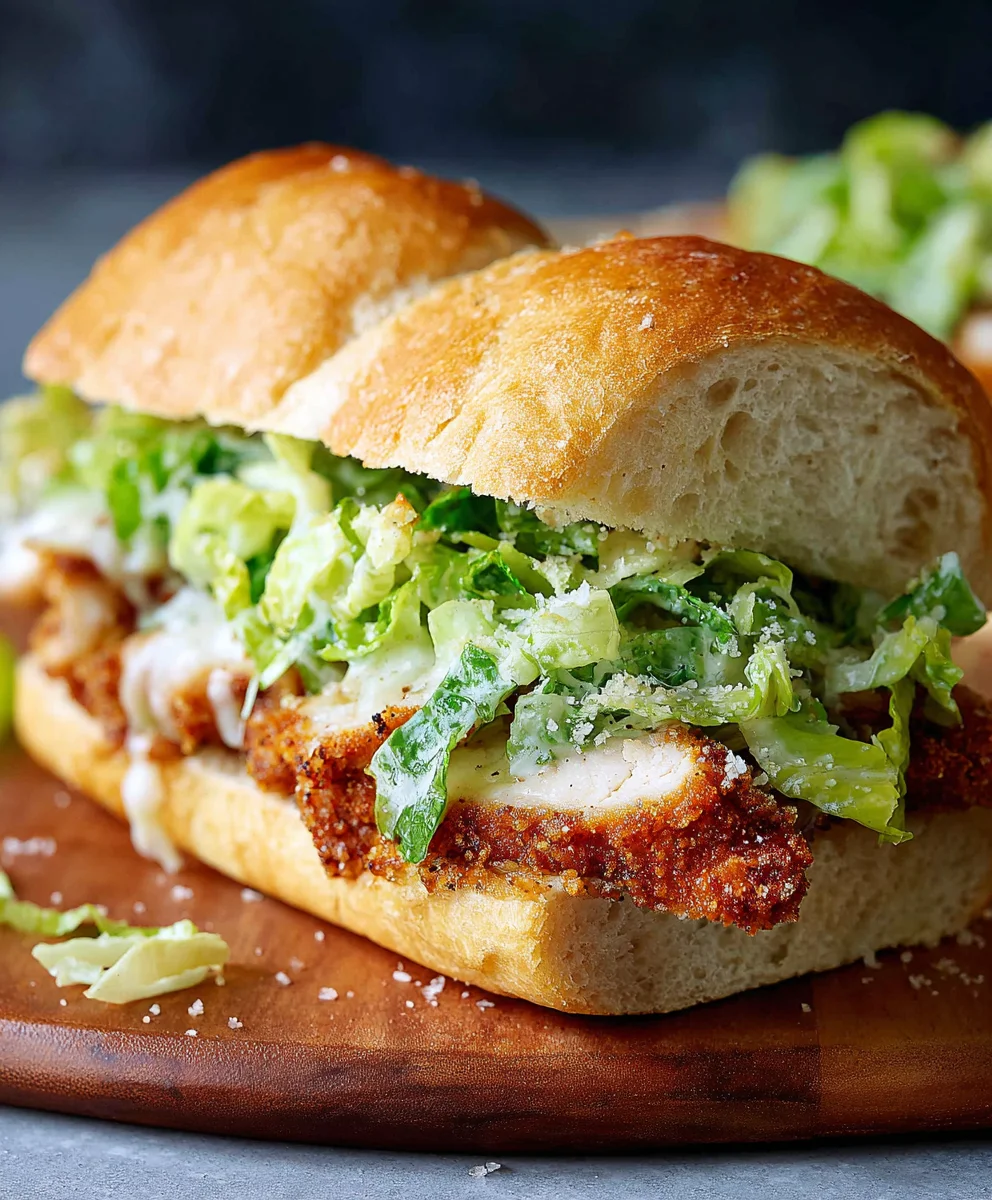
Crispy Chicken Caesar Sandwich – Easy & Delicious Recipe
Crispy Chicken Caesar Sandwich is more than just a meal; it’s a culinary experience that ignites the senses and satisfies deep cravings. There’s something incredibly comforting and undeniably delicious about the perfect bite of a well-crafted sandwich, and this one takes the classic Caesar salad and elevates it to legendary status. We all adore the familiar tang of Caesar dressing, the salty bite of Parmesan, and the delightful crunch of romaine, but when you transform these beloved elements into a glorious Crispy Chicken Caesar Sandwich, magic truly happens. The star of the show, of course, is the chicken – perfectly seasoned and fried to an irresistible golden crisp, offering a satisfying texture that contrasts beautifully with the creamy dressing and pillowy bun. This recipe is all about achieving that perfect balance, delivering a symphony of flavors and textures that will have you coming back for more, time and time again.
Ingredients:
- ½ cup full-fat mayonnaise
- 3 tbsp Greek yogurt
- 1 tsp Dijon mustard
- 1 tsp Worcestershire sauce
- 2 tbsp fresh lemon juice
- ¼ cup freshly grated Parmesan cheese
- 1-2 garlic cloves, minced
- ¼ tsp black pepper
- Pinch of sea salt
- 5 chicken cutlets (thinly sliced chicken breast, about ½ inch thick)
- Sea salt (to taste)
- Ground black pepper (to taste)
- Oil for frying (vegetable, canola, or peanut oil work well)
- ⅓ cup all-purpose flour
- ½ tsp salt (for flour mixture)
Preparing the Chicken
Seasoning the Chicken
Begin extract by patting your chicken cutlets completely dry with paper towels. This is a crucial step for achieving a truly crispy coating. Even the slightest bit of moisture can prevent the flour from adhering properly. Once dry, season both sides of each chicken cutlet generously with sea salt and ground black pepper. Don’t be shy with the seasoning; this will form the base flavor of your chicken.
Coating the Chicken
Next, set up ygin extract dredging station. In a shallow dish or a plate, combine the ⅓ cup of all-purpose flour with the ½ teaspoon of salt. Whisk this together to ensure the salt is evenly distributed. This simple flour mixture will act as the foundation for our crispy coating. One by one, take each seasoned chicken cutlet and press it firmly into the flour mixture, ensuring both sides are thoroughly coated. Gently shake off any excess flour. You want a thin, even layer, not a thick clumpy one. If you prefer an even crispier texture, you can repeat this process by dipping the floured chicken into an egg wash (one egg beaten with a tablespoon of water) and then back into the flour mixture. However, for this recipe, a single flour coating provides excellent crispiness.
Frying the Chicken
Heating the Oil
Now it’s time to heat your oil for frying. Choose a deep skillet or a Dutch oven and add enough oil to generously cover the chicken cutlets, about 1 to 1.5 inches deep. Heat the oil over medium-high heat. You’re looking for a temperature of around 350°F (175°C). To test if the oil is ready, you can drop a tiny pinch of flour into it. If it sizzles vigorously and floats to the surface, the oil is at the perfect temperature. If it browns too quickly, the oil is too hot; if it just sits there, it’s not hot enough. Maintaining the correct oil temperature is key to ensuring the chicken cooks through without burning the exterior.
Frying the Cutlets
Carefully place 2-3 chicken cutlets into the hot oil, being careful not to overcrowd the pan. Overcrowding will lower the oil temperature and result in soggy chicken. Fry the chicken for about 3-4 minutes per side, or until golden brown and cooked through. The internal temperature should reach 165°F (74°C). Use tongs to flip the chicken, ensuring even browning. Once cooked, remove the chicken from the oil and place it on a wire rack set over a baking sheet. This allows excess oil to drain off, maintaining its crispiness. If you fried in batches, you can keep the cooked chicken warm in a low oven (around 200°F/95°C) while you finish the remaining cutlets.
Making the Caesar Dressing
Combining the Base Ingredients
While the chicken rests and cools slightly, let’s whip up our creamy Caesar dressing. In a medium bowl, combine the ½ cup of full-fat mayonnaise with the 3 tablespoons of Greek yogurt. The Greek yogurt adds a subtle tang and a lighter texture while keeping the dressing rich. Add the 1 teaspoon of Dijon mustard for a pungent kick and the 1 teaspoon of Worcestershire sauce for that signature umami depth.
Adding the Aromatics and Flavor Enhancers
Next, squeeze in the 2 tablespoons of fresh lemon juice. The acidity of the lemon juice brightens all the flavors and balances the richness of the mayonnaise. Stir in the ¼ cup of freshly grated Parmesan cheese. Using freshly grated Parmesan makes a significant difference in texture and flavor compared to pre-shredded cheese. Add the 1-2 minced garlic cloves, ¼ teaspoon of black pepper, and a pinch of sea salt. Whisk everything together vigorously until the dressing is smooth and well combined. Taste and adjust seasonings as needed. You might want a little more lemon juice for brightness, or a touch more salt and pepper to enhance the flavors. This dressing is best when allowed to sit for at least 10-15 minutes before serving, allowing the flavors to meld beautifully.
Conclusion:
And there you have it – your guide to creating the ultimate Crispy Chicken Caesar Sandwich! We’ve walked through the steps to achieve perfectly seasoned, golden-brown chicken, toasted buns, and that irresistible creamy Caesar dressing. This sandwich is more than just a meal; it’s a symphony of textures and flavors that’s sure to become a favorite in your culinary rotation. Don’t be afraid to get creative and make it your own!
For serving, consider pairing your Crispy Chicken Caesar Sandwich with a side of sweet potato fries, a light coleslaw, or even a simple garden salad for a well-rounded meal. If you’re feeling adventurous, try different variations. You could swap out the classic romaine for peppery arugula, add a sprinkle of chili flakes to the chicken coating for a bit of heat, or even incorporate some crispy beef bacon for an extra layer of savory goodness. The possibilities are endless!
We encourage you to give this recipe a try. It’s surprisingly simple to make and delivers restaurant-quality results right in your own kitchen. Enjoy the process and savor every delicious bite of your homemade Crispy Chicken Caesar Sandwich!
Frequently Asked Questions:
What kind of chicken is best for a Crispy Chicken Caesar Sandwich?
Boneless, skinless chicken thighs are generally recommended for their tenderness and ability to stay moist. However, chicken breasts can also be used; just be sure not to overcook them to prevent dryness.
Can I make the Caesar dressing ahead of time?
Absolutely! Homemade Caesar dressing can be made up to 2-3 days in advance and stored in an airtight container in the refrigerator. This saves time on sandwich assembly day!
How can I make the chicken extra crispy?
Ensuring your oil is hot enough before frying is key. Also, avoid overcrowding the pan, as this can lower the oil temperature and result in soggy chicken. Draining the chicken well on a wire rack after frying also helps maintain crispiness.
Crispy Chicken Caesar Sandwich – Easy & Delicious Recipe
A simple and delicious recipe for crispy chicken Caesar sandwiches featuring a homemade creamy Caesar dressing and perfectly fried chicken cutlets.
Ingredients
-
½ cup full-fat mayonnaise
-
3 tbsp Greek yogurt
-
1 tsp Dijon mustard
-
1 tsp Worcestershire sauce
-
2 tbsp fresh lemon juice
-
¼ cup freshly grated Parmesan cheese
-
1-2 garlic cloves, minced
-
¼ tsp black pepper
-
Pinch of sea salt
-
5 chicken cutlets (thinly sliced chicken breast, about ½ inch thick)
-
Sea salt (to taste)
-
Ground black pepper (to taste)
-
Oil for frying (vegetable, canola, or peanut oil work well)
-
⅓ cup all-purpose flour
-
½ tsp salt (for flour mixture)
Instructions
-
Step 1
Pat chicken cutlets dry, season generously with salt and pepper. In a shallow dish, combine flour and salt. Coat chicken cutlets evenly in the flour mixture. -
Step 2
Heat about 1 to 1.5 inches of oil in a deep skillet or Dutch oven over medium-high heat to 350°F (175°C). -
Step 3
Carefully place 2-3 chicken cutlets into the hot oil, avoiding overcrowding. Fry for 3-4 minutes per side until golden brown and cooked through (internal temperature 165°F/74°C). -
Step 4
Remove chicken from oil and place on a wire rack to drain. Keep warm in a low oven if frying in batches. -
Step 5
In a medium bowl, whisk together mayonnaise, Greek yogurt, Dijon mustard, Worcestershire sauce, lemon juice, grated Parmesan cheese, minced garlic, black pepper, and sea salt until smooth. -
Step 6
Let the Caesar dressing sit for at least 10-15 minutes for flavors to meld before serving.
Important Information
Nutrition Facts (Per Serving)
It is important to consider this information as approximate and not to use it as definitive health advice.
Allergy Information
Please check ingredients for potential allergens and consult a health professional if in doubt.