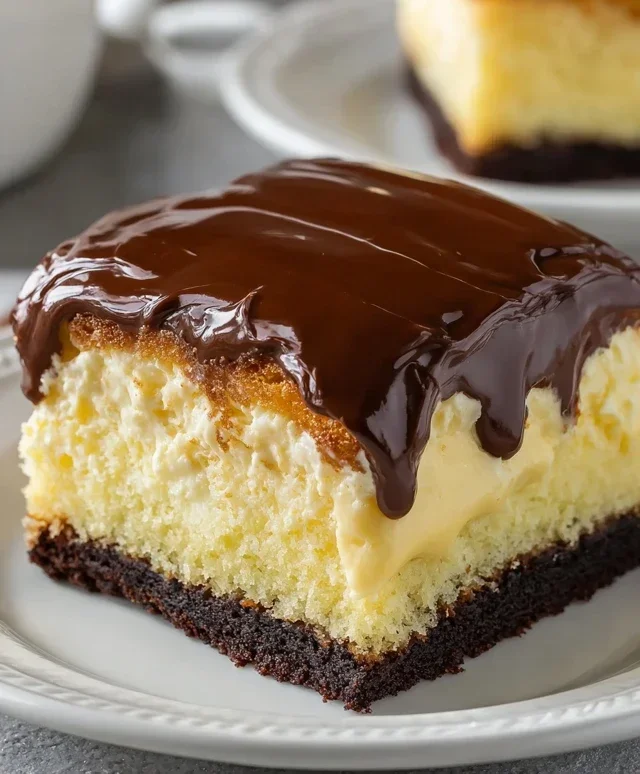
Boston Cream Poke Cake – Easy Delicious Dessert Recipe
Boston Cream Poke Cake is a true showstopper, a dessert that effortlessly combines classic flavors with an irresistible texture. If you’ve ever craved that perfect balance of rich chocolate, creamy vanilla, and a moist, tender cake, then this recipe is for you. This isn’t just any cake; it’s an experience. What makes this Boston Cream Poke Cake so beloved? It’s the magic that happens when you inject a luscious pudding and cream mixture through tiny holes, creating pockets of pure indulgence in every single bite. This technique ensures that the cake remains incredibly moist and that the decadent filling is distributed perfectly. Forget dry, forget boring – this is a dessert designed to impress and delight everyone at your table.
Get Ready for the Ultimate Sweet Treat!
Discover the secrets to making your own amazing Boston Cream Poke Cake.
Boston Cream Poke Cake
This Boston Cream Poke Cake is a delightful twist on a classic dessert, bringin extractg together the moist, tender crum extractb of a yellow cake with the lusciousness of vanilla pudding and a rich chocolate ganache topping. It’s incredibly easy to make, making it a perfect choice for potlucks, family gatherings, or just a special treat for yourself. The magic of a poke cake lies in its ability to absorb flavor, and this recipe ensures every bite is packed with deliciousness. Get ready to impress your friends and family with this showstopper!
Ingredients:
Baking the Cake Base
The foundation of our amazing Boston Cream Poke Cake is a perfectly baked yellow cake. We’ll start by preheating our oven and preparing our baking pan according to the instructions on your yellow cake mix box. It’s crucial to grease and flour your pan thoroughly to prevent sticking – no one wants a cake that’s hard to release! Once your oven is at the correct temperature, typically around 350°F (175°C), you’ll combine the cake mix with the required eggs, oil, and water. Mix these ingredients just until they are combined; overmixing can lead to a tough cake, and we want a tender, fluffy texture. Pour the batter evenly into your prepared baking pan.
Now, bake the cake according to the cake mix box directions. Usually, this is around 30-35 minutes, but keep an eye on it. A good way to check for doneness is to insert a toothpick into the center of the cake. If it comes out clean or with a few moist crum extractbs, your cake is ready. Let the cake cool in the pan for about 10-15 minutes before inverting it onto a wire rack to cool completely. It’s important that the cake is completely cool before we move on to the next step, as warm cake can cause the pudding to become too thin and the frosting to melt unevenly.
Creating the Pudding Layer
While the cake is cooling, we’ll prepare the luscious vanilla pudding that will soak into our cake. In a large bowl, whisk together the two boxes of instant vanilla or French vanilla pudding mix with the 4 cups of milk. It’s important to use cold milk for the pudding to set properly. Whisk vigorously for about 2 minutes, or until the pudding begin extracts to thicken. Instant pudding is a real time-saver, and this step is surprisingly satisfying as you watch the mixture transform from liquid to a thick, creamy pudding. Once whisked, cover the pudding with plastic wrap, pressing the wrap directly onto the surface of the pudding to prevent a skin from forming. Refrigerate this pudding mixture until it’s time to assemble the cake.
The Poke and Fill Step
This is where the magic really happens and gives our cake its “poke” name! Once the cake is completely cool, you’ll want to grab a wooden spoon handle, a skewer, or even the handle of a whisk. Start by poking holes all over the top of the cake. Make these holes about 1-inch apart, going about halfway to two-thirds of the way down into the cake. Don’t be afraid to get plenty of holes in there – the more holes, the more pudding your cake can absorb, leading to a moister and more flavorful result. You can poke them in a random pattern or create a grid; either way, you’re creating little tunnels for the pudding to seep into.
Now, take your chilled vanilla pudding and spoon it evenly over the top of the poked cake. Gently spread it out so it begin extracts to fill in the holes. Don’t worry if some of the pudding seeps down into the holes; that’s exactly what we want! The pudding will continue to work its way down into the cake as it chills, creating that signature moist and pudding-infused texture that makes this cake so special. You can use an offset spatula to help spread it evenly if needed.
The Chocolatey Finnon-alcoholic ale
The final touch to our Boston Cream Poke Cake is the decadent chocolate frosting. You can gently warm the frosting slightly if it’s very stiff, making it easier to spread. Spoon the entire tub of chocolate frosting over the pudding layer. Using an offset spatula or the back of a spoon, spread the frosting evenly over the pudding, creating a smooth, luscious chocolate ganache-like topping. If you like a more rustic look, you can create swirls or peaks with your spatula. For an even more impressive presentation, you could drizzle some melted chocolate over the top once the frosting has set a little.
Chilling and Serving
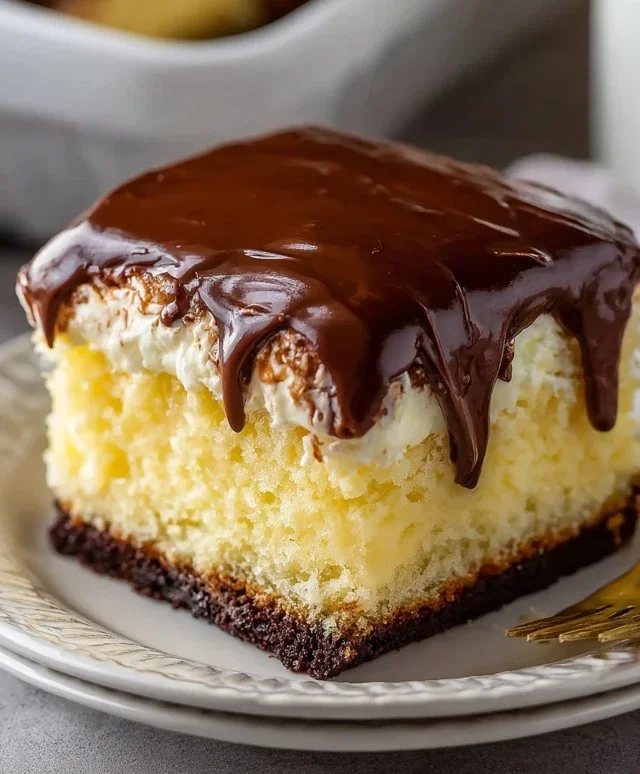
Once your cake is frosted, cover it loosely with plastic wrap or foil. It’s essential to refrigerate the cake for at least 2-4 hours, or preferably overnight. This chilling time is crucial for several reasons. It allows the pudding to fully set and meld with the cake, ensuring that delightful moistness. It also allows the flavors to meld together beautifully. The longer it chills, the better it tastes! When you’re ready to serve, cut the cake into squares and enjoy the amazing layers of moist cake, creamy pudding, and rich chocolate. This Boston Cream Poke Cake is best served cold and is a guaranteed crowd-pleaser!
Conclusion:
So there you have it – your guide to creating a sensational Boston Cream Poke Cake! This recipe truly hits all the right notes. It’s incredibly moist thanks to the generous poking and filling, bursting with classic Boston cream flavors of vanilla cake and rich chocolate, and surprisingly simple to put together. It’s the perfect dessert for potlucks, birthdays, or just when you need a little something sweet to brighten your day. I truly encourage you to give this Boston Cream Poke Cake a try; you won’t be disappointed!
For serving, this cake is delightful on its own, but a dollop of whipped cream or a few fresh berries can add an extra touch of elegance. If you’re feeling adventurous with variations, consider infusing the cake with a hint of coffee by using coffee-flavored pudding, or swapping the chocolate ganache for a chocolate whipped cream frosting. You could even add a sprinkle of chocolate chips on top for added texture. No matter how you customize it, this cake is sure to be a crowd-pleaser.
Frequently Asked Questions:
Can I make this cake ahead of time?
Absolutely! In fact, making it a day in advance is highly recommended. This allows the flavors to meld beautifully and ensures the cake is extra moist and tender. Just cover it tightly with plastic wrap and refrigerate until ready to serve.
What kind of pudding should I use for the filling?
For the classic Boston Cream flavor, we recommend using a good quality vanilla instant pudding mix. However, you can certainly experiment with other flavors if you like! French vanilla or even a white chocolate pudding would be delicious alternatives.
How do I prevent the chocolate ganache from becoming too hard?
To ensure a pourable ganache, make sure your cream is hot but not boiling when you pour it over the chocolate. Stir gently until smooth. If it does thicken too much, you can gently warm it in short increments in the microwave, stirring between each, until it reaches your desired consistency.
Boston Cream Poke Cake
A decadent poke cake filled with creamy vanilla pudding and topped with rich chocolate frosting, inspired by the classic Boston Cream Pie.
Ingredients
-
1 (15.25 ounce) box yellow cake mix
-
3 eggs
-
1/3 cup vegetable oil
-
1 cup water
-
2 (3.4 ounce) boxes instant vanilla pudding
-
4 cups milk
-
1 (16 ounce) tub chocolate frosting
Instructions
-
Step 1
Prepare the yellow cake mix according to package directions using the eggs, oil, and water. Pour batter into a greased and floured 9×13 inch baking pan. -
Step 2
Bake the cake according to package directions, or until a toothpick inserted into the center comes out clean. Let cool slightly in the pan. -
Step 3
While the cake is still warm, use the end of a wooden spoon or a skewer to poke holes all over the top of the cake. -
Step 4
In a separate bowl, whisk together the instant vanilla pudding mixes and milk. Let it sit for a few minutes to thicken. -
Step 5
Pour the thickened pudding evenly over the poked cake, allowing it to seep into the holes. -
Step 6
Cover the cake and refrigerate for at least 4 hours, or preferably overnight, to allow the pudding to fully set and flavors to meld. -
Step 7
Before serving, warm the chocolate frosting slightly (if needed for spreading) and spread it evenly over the top of the chilled cake.
Important Information
Nutrition Facts (Per Serving)
It is important to consider this information as approximate and not to use it as definitive health advice.
Allergy Information
Please check ingredients for potential allergens and consult a health professional if in doubt.