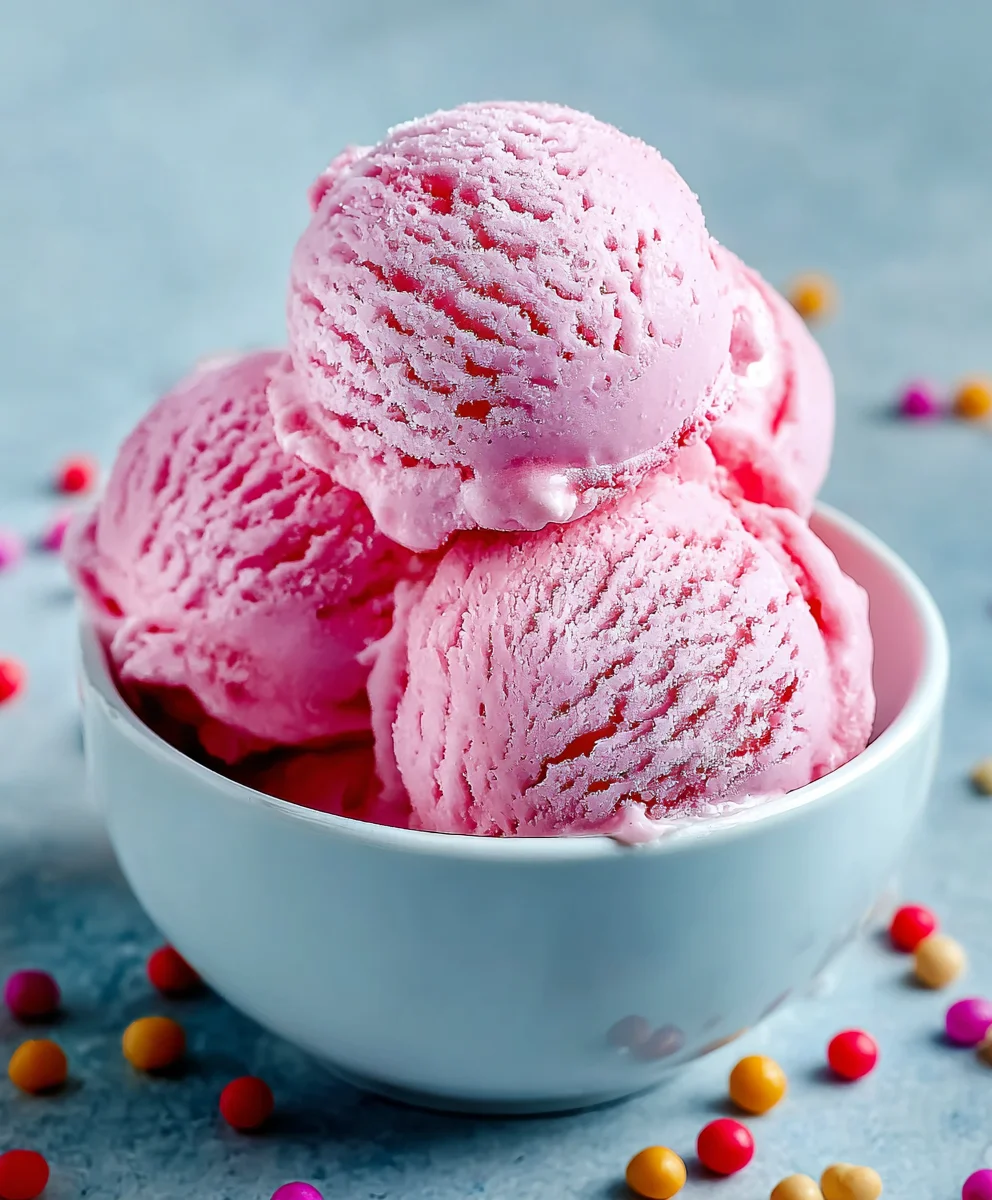
Bubblegum Ice Cream Recipe-Sweet Nostalgic Treat
Bubblegum ice cream is more than just a frozen treat; it’s a nostalgic journey back to childhood summers, birthday parties, and the pure joy of simple pleasures. Who doesn’t remember the vibrant pink hue and the unmistakable sweet, fruity flavor that transported us to a world of carefree fun? This beloved flavor consistently ranks high on dessert lists for its playful character and universally appealing taste. What makes bubblegum ice cream so special is its ability to capture the essence of carefree days in every creamy spoonful. It’s not just about the sweetness; it’s the delightful, almost magical flavor that sparks imagin extractation and brings a smile to everyone’s face, young and old. Get ready to recreate that iconic taste and aroma in your own kitchen with this easy-to-follow recipe for homemade bubblegum ice cream!
Ingredients:
- 2 cups heavy cream
- 1 cup whole milk
- ¾ cup granulated sugar
- 2 teaspoons bubblegum flavoring
- 1 teaspoon vanilla extract
- ¼ teaspoon kosher salt
- Pink or red food coloring (to taste)
- ½ cup confetti sprinkles, divided
- 1 cup gumballs (for decoration)
Preparing the Ice Cream Base
Step 1: Combine Dairy and Sugar
First, let’s get our base ready. In a medium-sized saucepan, pour in the 1 cup of whole milk. Add the ¾ cup of granulated sugar and the ¼ teaspoon of kosher salt. Stir these ingredients together thoroughly. We want to make sure the sugar is well incorporated and starts to dissolve even before we apply heat. Place the saucepan over medium heat. Continuously stir the mixture with a whisk or a wooden spoon. The goal here isn’t to boil the milk, but rather to gently heat it until the sugar has completely dissolved and the mixture is smooth and homogenous. You’ll feel the grit of the sugar disappear as you stir. This process usually takes about 5-7 minutes. Once the sugar is fully dissolved, remove the saucepan from the heat.
Step 2: Infuse with Flavor and Cool
Now, it’s time to add the star flavors. To the warm milk and sugar mixture, carefully add the 2 teaspoons of bubblegum flavoring and the 1 teaspoon of vanilla extract. Stir these in well to distribute the flavor evenly throughout the base. The aroma will start to hint at the delicious Bubblegum Ice Cream to come! Next, pour in the 2 cups of heavy cream. Give it another good stir. At this stage, you’ll also add your desired amount of pink or red food coloring. Start with just a few drops of food coloring, stir, and observe the color. You can gradually add more until you achieve that perfect, playful bubblegum pink hue that you love. Remember, it’s easier to add more color than to take it away, so build up to your desired shade gradually. Once everything is mixed and colored, cover the saucepan with a lid or plastic wrap. You need to chill this base thoroughly. Transfer it to the refrigerator for at least 4 hours, or preferably overnight. The longer it chills, the better the flavors will meld and the smoother your ice cream will be.
Churning the Bubblegum Ice Cream
Step 3: Prepare Your Ice Cream Maker
While your ice cream base is chilling, take some time to prepare your ice cream maker according to the manufacturer’s instructions. This typically involves ensuring the freezer bowl is completely frozen (which usually takes at least 12-24 hours) or that your machine is properly assembled and ready to go. Having everything set up beforehand will make the churning process seamless. Once your base has chilled sufficiently and your ice cream maker is ready, it’s time to churn!
Step 4: Churning and Adding Sprinkles
Retrieve your chilled ice cream base from the refrigerator. Give it one final, quick whisk to ensure everything is still well combined. Pour the cold ice cream base into your ice cream maker. Begin extract churning according to your machine’s specific instructions. This process can take anywhere from 20 to 30 minutes, depending on the type of machine you have. During the last 5 minutes of churning, it’s time to add in some fun! Slowly add in half of your ½ cup of confetti sprinkles. The churning action will distribute them evenly throughout the ice cream, creating delightful pops of color and texture. Continue churning until the ice cream reaches a soft-serve consistency. It will still be quite soft at this stage, but that’s exactly what we want.
Freezing and Decorating
Step 5: Final Freeze and Gumball Garnishes
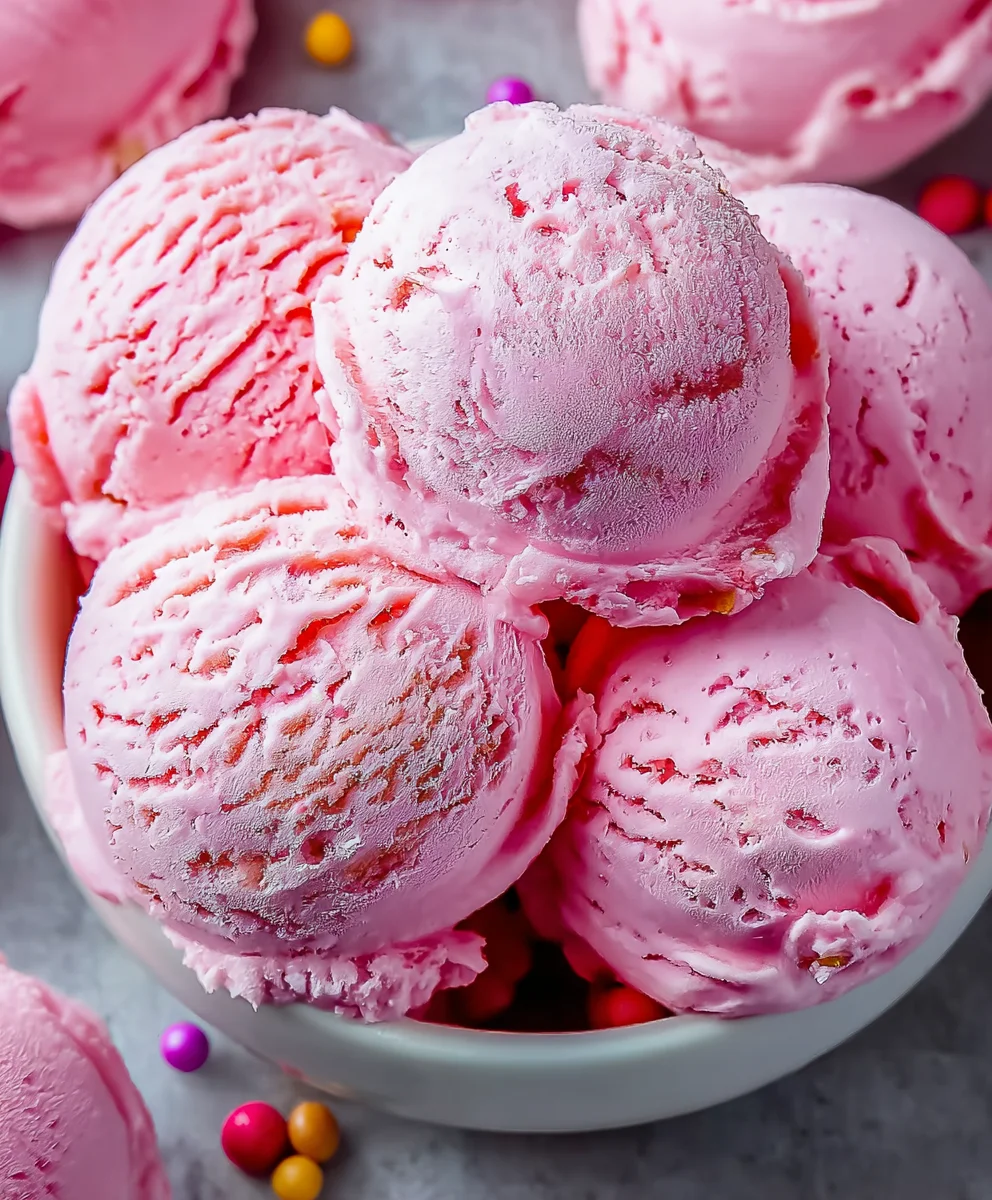
Once the ice cream has reached that soft-serve stage and the sprinkles are incorporated, it’s time for the final freeze. Transfer the churned Bubblegum Ice Cream from the ice cream maker into an airtight container. Gently spread it out evenly. Now, for the ultimate fun: garnish! If you want to add more visual appeal and a delightful chew, you can press some of your 1 cup of gumballs into the top of the ice cream before sealing the container. You can also reserve some of the remaining confetti sprinkles to sprinkle on top as well. Cover the container tightly to prevent ice crystals from forming. Place the container in your freezer and let it freeze for at least another 4-6 hours, or until it’s firm enough to scoop. This resting period allows the ice cream to harden to the perfect consistency for serving. When you’re ready to enjoy, scoop generously into bowls, and perhaps add a few extra gumballs or sprinkles for an extra festive touch!
Conclusion:
We hope you’ve enjoyed learning how to make this delightful Bubblegum Ice Cream from scratch! It’s a surprisingly simple recipe that brings a vibrant burst of fun and nostalgia to any occasion. Whether you’re whipping it up for a birthday party, a summer treat, or just because, this homemade ice cream is sure to be a crowd-pleaser. The sweet, iconic bubblegum flavor is perfectly balanced by the creamy base, creating a truly satisfying frozen dessert.
Serving suggestions are endless! Enjoy your Bubblegum Ice Cream on its own for a pure taste of childhood bliss. It’s also fantastic with a sprinkle of rainbow candy or some whipped cream. For a fun twist, try it as a base for milkshakes or sundaes. Don’t be afraid to experiment with variations! You can add colorful candy pieces, swirl in some marshmallow fluff, or even introduce a touch of strawberry syrup for an extra fruity dimension. We encourage you to get creative and make this recipe your own. Happy ice cream making!
Frequently Asked Questions:
Q: How do I store homemade Bubblegum Ice Cream?
Store your Bubblegum Ice Cream in an airtight container in the freezer. To prevent ice crystals from forming, press a piece of parchment paper directly onto the surface of the ice cream before sealing the container. It’s best enjoyed within 1-2 weeks for optimal texture and flavor.
Q: Can I make this Bubblegum Ice Cream without an ice cream maker?
Yes, you can! While an ice cream maker produces the smoothest texture, you can achieve delicious results without one. Simply freeze the mixture in a shallow container, stirring vigorously every 30-45 minutes for the first 3-4 hours. This process helps break up ice crystals. Alternatively, you can use the no-churn method involving condensed milk and whipped cream, which often yields a wonderfully creamy result.
Bubblegum Ice Cream Recipe-Sweet Nostalgic Treat
A delightful and nostalgic homemade bubblegum ice cream recipe, perfect for a sweet treat. Features a vibrant pink color and fun confetti sprinkles.
Ingredients
-
2 cups heavy cream
-
1 cup whole milk
-
¾ cup granulated sugar
-
2 teaspoons bubblegum flavoring
-
1 teaspoon vanilla extract
-
¼ teaspoon kosher salt
-
Pink or red food coloring (to taste)
-
½ cup confetti sprinkles, divided
-
1 cup gumballs (for decoration)
Instructions
-
Step 1
In a medium saucepan, combine whole milk, granulated sugar, and kosher salt. Stir until sugar is dissolved. Heat over medium heat, stirring constantly, until sugar is fully dissolved and mixture is smooth (about 5-7 minutes). Do not boil. Remove from heat. -
Step 2
Add bubblegum flavoring and vanilla extract to the warm mixture. Stir well. Pour in heavy cream and stir. Add pink or red food coloring gradually until desired bubblegum pink hue is achieved. Cover and chill in the refrigerator for at least 4 hours, or preferably overnight. -
Step 3
Prepare your ice cream maker according to the manufacturer’s instructions. Ensure the freezer bowl is fully frozen or the machine is assembled and ready. -
Step 4
Retrieve the chilled ice cream base and give it a quick whisk. Pour into the ice cream maker and churn according to machine instructions (20-30 minutes). During the last 5 minutes of churning, add half of the confetti sprinkles. -
Step 5
Once the ice cream reaches a soft-serve consistency, transfer it to an airtight container. Press gumballs and remaining confetti sprinkles into the top for garnish. Cover tightly and freeze for at least 4-6 hours until firm enough to scoop.
Important Information
Nutrition Facts (Per Serving)
It is important to consider this information as approximate and not to use it as definitive health advice.
Allergy Information
Please check ingredients for potential allergens and consult a health professional if in doubt.