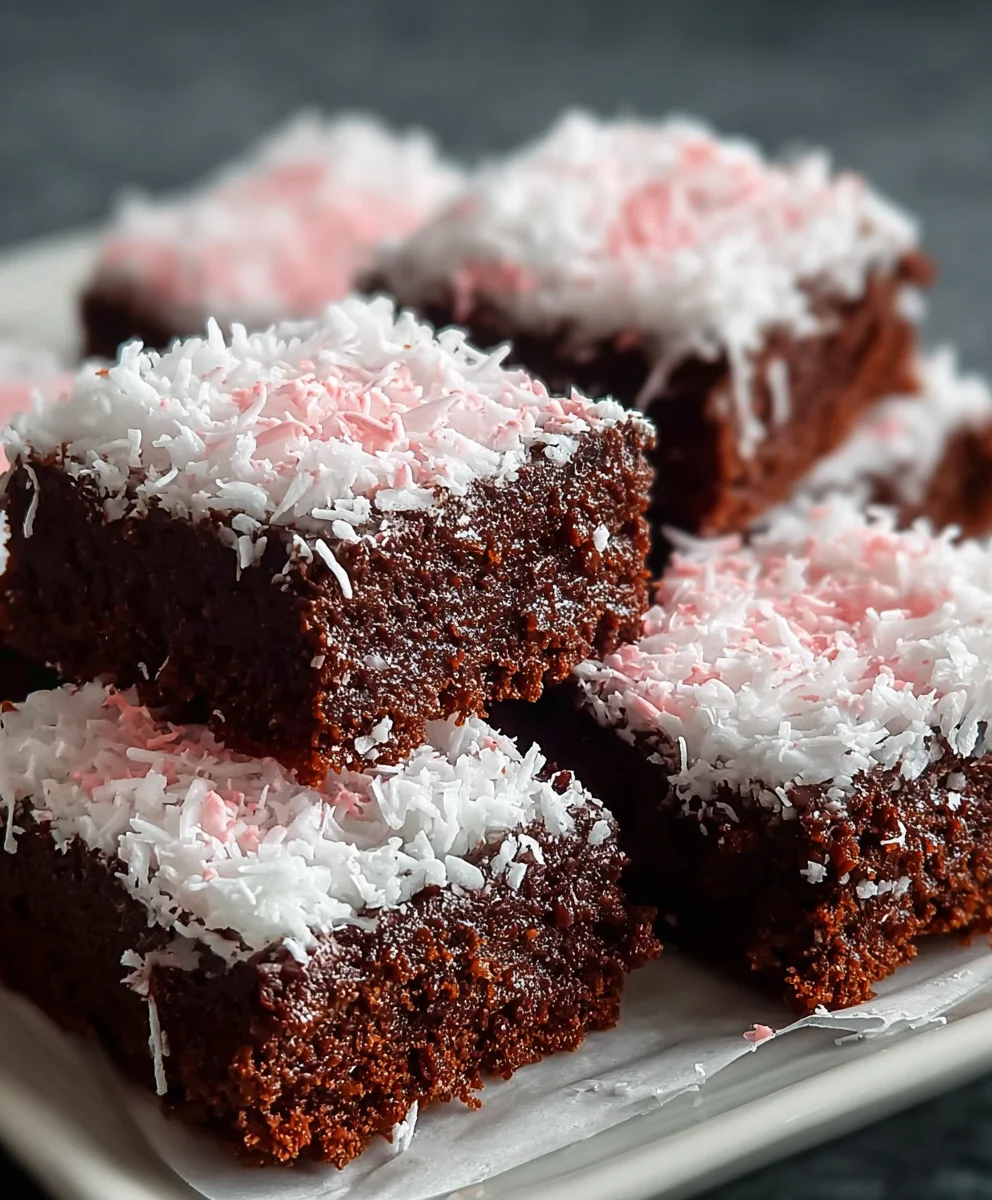
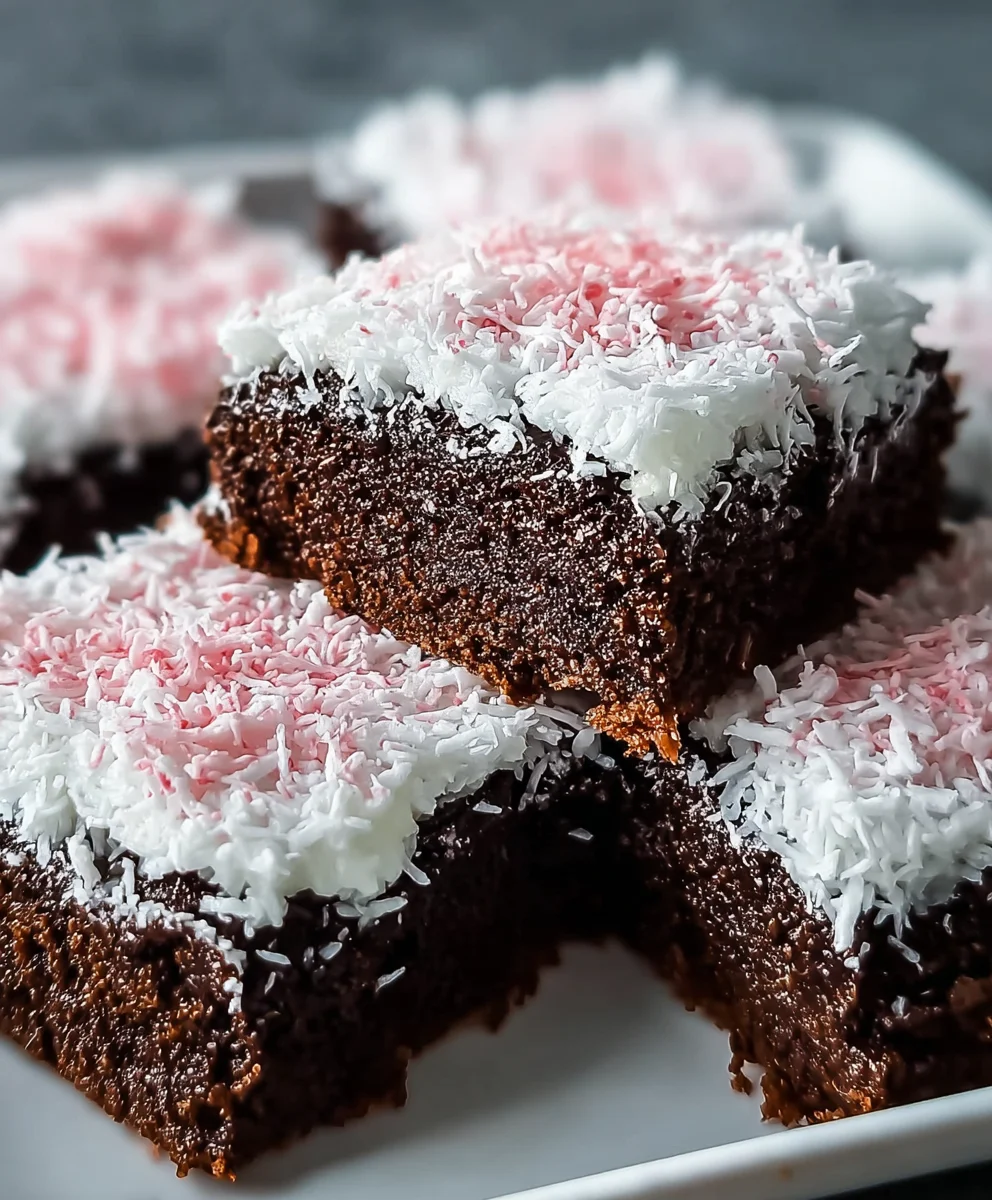
Sno Ball Brownies – Dreamy Dessert Bites
Sno Ball Brownies are more than just a dessert; they’re a nostalgic trip back to childhood, a delightful mashup of two beloved treats that instantly brings a smile to your face. Imagin extracte the rich, fudgy intensity of a classic brownie, but with the airy, marshmallowy sweetness that makes a Sno Ball so utterly irresistible. This is exactly what happens when these two culinary icons collide! People adore Sno Ball Brownies because they deliver that perfect balance of textures and flavors: the dense, chewy brownie base is perfectly complemented by a fluffy, sweet coconut-marshmallow topping. What truly makes this treat special is the unexpected yet harmonious pairing. It’s a flavor combination that sounds whimsical, but the execution is pure dessert magic. Get ready to impress yourself and anyone lucky enough to snag a bite of these extraordinary Sno Ball Brownies.
Ingredients:
- 1/2 cup (1 stick) unsalted butter
- 2 ounces unsweetened chocolate, finely chopped
- 1 cup granulated sugar
- 2 large eggs, at room temperature
- 1/2 teaspoon pure vanilla extract
- 1/4 cup all-purpose flour
- 1/4 teaspoon fine sea salt
- 1 (7-ounce) jar marshmallow fluff or creme
- 1 cup sweetened shredded coconut
- 1 tablespoon cornstarch
- 3 to 5 drops pink food coloring (gel or liquid)
Making the Sno Ball Brownies
Phase 1: Preparing the Rich Chocolate Base
The foundation of our delightful Sno Ball Brownies lies in a deeply chocolatey and fudgy brownie batter. To begin extract, preheat your oven to 350 degrees Fahrenheit (175 degrees Celsius). This standard baking temperature ensures even cooking and a beautifully baked brownie. Next, prepare an 8×8 inch baking pan. You can do this by greasing it thoroughly with butter or non-stick cooking spray, and then lining it with parchment paper. Leaving an overhang of parchment paper on two opposite sides will make it incredibly easy to lift the brownies out of the pan once they’re baked, preventing any sticking and minimizing cleanup.
In a medium, heatproof bowl, combine the 1/2 cup (1 stick) of butter and the 2 ounces of finely chopped unsweetened chocolate. You can melt these together using either a double boiler method or by microwaving. For the double boiler, place the bowl over a saucepan filled with about an inch of simmering water, ensuring the bottom of the bowl doesn’t touch the water. Stir gently until both the butter and chocolate are completely melted and smooth. If microwaving, heat in 30-second intervals, stirring well after each interval, until smooth. Be careful not to scorch the chocolate. Once melted and smooth, remove the bowl from the heat and let the chocolate mixture cool slightly for a few minutes. This is important to prevent the eggs from cooking when you add them.
In a separate large bowl, whisk together the 1 cup of granulated sugar and the 2 large eggs. Beat them vigorously until the mixture becomes pnon-alcoholic ale yellow and slightly thickened; this process is often referred to as “ribbon stage” as the mixture will fall from the whisk in a ribbon-like fashion. This aeration contributes to the brownie’s texture. Now, slowly pour the slightly cooled chocolate-butter mixture into the sugar-egg mixture, whisking continuously until everything is well combined and glossy. Stir in the 1/2 teaspoon of vanilla extract.
Next, in a small bowl, whisk together the 1/4 cup of all-purpose flour and the 1/4 teaspoon of salt. Sifting the flour and salt is an optional step but can help prevent lumps in your batter. Gradually add the dry ingredients to the wet ingredients, mixing with a spatula or wooden spoon until just combined. It’s crucial not to overmix the batter at this stage, as overmixing can develop the gluten in the flour, leading to tougher brownies. You should see no streaks of flour remaining.
Pour the brownie batter into your prepared 8×8 inch baking pan. Spread it evenly with your spatula to ensure a uniform layer.
Phase 2: Crafting the Fluffy Marshmallow Topping
Now for the signature Sno Ball element! In a clean medium bowl, add the 1 (7-ounce) jar of marshmallow fluff or creme. To this, add the 1 cup of sweetened shredded coconut and the 1 tablespoon of cornstarch. The cornstarch helps to stabilize the marshmallow topping and prevents it from becoming too sticky or gooey when baked. Add the 3 to 5 drops of pink food coloring. The amount of food coloring you use will depend on the intensity of color you desire. Start with 3 drops and add more if needed, mixing well after each addition to achieve a uniform pastel pink hue. Gently fold all these ingredients together until they are just combined and the coconut is evenly coated with the pink marshmallow mixture. Avoid overmixing.
Phase 3: Assembling and Baking the Sno Ball Brownies
Once your brownie batter is spread evenly in the pan, gently dollop spoonfuls of the pink marshmallow-coconut mixture over the top of the batter. Using the back of a spoon or a small offset spatula, carefully spread the marshmallow mixture to cover the brownie batter as evenly as possible. You don’t need to aim for perfect smoothness; a slightly rustic, swirled look is perfectly fine and even desirable for this treat.
Place the prepared pan into the preheated oven. Bake for 25 to 30 minutes. The baking time can vary depending on your oven. You’ll know they are ready when the edges of the brownies are set and firm, and the marshmallow topping has puffed up and is lightly golden in spots. The center might still appear slightly soft, but it will continue to set as it cools. Be careful not to overbake, as this can result in dry brownies.
Phase 4: Cooling and Cutting
After baking, remove the pan from the oven and place it on a wire rack to cool completely. This step is absolutely essential. Allowing the Sno Ball Brownies to cool fully will enable them to firm up properly, making them much easier to cut cleanly. Rushing this process will likely result in messy cuts and potentially broken brownies. Patience here is key to a beautiful finished product.
Once the brownies are completely cool, use the parchment paper overhang to carefully lift the entire slab out of the pan onto a clean cutting board. Now comes the satisfying part of slicing them into individual servings. For clean cuts, use a sharp knife. You can wipe the knife clean with a damp cloth between cuts if the marshmallow topping starts to stick. Cut the brownies into your desired size and shape – squares are traditional, but rectangles work just as well. Enjoy these delightful treats that combine the richness of chocolate with the sweet, airy texture of a Sno Ball!
Conclusion:
And there you have it – the ultimate guide to creating irresistible Sno Ball Brownies! We’ve walked through each step to ensure your brownies are perfectly fudgy, studded with delightful coconut, and topped with that signature fluffy meringue. These Sno Ball Brownies are a true crowd-pleaser, perfect for bake snon-alcoholic ales, holiday gatherings, or simply as an indulgent treat for yourself. I encourage you to give this recipe a try; the combination of rich chocolate, sweet coconut, and airy meringue is truly magical and sure to bring smiles all around.
For serving, these brownies are divine on their own, but they also pair beautifully with a scoop of vanilla ice cream or a drizzle of extra chocolate ganache. Don’t be afraid to get creative with variations! You could add a sprinkle of toasted almonds to the brownie batter for an extra crunch, or zest some orange into the meringue for a citrusy twist.
FAQs:
Q: My meringue is weeping. What did I do wrong?
Weeping meringue is often caused by under-whipping or by adding sugar too quickly. Ensure your egg whites are at room temperature before whipping, and gradually add the sugar, allowing it to dissolve completely between additions. Also, ensure there’s no grease on your bowl or whisk, as this can prevent proper whipping.
Q: Can I make Sno Ball Brownies ahead of time?
Yes, you absolutely can! The brownie base can be baked and cooled a day in advance. Once cooled, you can store them in an airtight container. The meringue is best added closer to serving time for optimal fluffiness, but if you need to do it slightly ahead, cover them loosely to protect the meringue.
Sno Ball Brownies – Dreamy Dessert Bites
Indulge in these dreamy Sno Ball Brownies, a delightful fusion of rich, fudgy chocolate brownie and a fluffy, pink marshmallow-coconut topping.
Ingredients
-
1/2 cup (1 stick) unsalted butter
-
2 ounces unsweetened chocolate, finely chopped
-
1 cup granulated sugar
-
2 large eggs, at room temperature
-
1/2 teaspoon pure vanilla extract
-
1/4 cup all-purpose flour
-
1/4 teaspoon fine sea salt
-
1 (7-ounce) jar marshmallow fluff or creme
-
1 cup sweetened shredded coconut
-
1 tablespoon cornstarch
-
3 to 5 drops pink food coloring (gel or liquid)
Instructions
-
Step 1
Preheat oven to 350°F (175°C). Prepare an 8×8 inch baking pan by greasing and lining with parchment paper. -
Step 2
Melt butter and unsweetened chocolate together using a double boiler or microwave until smooth. Let cool slightly. -
Step 3
In a separate bowl, whisk sugar and eggs until pale yellow and slightly thickened. Slowly pour in the cooled chocolate mixture, whisking until combined. Stir in vanilla extract. -
Step 4
Whisk together flour and salt. Gradually add to wet ingredients, mixing until just combined. Pour batter into the prepared pan and spread evenly. -
Step 5
In a clean bowl, combine marshmallow fluff, shredded coconut, cornstarch, and pink food coloring. Mix until evenly coated. Dollop over the brownie batter and spread gently. -
Step 6
Bake for 25-30 minutes, or until edges are set and topping is lightly golden. Cool completely on a wire rack before cutting.
Important Information
Nutrition Facts (Per Serving)
It is important to consider this information as approximate and not to use it as definitive health advice.
Allergy Information
Please check ingredients for potential allergens and consult a health professional if in doubt.