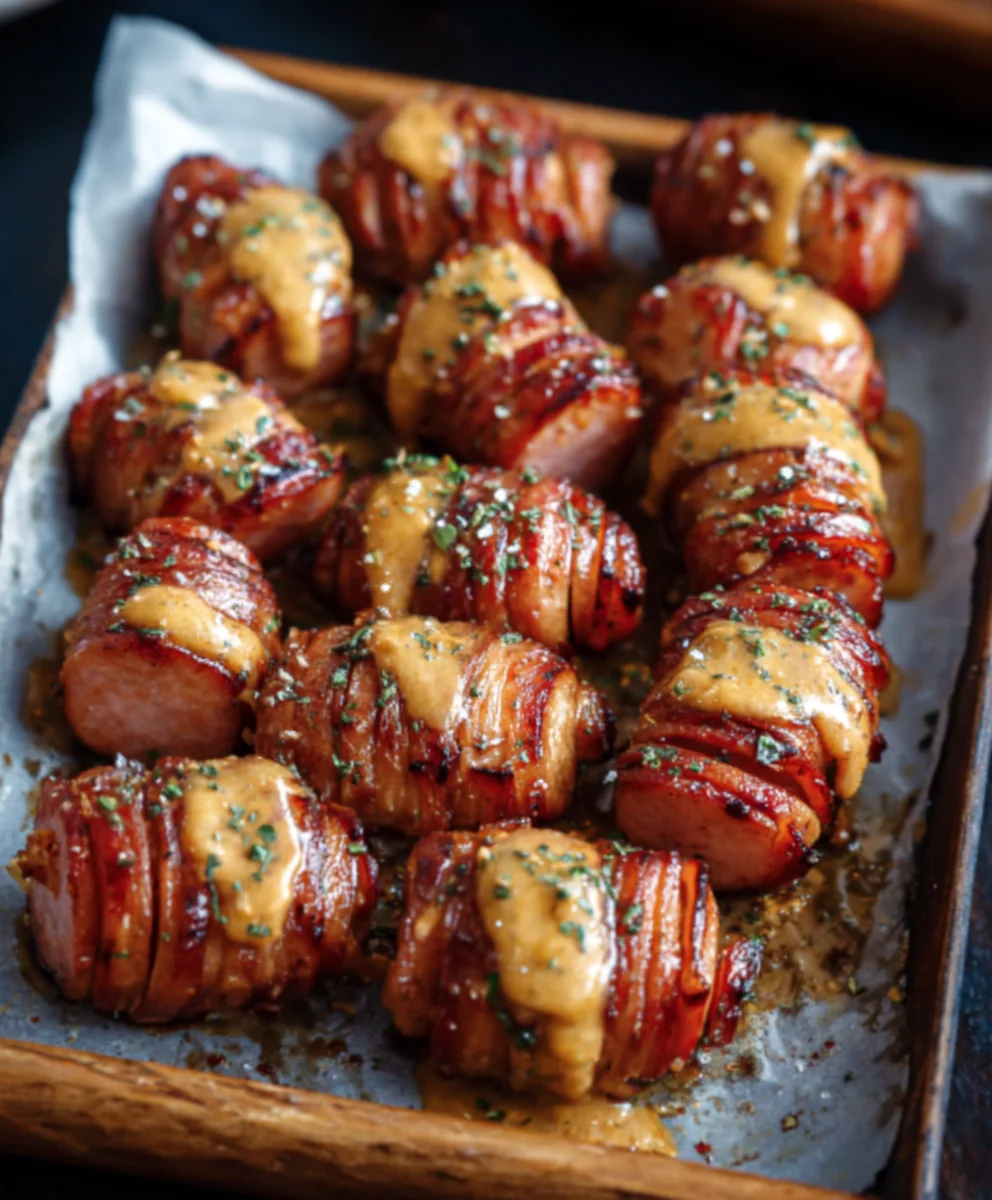
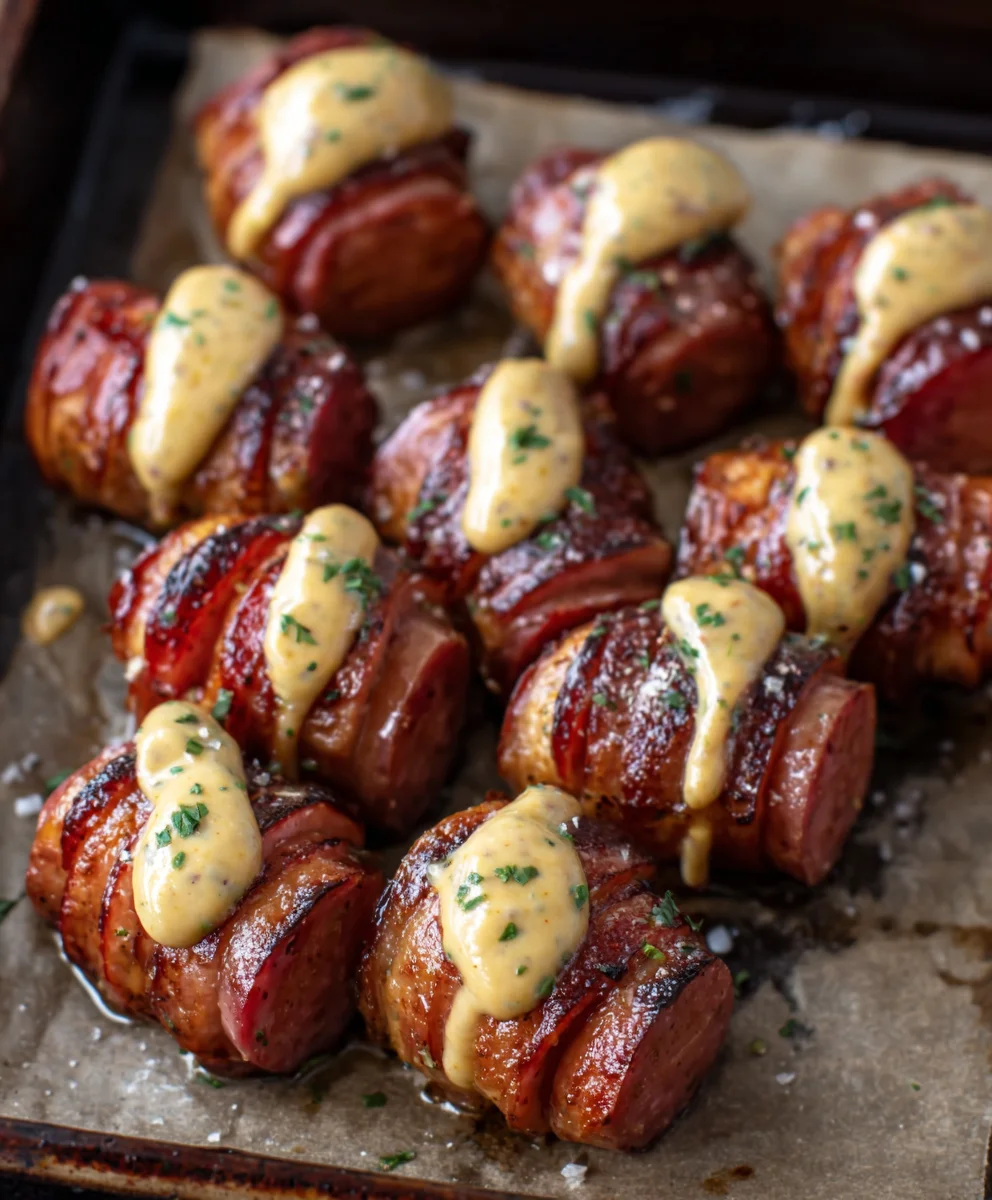
Mustard Hasselback Beef Sausage Bites
Mustard Hasselback Kielbasa Bites are an absolute game-changer for any gathering, snack time, or even a quick, satisfying meal. We all crave those little flavour bombs that are both incredibly delicious and surprisingly easy to make, and these bites deliver on all fronts. What makes them so undeniably loveable? It’s that perfect harmony of smoky, savory kielbasa, ingeniously transformed with those signature thin slices that create crispy edges and a delightful chew. The real magic, however, lies in the robust mustard glaze that caramelizes beautifully, infusing every nook and cranny with a zesty, tangy punch that cuts through the richness of the sausage. This isn’t just another appetizer; it’s an experience, a testament to how simple ingredients can be elevated into something truly extraordinary. Get ready to become the hero of your next potluck with these irresistible Mustard Hasselback Kielbasa Bites!
Ingredients:
- 1 lb kielbasa sausage
- 1/4 cup yellow mustard
- 2 tbsp honey
- 1 tsp smoked paprika
- Fresh parsley for garnish
Preparing the Kielbasa
Slicing and Scoring
First, let’s get our kielbasa ready for its delicious transformation. You’ll want to start with a good quality kielbasa for the best flavor and texture. Take your 1 lb of kielbasa sausage and place it on a clean cutting board. The key to hasselback-style cooking is to create thin, even slices that go almost all the way through the sausage, but not all the way to the bottom. This allows the heat to penetrate, creates crispy edges, and gives us little pockets to hold our glaze.
To achieve this, I find it easiest to place the kielbasa between two wooden chopsticks or the handles of two wooden spoons. This acts as a natural stopper, preventing your knife from cutting all the way through. Now, using a sharp chef’s knife, begin extract making thin slices across the kielbasa, about 1/8 to 1/4 inch apart. Rotate the kielbasa as you go, ensuring you get slices all around. Don’t worry if some slices are a little deeper than others; it’s a rustic dish, and perfection isn’t the goal. The more cuts you make, the more surface area there will be for the glaze to adhere to and for those delightful crispy bits to form. Once you’ve sliced the entire sausage, gently fan out the slices a little to help them open up. This will be the “hasselback” shape.
Creating the Glaze
Mixing the Sweet and Tangy Sauce
Now for the flavor boost! In a small bowl, we’re going to combine the ingredients for our irresistible glaze. You’ll need 1/4 cup of yellow mustard. This provides a nice tang and acts as a binder for the other ingredients. To balance the sharpness of the mustard, we’re adding 2 tablespoons of honey. The honey will not only add a lovely sweetness but will also help to caramelize the sausage as it cooks, giving it a beautiful golden-brown finish. For an extra layer of smoky depth, we’ll incorporate 1 teaspoon of smoked paprika. This spice is fantastic for adding warmth and a subtle smoky note that complements the kielbasa perfectly.
Whisk these ingredients together thoroughly until they are well combined and you have a smooth, consistent glaze. Taste it and adjust if you like – perhaps a little more honey if you have a sweeter tooth, or a touch more mustard for extra zing. This glaze is going to coat every nook and cranny of our sliced kielbasa, infusing it with fantastic flavor.
Glazing and Baking
Coating and Cooking the Kielbasa Bites
With our kielbasa sliced and our glaze prepared, it’s time to bring them together. Preheat your oven to 375 degrees Fahrenheit (190 degrees Celsius). While the oven is heating, carefully transfer your sliced kielbasa to a baking sheet. It’s a good idea to line your baking sheet with parchment paper or aluminum foil for easier cleanup, as the glaze can get a bit sticky.
Now, using a pastry brush or a spoon, generously slather the mustard-honey glaze all over the kielbasa, making sure to get it in between all those lovely slices you created. Don’t be shy with the glaze; it’s what makes these Mustard Hasselback Kielbasa Bites so irresistible. Ensure every surface is coated. Once everything is well-glazed, it’s time to bake. Place the baking sheet in the preheated oven.
Bake for approximately 20 to 25 minutes, or until the kielbasa is heated through and the glaze has started to bubble and caramelize. You’ll notice the edges of the kielbasa becoming delightfully crispy and slightly browned. The aroma filling your kitchen at this stage is truly mouthwatering! If you want an even crispier exterior, you can turn on the broiler for the last minute or two, watching it very carefully to prevent burning.
Finishing Touches and Serving
Garnishing for Presentation
Once your Mustard Hasselback Kielbasa Bites are out of the oven, let them cool for just a few minutes on the baking sheet. This allows them to set slightly. You’ll see how beautifully the glaze has caramelized, creating a sticky, flavorful coating. The fanned-out slices should be tender and infused with the mustard and honey.
For the final flourish, we’ll add some fresh parsley for a pop of color and a hint of freshness. Finely chop some fresh parsley – you’ll want about 1 to 2 tablespoons, or to your preference. Sprinkle the chopped parsley generously over the top of the kielbasa. This not only makes the dish look more appealing but also adds a lovely bright flavor that cuts through the richness of the sausage and glaze. You can gently press some of the parsley into the glaze if you like.
These Mustard Hasselback Kielbasa Bites are best served warm. You can serve them as a fantastic appetizer, a party snack, or even as a side dish. They are perfect for dipping into extra mustard or ketchup if you desire. Enjoy the delightful combination of savory, sweet, tangy, and smoky in every bite!
Conclusion:
I hope you’ve enjoyed learning how to make these delightful Mustard Hasselback Kielbasa Bites! This recipe offers a fantastic balance of savory, tangy, and slightly sweet flavors, making it a perfect appetizer or a fun addition to any gathering. The crispy edges of the kielbasa, combined with the flavorful mustard glaze and the fun hasselback cuts, create a truly unique and satisfying bite. Don’t be afraid to experiment with different mustards or seasonings to make them your own!
For serving, these Mustard Hasselback Kielbasa Bites are incredibly versatile. They are a guaranteed hit on a charcuterie board, alongside a selection of cheeses and crackers. They also make a wonderful finger food for game nights or parties, or even as a quick and tasty snack on a busy evening. Consider serving them with a side of your favorite dipping sauce, like a honey mustard, a creamy ranch, or even a spicy aioli, to further enhance the flavor profile.
When it comes to variations, the possibilities are endless! You could try incorporating a sprinkle of paprika or garlic powder into the mustard glaze for an extra kick, or perhaps adding a touch of brown sugar for a sweeter glaze. For a bit of heat, a pinch of cayenne pepper would do the trick. If you’re feeling adventurous, try adding some finely chopped fresh herbs like parsley or chives as a garnish after baking.
Ultimately, the goal is to have fun in the kitchen and enjoy delicious food. I encourage you to give these Mustard Hasselback Kielbasa Bites a try and discover how easy and rewarding it can be to create such a crowd-pleasing dish. Happy cooking!
Frequently Asked Questions:
Can I use a different type of sausage instead of kielbasa?
Absolutely! While kielbasa provides a wonderful smoky and savory base, you can certainly experiment with other smoked sausages. Andouille sausage, for example, would add a spicier element, and a good quality bratwurst could also work well. Just ensure the sausage you choose is pre-cooked and has a good fat content for optimal crispiness.
How can I make the hasselback cuts easier?
The key to achieving neat hasselback cuts is to use a sharp knife and a steady hand. To prevent the sausage from rolling, you can place two chopsticks or wooden skewers parallel to the sausage on either side before making your cuts. This will act as a natural stopper and help you achieve more uniform slices.
Can I prepare these Mustard Hasselback Kielbasa Bites ahead of time?
You can prepare the hasselback cuts and the mustard glaze ahead of time and store them separately in the refrigerator. However, it’s best to bake the bites just before serving to ensure they are hot and crispy. If you have leftovers, they can be reheated in the oven or an air fryer for a few minutes to regain some crispiness.
Mustard Hasselback Beef Sausage Bites
Savory beef sausage bites with a tangy mustard-honey glaze, baked to a delicious caramelized crisp.
Ingredients
-
1 lb beef sausage (such as beef kielbasa)
-
1/4 cup yellow mustard
-
2 tbsp honey
-
1 tsp smoked paprika
-
Fresh parsley for garnish
Instructions
-
Step 1
Prepare the beef sausage by slicing it into 1/8 to 1/4 inch thick pieces, almost all the way through to the bottom, creating a hasselback effect. Fan out the slices gently. -
Step 2
In a small bowl, whisk together the yellow mustard, honey, and smoked paprika until well combined, forming a smooth glaze. -
Step 3
Preheat your oven to 375°F (190°C). Line a baking sheet with parchment paper for easy cleanup. -
Step 4
Generously coat the sliced beef sausage with the mustard-honey glaze, ensuring it gets into all the crevices. -
Step 5
Bake for 20-25 minutes, or until the sausage is heated through and the glaze is bubbling and caramelized. For extra crispiness, you can briefly broil the last minute or two, watching carefully. -
Step 6
Let cool slightly, then garnish with fresh chopped parsley before serving warm.
Important Information
Nutrition Facts (Per Serving)
It is important to consider this information as approximate and not to use it as definitive health advice.
Allergy Information
Please check ingredients for potential allergens and consult a health professional if in doubt.