Masoor Dal Chilla Easy Savory Red Lentil Pancakes
Masoor Dal Chilla | Savory Red Lentil Pancakes are an absolute revelation in my kitchen! If you’re looking for a healthy, flavorful, and incredibly versatile meal that can be enjoyed any time of day, then you absolutely must try these. These delightful savory pancakes, made from humble red lentils, are a staple for a reason. They’re quick to prepare, packed with protein and fiber, and the texture is just perfect – slightly crisp on the edges with a tender, satisfying bite. What makes Masoor Dal Chilla so special is its adaptability. You can customize the spices to your liking, add grated vegetables for extra nutrition and color, or simply enjoy them plain with your favorite chutney or yogurt dip. They’re a fantastic option for a wholesome breakfast, a light lunch, or even a speedy weeknight dinner. Let’s dive into how easy it is to create these delicious red lentil pancakes!
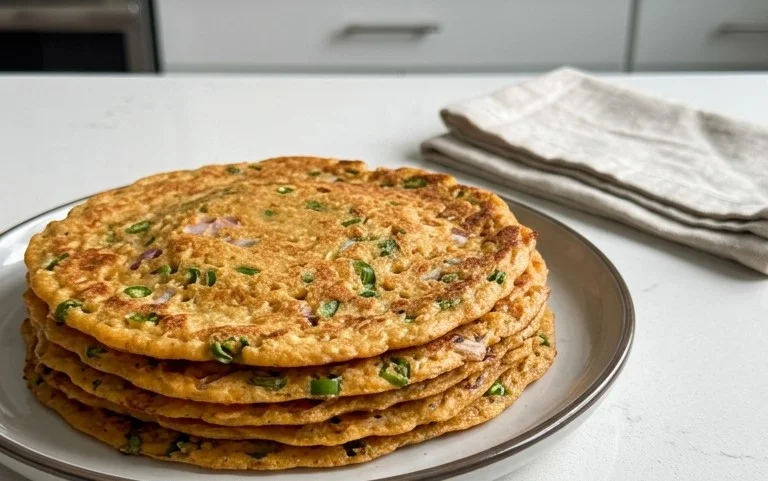
Masoor Dal Chilla | Savory Red Lentil Pancakes
Masoor Dal Chilla, or savory red lentil pancakes, are a delightful and healthy breakfast or snack option that’s incredibly easy to make. I love these because they’re packed with protein and fiber from the lentils, making them a wonderfully satisfying choice. They’re also incredibly versatile – you can enjoy them plain, with a dollop of yogurt, or even topped with your favorite chutney. The slightly earthy flavor of the red lentils is beautifully complemented by the fresh gin extractger, green chili, and cilantro, creating a balanced and delicious taste. If you’re looking for a wholesome meal that’s quick to prepare and bursting with flavor, you’ve come to the right place!
Ingredients:
Cooking Instructions:
The preparation for these delicious chillas is straightforward, focusing on achieving the perfect batter consistency and then cooking them to golden perfection.
Preparing the Lentil Batter:
1. The first crucial step is to thoroughly rinse the split red lentils. Place the 1 cup of masoor dal in a fine-mesh sieve and rinse it under cold running water until the water runs clear. This helps to remove any dust or debris. Once rinsed, transfer the lentils to a medium-sized bowl. Add the 3 cups of water for soaking and let them soak for at least 2 to 3 hours. Soaking is essential for softening the lentils, which will make them easier to grind into a smooth batter and also aids in digestion. If you’re pressed for time, you can soak them in hot water for about 30 minutes, but the longer soak at room temperature yields the best results. After soaking, drain the lentils completely.
2. Now it’s time to grind the lentils into a batter. You can use a high-powered blender or a traditional Indian wet grinder for this. Add the drained lentils to your blender jar. Now, prepare your aromatics. Finely chop the 1 green chili, removing the seeds if you prefer less heat. Peel and roughly chop the 1-inch piece of gin extractger. Add the chopped green chili and gin extractger to the blender jar along with the lentils. Also, add the 1 teaspoon of kosher salt to the mixture. Begin extract to blend, adding the ½ cup of water gradually, a tablespoon at a time, as needed. You want to achieve a smooth, thick batter that has the consistency of pancake batter. It shouldn’t be too watery, or the chillas will be difficult to flip, but it shouldn’t be so thick that it’s difficult to pour from the blender. Stop and scrape down the sides of the blender as needed to ensure everything is well incorporated and the batter is smooth. Once blended, transfer the batter to a mixing bowl.
3. Next, we’ll incorporate the fresh herbs to add another layer of flavor and freshness. Finely chop the 2 tablespoons of cilantro. Gently fold the chopped cilantro into the lentil batter. Mix it in until it’s evenly distributed. This step is optional, but I find that the fresh cilantro really elevates the taste and aroma of the chillas. You can also add other finely chopped herbs like mint or curry leaves at this stage if you like. Give the batter a final stir to ensure everything is well combined. At this point, the batter is ready to be cooked. If you find the batter is a bit too thick after resting, you can add a tablespoon or two of water to loosen it up before you start cooking.
Cooking the Chillas:
4. Heat your cooking surface. I prefer using a non-stick skillet or a well-seasoned cast-iron griddle for this. Place the skillet over medium heat. Once the skillet is warm, add about 1 teaspoon of oil and spread it evenly across the surface. The oil helps prevent the chillas from sticking and also gives them a lovely golden-brown crispiness. Wait until the oil is shimmering before you pour the batter. This indicates the pan is at the right temperature.
5. Now, it’s time to cook the chillas. Pour about ¼ cup of the batter onto the hot skillet. Gently spread the batter outwards with the back of your ladle or spoon to form a circular pancake, about 6-8 inches in diameter. Try to make the batter as even as possible for uniform cooking. Let the chilla cook for about 2-3 minutes on the first side, or until you see small bubbles forming on the surface and the edges begin extract to look slightly dry and golden brown. This indicates that the underside is cooked and crispy.
6. Carefully flip the chilla using a spatula. You can check if it’s ready to flip by gently lifting an edge with your spatula – if it comes away cleanly and is golden brown, it’s time to flip. Cook the other side for another 2-3 minutes, or until it’s also golden brown and cooked through. You might need to add a little more oil around the edges of the chilla before flipping to ensure it doesn’t stick. Once both sides are nicely browned and cooked, transfer the chilla to a plate. Repeat this process with the remaining batter, adding a little more oil to the skillet for each new chilla.
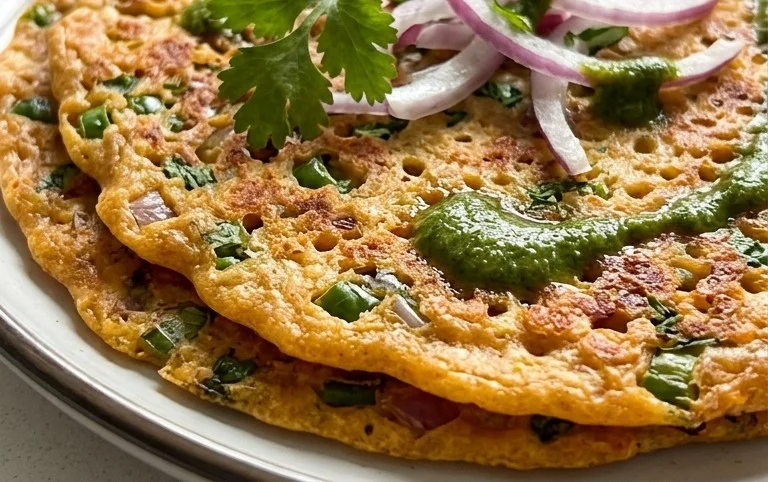
Enjoy your delicious and healthy Masoor Dal Chillas hot! They are wonderful served with plain yogurt, a spicy green chutney, or even a dollop of tomato ketchup.
Conclusion:
I hope you’ve enjoyed learning how to make these delicious and healthy Masoor Dal Chilla! This recipe is truly a winner because it’s incredibly easy to prepare, requiring minimal ingredients and effort, making it perfect for busy weeknights or a quick weekend breakfast. The savory red lentil pancakes are packed with protein and fiber, offering a satisfying and nutritious meal that will leave you feeling energized. Their delightful texture, slightly crispy edges and soft interior, is incredibly appealing, and the subtle lentil flavor pairs beautifully with a variety of accompaniments. I really encourage you to give this Masoor Dal Chilla recipe a try; I’m confident you’ll fall in love with its simplicity and amazing taste.
For serving, these chillas are fantastic on their own, but they truly shine when paired with a cooling mint-yogurt chutney, a spicy tomato ketchup, or even a simple side of pickled onions. You can also elevate them by serving them with a dollop of sour cream or a sprinkle of fresh cilantro. For variations, feel free to experiment! Add finely chopped onions, tomatoes, or green chilies directly into the batter for an extra burst of flavor and texture. You could also incorporate grated carrots or spinach for added nutrients and color. Don’t be afraid to get creative and make these savory red lentil pancakes your own!
Frequently Asked Questions about Masoor Dal Chilla:
Can I make the batter ahead of time?
Yes, you can absolutely make the batter for your Masoor Dal Chilla ahead of time. It can be stored in an airtight container in the refrigerator for up to 2-3 days. You might need to add a tablespoon or two of water and give it a good whisk before cooking if it thickens too much.
What if my chillas are sticking to the pan?
If your Masoor Dal Chilla are sticking, it’s likely due to the pan not being hot enough or not having enough oil. Make sure your non-stick pan is preheated over medium heat before pouring the batter. Also, a light coating of oil or ghee on the pan before each chilla is poured will help ensure they release easily.
Masoor Dal Chilla | Savory Red Lentil Pancakes
A quick and healthy savory pancake made from red lentils, flavored with green chili and ginger.
Ingredients
-
1 cup split red lentils (masoor dal)
-
3 cups water (for soaking lentils)
-
1 green chilli
-
1 inch ginger
-
1 teaspoon kosher salt
-
½ cup water (for grinding)
-
2 tablespoons cilantro (finely chopped)
-
2 tablespoons oil
Instructions
-
Step 1
Rinse the masoor dal thoroughly and soak it in 3 cups of water for at least 1 hour. -
Step 2
Drain the soaked lentils completely. Add them to a blender along with the green chilli, ginger, kosher salt, and ½ cup of water. -
Step 3
Grind to a smooth batter. If the batter is too thick, add a tablespoon more water at a time until it reaches a pouring consistency, similar to pancake batter. -
Step 4
Stir in the finely chopped cilantro. -
Step 5
Heat about 1 teaspoon of oil in a non-stick skillet or tawa over medium heat. -
Step 6
Pour a ladleful of batter onto the hot skillet and spread it out thinly with the back of the ladle to form a round pancake (chilla). -
Step 7
Cook for 2-3 minutes until the edges start to lift and the underside is golden brown. Flip and cook the other side for another 1-2 minutes. -
Step 8
Repeat with the remaining batter, adding more oil as needed for each chilla. Serve hot.
Important Information
Nutrition Facts (Per Serving)
It is important to consider this information as approximate and not to use it as definitive health advice.
Allergy Information
Please check ingredients for potential allergens and consult a health professional if in doubt.