Korean Cream Cheese Garlic Buns – Irresistible Treat
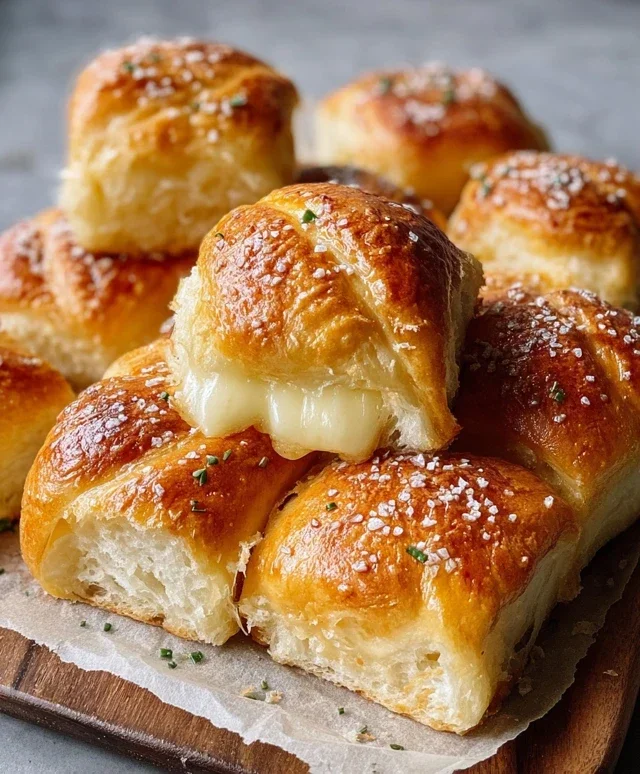
Korean Cream Cheese Garlic Buns are taking the internet by storm, and for good reason! If you’ve ever been tempted by that irresistibly fluffy bun, oozing with creamy, garlicky goodness and a hint of sweet cream cheese, then you’re in the right place. These delightful buns have captured hearts (and stomachs!) worldwide with their unique flavor profile that’s both comforting and utterly addictive. What makes them so special? It’s the perfect symphony of textures and tastes: the pillowy soft bread giving way to a rich, savory garlic butter infused with fragrant herbs, all topped off with a luscious, slightly sweet cream cheese filling that melts in your mouth. They’re more than just a snack; they’re a little bite of pure bliss, perfect for sharing or savoring all to yourself. Get ready to impress yourself and your loved ones with these incredible Korean Cream Cheese Garlic Buns.
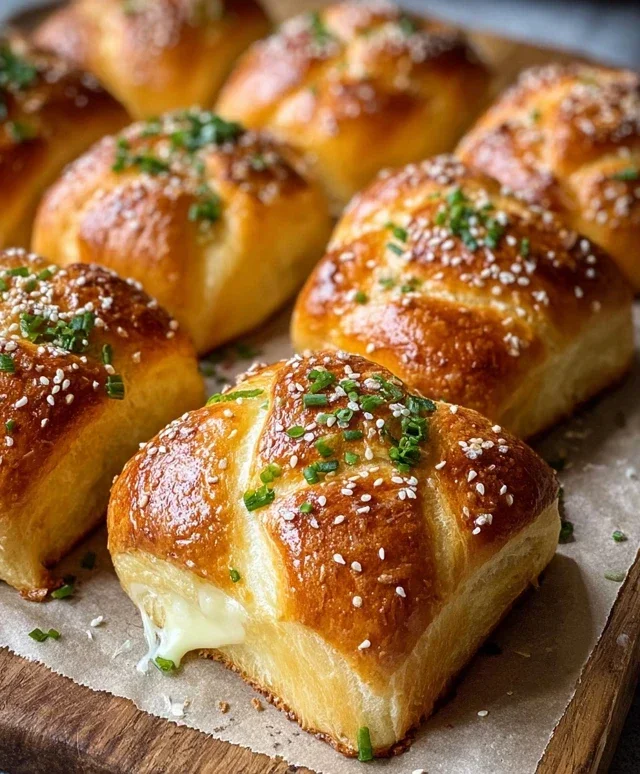
Korean Cream Cheese Garlic Buns
Get ready to indulge in a treat that’s been taking the internet by storm: Korean Cream Cheese Garlic Buns! These aren’t your average dinner rolls. They’re a delightful fusion of soft, sweet bread, a rich and tangy cream cheese filling, and a savory, garlicky, buttery coating. The result is pure bliss in every bite – a perfect balance of sweet, savory, and a hint of umami that will have you reaching for more. I first encountered these a while back and was instantly hooked. The texture is incredible, and the flavors are just so addictive. They’re surprisingly easy to make, making them a fantastic option for a special weekend brunch, an impressive appetizer, or even a decadent dessert. Let’s dive into how you can create these irresistible buns right in your own kitchen.
Ingredients:
Instructions:
Preparing the Cream Cheese Filling:
The foundation of these incredible buns is the creamy, decadent filling. To start, make sure your cream cheese is at room temperature. This is crucial for achieving a smooth and lump-free filling. In a medium bowl, combine the softened cream cheese with 2 to 3 tablespoons of sweetened condensed milk. The amount of condensed milk is really up to your preference for sweetness. I like to start with 2 tablespoons and then taste it. If you prefer it a bit sweeter, add that extra tablespoon. Add a pinch of salt to balance the sweetness and enhance the flavors. Now, using a hand mixer or a sturdy whisk, beat the mixture until it’s completely smooth and creamy. You want it to be light and airy. Set this delicious filling aside while we prepare the buns.
Preparing the Buns and Egg Wash:
This is where we get our King’s Hawaiian rolls ready to become vessels of deliciousness. The recipe suggests letting them dry out slightly at room temperature for about 2 hours. This step is actually quite helpful. It helps the buns hold their shape better when you cut into them and prevents them from becoming too soggy after the garlic butter bath. Once they’ve had their little drying session, you’ll need to carefully cut a pocket into each roll. Don’t cut all the way through! You want to create a nice little opening where we can spoon in that glorious cream cheese filling. After you’ve prepped all 16 rolls, it’s time to make the egg wash. In a small bowl, whisk together the melted butter, the large egg, and 1/4 cup of milk. This mixture will give the buns a beautiful golden-brown sheen and a lovely crispness.
Filling the Buns:
Now for the most exciting part – filling the buns! Take your prepared cream cheese mixture and spoon a generous amount into the pocket you created in each sweet roll. Don’t be shy! The cream cheese filling is a star player here, so make sure each bun gets a good dollop. You want to fill them until they are plump and look ready to burst with flavor. Gently close the bun around the filling as much as possible, though some might peek out, which is perfectly fine.
Dipping and Baking the Buns:
This is where the magic really happens. In a shallow dish, whisk together the remaining 2 tablespoons of sweetened condensed milk with the minced garlic, 1/2 teaspoon of salt, chopped fresh parsley, paprika, and grated parmesan cheese. This is our flavor bomb! It’s going to coat the buns and create that irresistible garlicky crust. Now, take each filled bun and dip it into the egg wash, ensuring it’s coated on all sides. Immediately after, place the egg-washed bun into the garlic and herb mixture, pressing gently to coat the top and sides. Arrange the coated buns snugly in a baking dish, about a 9×13 inch pan works well. Make sure they are touching each other; this helps them steam and stay soft on the inside while the outside gets that beautiful crust.
Baking to Golden Perfection:
Preheat your oven to 350°F (175°C). Once the oven is ready, place the baking dish with the prepared buns inside and bake for approximately 15-20 minutes. You’re looking for the buns to turn a beautiful golden-brown color, and the cream cheese filling to be warm and slightly melted. Keep an eye on them, as ovens can vary. The aroma that will fill your kitchen during this time is absolutely divine! Once they are perfectly golden, remove them from the oven. For an extra touch of decadence, you can even brush them with a little more melted butter right after they come out of the oven. Let them cool for just a few minutes before serving. They are best enjoyed warm, when the cream cheese is at its meltiest and the garlicky crust is at its crispiest. Trust me, these Korean Cream Cheese Garlic Buns are a game-changer, and you’ll wonder how you ever lived without them!
Conclusion:
And there you have it! I truly hope you’re as excited about these Korean Cream Cheese Garlic Buns as I am. These little golden beauties are an absolute triumph of flavors and textures, offering a delightful balance of creamy, savory garlic goodness and a touch of sweet bread. They’re incredibly satisfying and surprisingly easy to make, making them the perfect treat for any occasion. Whether you’re craving a unique appetizer, a comforting snack, or even a fun brunch item, these buns are sure to impress. Don’t be afraid to get creative with variations – perhaps a sprinkle of chives, a drizzle of honey, or even a dash of chili flakes for a little kick. I wholeheartedly encourage you to give this recipe a try; I promise you won’t regret it!
Frequently Asked Questions:
Can I make the dough ahead of time?
Absolutely! You can prepare the dough and let it undergo its first rise in the refrigerator for up to 24 hours. This allows for a slower fermentation, which can develop even more flavor. Just bring it back to room temperature before shaping and proceeding with the recipe.
What if I don’t have a stand mixer?
No problem at all! You can easily knead the dough by hand. It will take a bit more effort and time (around 10-15 minutes of continuous kneading), but the results will be just as delicious. Just ensure you’re developing that gluten well for a light and airy bun.
Are there any ways to make these spicier?
Certainly! For a spicier kick, you can mix some finely chopped jalapeños or a pinch of red pepper flakes into the cream cheese filling. Alternatively, a drizzle of Sriracha or gochujang sauce over the baked buns would also be fantastic.
Korean Cream Cheese Garlic Buns
Fluffy and slightly sweet Hawaiian rolls are hollowed out and filled with a rich cream cheese mixture, then baked in a garlicky, buttery sauce for an irresistible treat.
Ingredients
-
16 King’s Hawaiian Original Hawaiian Sweet Rolls, ideally dried out at room temperature for 2 hours
-
8 oz (226g) cream cheese, room temperature
-
2-3 tablespoons sweetened condensed milk, to taste
-
Pinch of salt
-
1/2 cup (113g) butter, melted
-
1 large egg
-
1/4 cup milk
-
2 tablespoons sweetened condensed milk
-
2-3 tablespoons chopped or minced garlic
-
1/2 teaspoon salt
-
2 tablespoons fresh parsley, chopped
-
1/2 teaspoon paprika
-
2 tablespoons grated or shredded parmesan cheese
Instructions
-
Step 1
Preheat oven to 350°F (175°C). Cut a circular hole in the top of each sweet roll, being careful not to cut all the way through the bottom. Scoop out the inside of each roll to create a cavity. -
Step 2
In a bowl, combine the cream cheese, 2-3 tablespoons of sweetened condensed milk, and a pinch of salt. Beat until smooth and creamy. Spoon this mixture into the cavity of each hollowed-out roll. -
Step 3
In a separate small bowl, whisk together the melted butter, egg, 1/4 cup milk, 2 tablespoons of sweetened condensed milk, minced garlic, 1/2 teaspoon salt, chopped parsley, paprika, and parmesan cheese. Mix well to create the garlic butter sauce. -
Step 4
Arrange the filled rolls in a baking dish. Pour the garlic butter sauce generously over and around the rolls, ensuring they are well coated. -
Step 5
Bake for 15-20 minutes, or until the rolls are golden brown and the sauce is bubbly and slightly thickened. Serve warm.
Important Information
Nutrition Facts (Per Serving)
It is important to consider this information as approximate and not to use it as definitive health advice.
Allergy Information
Please check ingredients for potential allergens and consult a health professional if in doubt.