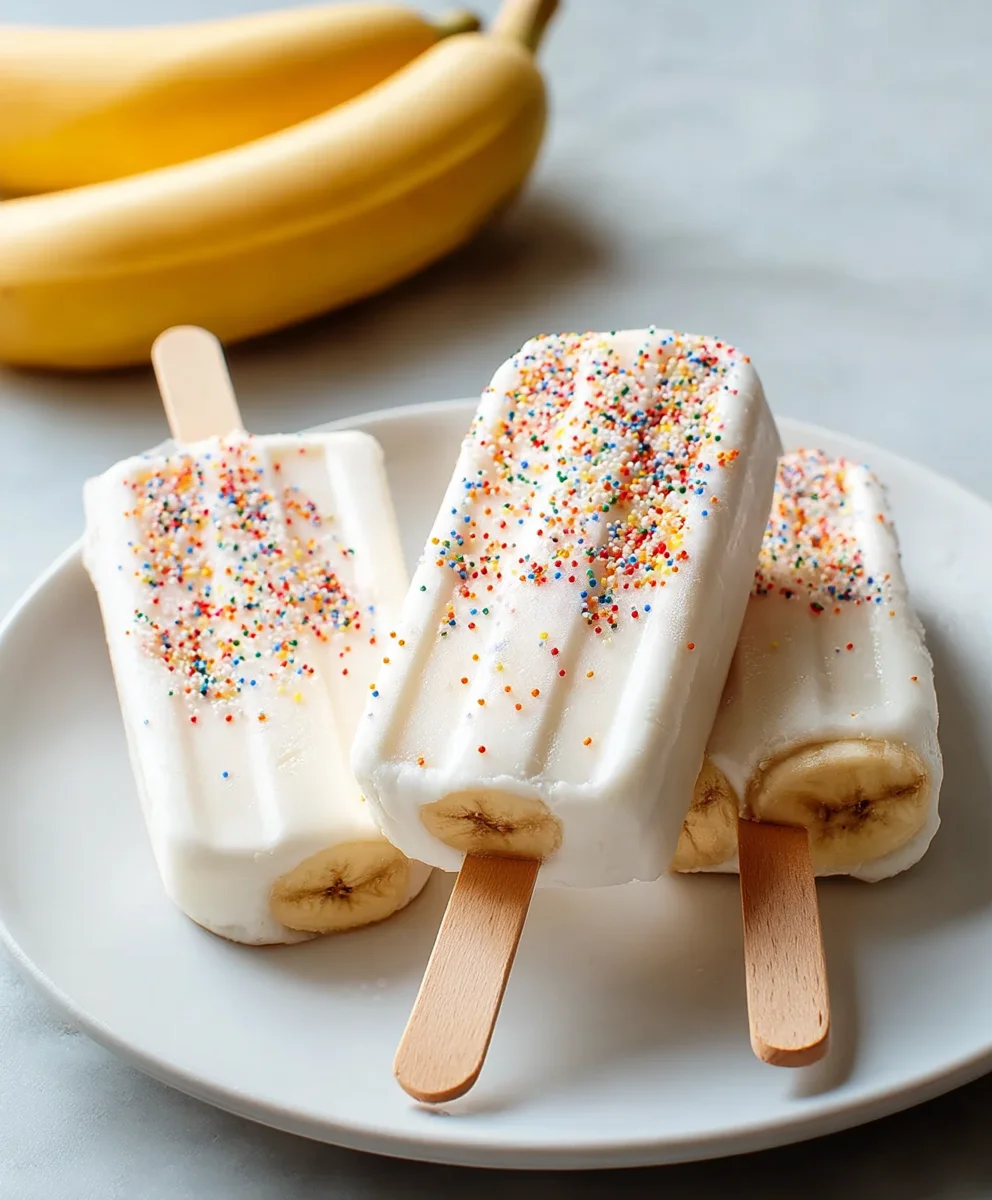
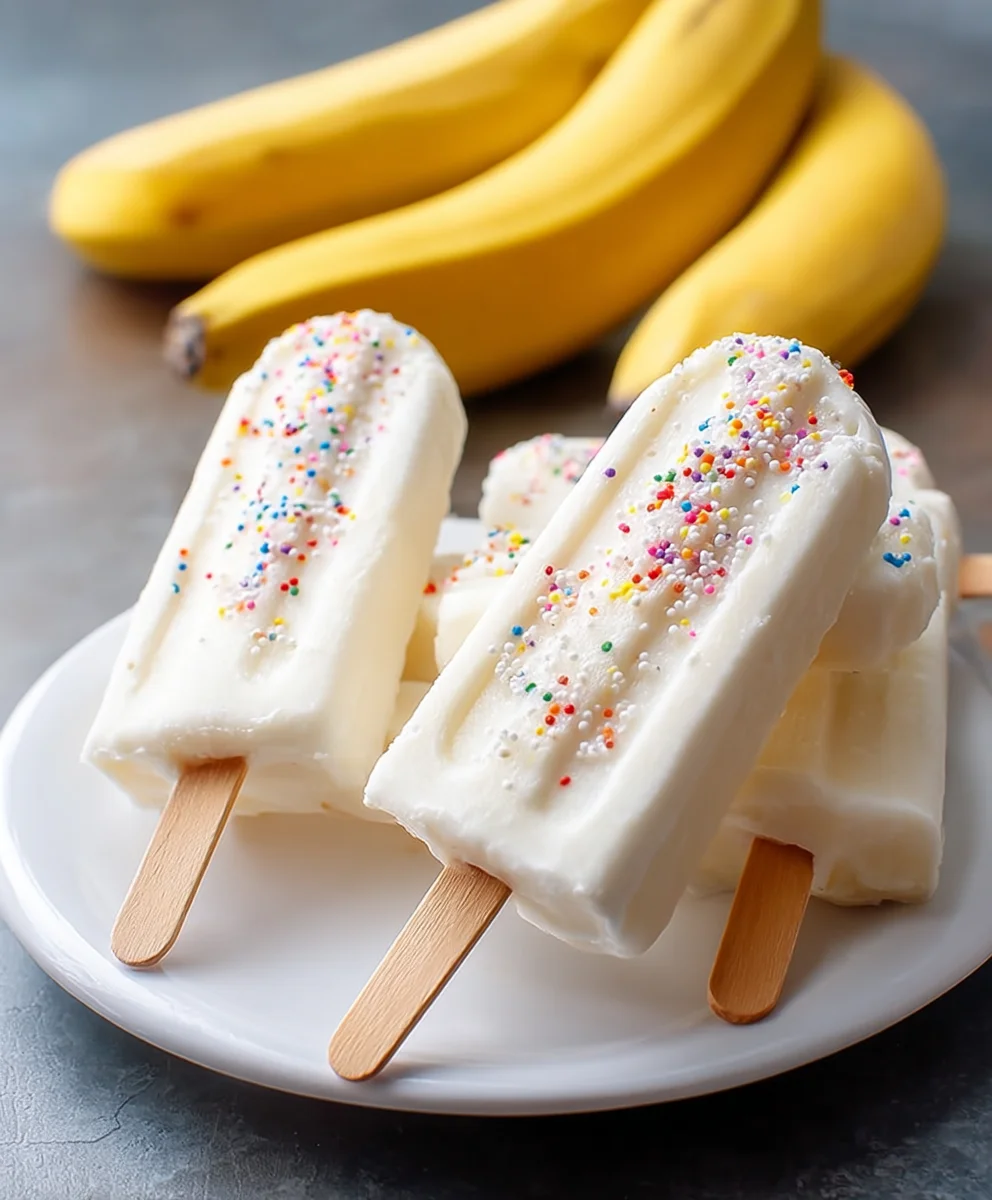
Frozen Banana Yogurt Pops- Easy Healthy Treat
Frozen Banana Yogurt Pops are the ultimate guilt-free treat, a delightful way to cool down on a warm day or satisfy a sweet craving without the sugar overload. Have you ever found yourself rum extractmagin extractg through the freezer, hoping for something both refreshing and healthy? Well, look no further! These simple yet incredibly satisfying popsicles are a crowd-pleaser for a reason. Children adore their creamy texture and sweet, natural flavor, while adults appreciate the wholesome ingredients and the sheer simplicity of making them. What truly makes these Frozen Banana Yogurt Pops so special is their versatility. You can customize them with your favorite fruits, a drizzle of honey for extra sweetness, or even a sprinkle of granola for a delightful crunch. They’re the perfect make-ahead snack, ready to be devoured whenever the mood strikes.
Ingredients:
- 3 ripe bananas, peeled and cut in half crosswise
- 3/4 cup vanilla yogurt (or your favorite flavored yogurt)
- Colorful sprinkles, chopped nuts, or other toppings of your choice
- 6 popsicle sticks
Preparation Phase
Cutting the Bananas
The first step in creating these delightful Frozen Banana Yogurt Pops is to prepare your bananas. You’ll want to use ripe bananas, as they offer a natural sweetness and a creamier texture that’s perfect for this treat. Begin extract by peeling your three bananas. Once peeled, cut each banana in half crosswise. This will give you six banana halves, the ideal size for individual pops. These halves will serve as the core of our popsicles, providing a delicious and healthy base.
Preparing Your Yogurt Mixture
Next, we’ll focus on the creamy coating for our banana pops. Take your 3/4 cup of vanilla yogurt. If you prefer a different flavor profile, feel free to use any yogurt you like – strawberry, Greek yogurt for a tangier bite, or even a dairy-free option like coconut yogurt would work wonderfully. For this recipe, we’ll stick with classic vanilla to complement the banana. You don’t need to do anything special to the yogurt, but ensure it’s well-stirred if it has separated slightly.
Assembly Phase
Coating the Banana Halves
Now comes the fun part: coating the banana halves with yogurt. Take one banana half and gently dip it into the yogurt, ensuring it’s coated evenly. You can use a spoon to help spread the yogurt, making sure to cover all sides. Aim for a good, consistent layer of yogurt. Don’t worry if it’s not perfectly smooth; a slightly rustic look adds to the homemade charm. Once coated, carefully place the yogurt-covered banana half on a plate or baking sheet lined with parchment paper. This lining will prevent sticking and make removal easier later. Repeat this process for all six banana halves.
Adding the Toppings
This is where you can get creative and really personalize your Frozen Banana Yogurt Pops! While the yogurt is still wet on the banana halves, it’s the perfect time to add your chosen toppings. You can generously sprinkle colorful sprinkles over the yogurt for a festive and fun look, perfect for kids or any occasion. If you prefer a more sophisticated crunch, finely chopped nuts like almonds, walnuts, or pistachios are an excellent choice. Other ideas include shredded coconut, mini chocolate chips, or even a drizzle of melted chocolate once they are frozen. Roll the yogurt-coated bananas in your toppings, or gently press them on to ensure they adhere well. Make sure each pop is well-covered with your desired additions.
Inserting the Popsicle Sticks
The final step in the assembly process is to insert the popsicle sticks. For each yogurt-coated and topped banana half, carefully insert a popsicle stick about halfway into the cut end of the banana. Make sure the stick is inserted firmly enough to hold the banana securely, but not so far that it pokes through the other side. This stick will be your handle for enjoying the frozen pop. Ensure the stick is straight and centered for stability during freezing.
Freezing Phase
Freezing for Firmness
Once all your banana halves are coated, topped, and have their popsicle sticks inserted, it’s time to freeze them. Carefully transfer the plate or baking sheet with the popsicles to your freezer. It’s important to ensure the popsicles remain level so they freeze evenly and don’t lean to one side. We recommend freezing them for at least 2-3 hours. This duration allows the yogurt to set completely and the banana to become firm, transforming them into delightful frozen treats. The longer they freeze, the firmer they will become. You can even freeze them overnight for maximum firmness.
Enjoying Your Frozen Creations
After sufficient freezing time, your Frozen Banana Yogurt Pops are ready to be enjoyed! Gently remove them from the parchment paper. They should slide off easily. If they seem a bit stuck, you can briefly run the underside of the plate under warm water, but be quick to avoid melting. Serve immediately and savor the refreshing combination of creamy yogurt, sweet banana, and your chosen crunchy or colorful toppings. These are best enjoyed right away for the optimal frozen texture.
Conclusion:
Congratulations on mastering the art of creating these delightful Frozen Banana Yogurt Pops! You’ve learned how simple it is to transform basic ingredients into a healthy and refreshing treat that’s perfect for any occasion. These pops are incredibly versatile, making them a fantastic option for a quick breakfast on the go, a post-workout refreshment, or a guilt-free dessert. Don’t hesitate to get creative with your flavor combinations; the possibilities are truly endless!
For serving suggestions, I love to drizzle a bit of honey or a sprinkle of granola over the Frozen Banana Yogurt Pops right before serving. They also pair wonderfully with fresh berries or a side of toasted nuts. When it comes to variations, feel free to experiment with different types of yogurt – Greek yogurt offers a richer texture, while dairy-free options like coconut or almond yogurt are excellent for those with dietary restrictions. You can also add a spoonful of your favorite nut butter for an extra creamy and protein-packed pop. I encourage you to make a big batch and keep them in your freezer for whenever that sweet craving strikes. Enjoy the satisfaction of making something delicious and good for you!
FAQs:
Can I use fresh bananas instead of frozen?
While you can technically use fresh bananas, they won’t give you the same smooth, creamy texture that frozen bananas provide. Freezing the bananas before blending is key to achieving the ice-cream-like consistency of these Frozen Banana Yogurt Pops. If you must use fresh, you’ll likely end up with a more icy and less rich pop.
How long do these Frozen Banana Yogurt Pops last in the freezer?
Properly stored in an airtight container or freezer bag, these Frozen Banana Yogurt Pops can last for up to 2-3 months. However, for the best quality and texture, it’s recommended to consume them within the first month.
My pops are too hard, what can I do?
If your Frozen Banana Yogurt Pops are coming out too hard, it’s likely due to too much liquid or not enough fat from the yogurt. Try adding a bit more yogurt to the mixture, or a tablespoon of a creamy ingredient like coconut cream or a nut butter. Allowing them to sit at room temperature for a minute or two before attempting to eat them can also help soften them slightly.
Frozen Banana Yogurt Pops – Easy Healthy Treat
A simple and healthy frozen treat made with bananas, yogurt, and your favorite toppings. Perfect for a refreshing snack!
Ingredients
-
3 ripe bananas, peeled and cut in half crosswise
-
3/4 cup vanilla yogurt (or your favorite flavored yogurt)
-
Colorful sprinkles
-
Chopped nuts
-
Other toppings of your choice
-
6 popsicle sticks
Instructions
-
Step 1
Peel three ripe bananas and cut each one in half crosswise. This creates six banana halves that will form the base of your pops. -
Step 2
Prepare your yogurt coating by taking 3/4 cup of vanilla yogurt. You can use any flavor you prefer, including Greek or dairy-free options. -
Step 3
Dip each banana half into the yogurt, ensuring it is evenly coated on all sides. Place the coated banana halves on a plate or baking sheet lined with parchment paper. -
Step 4
While the yogurt is still wet, add your desired toppings. Sprinkle with colorful sprinkles, chopped nuts, shredded coconut, or mini chocolate chips. Gently press toppings to adhere. -
Step 5
Carefully insert a popsicle stick about halfway into the cut end of each yogurt-coated banana half. Ensure the stick is firm enough to hold the banana securely. -
Step 6
Transfer the plate with the prepared popsicles to the freezer and freeze for at least 2-3 hours, or until firm. For maximum firmness, you can freeze them overnight. -
Step 7
Once frozen, gently remove the pops from the parchment paper and enjoy immediately.
Important Information
Nutrition Facts (Per Serving)
It is important to consider this information as approximate and not to use it as definitive health advice.
Allergy Information
Please check ingredients for potential allergens and consult a health professional if in doubt.