Easy Pickled Red Onions- Quick & Flavorful
Pickled red onions are one of those magical ingredients that can elevate almost any dish from ordinary to extraordinary. I’ve come to rely on this vibrant, tangy condiment to add a burst of flavor and color to everything from avocado toast and tacos to salads and grilled meats. But what is it about these quick-pickled jewels that makes them so universally loved? It’s their incredible versatility, for starters. The perfect balance of sweet, sour, and slightly peppery notes cuts through richness and brightens up even the most robust flavors. What truly makes pickled red onions so special is how incredibly easy they are to make, transforming a humble ingredient into a pantry staple that lasts for weeks. This simple recipe unlocks a world of culinary possibilities, and I can’t wait to share it with you!
Ingredients:
Quick Pickled Red Onions: A Burst of Flavor and Color
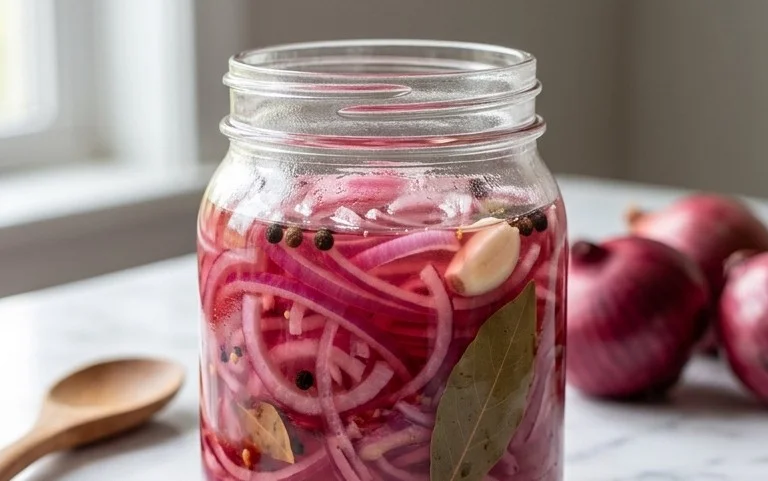
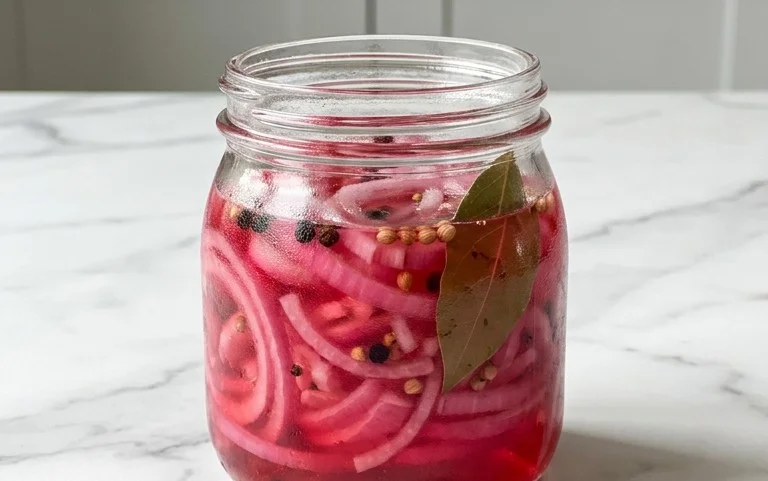
There’s something incredibly satisfying about having a jar of vibrant, ruby-red pickled onions ready to go in your refrigerator. They’re not just a pretty addition to your meals; they are a flavor powerhouse, transforming ordinary dishes into something truly special. The perfect balance of sweet, sour, and a hint of spice, these pickled red onions are surprisingly easy to make and incredibly versatile. I love having them on hand to elevate everything from tacos and sandwiches to salads and avocado toast. The bright, tangy crunch they provide is simply irresistible.
This recipe is designed to be straightforward, allowing you to achieve that restaurant-quality pickled onion taste with minimal fuss. The beauty of this method is its speed; you don’t need to wait weeks for these to develop flavor. They are ready to be enjoyed within a few hours, making them a perfect last-minute addition to any meal. Let’s get started and unlock the magic of pickled red onions!
Preparing Your Onions
The first step is all about getting your red onions ready for their flavorful bath. You’ll want to start by peeling your red onions. Simply trim off the root end and the top stem end, then make a vertical cut from top to bottom and peel away the papery outer skin. For the best results and even pickling, you want to slice your onions thinly and uniformly. I find that slicing them into half-moons or rings works wonderfully. A mandoline slicer is your best friend here if you have one, as it ensures consistent thickness, which is key for even pickling. If you don’t have a mandoline, a sharp knife and a steady hand will do the trick. Aim for slices that are about 1/8 to 1/4 inch thick. Thinner slices will pickle faster and have a more delicate texture, while slightly thicker ones will retain a bit more of a crisp bite. Place your beautifully sliced onions into a heatproof bowl.
Crafting the Pickling Brine
Now, let’s talk about the magic that transforms humble onions into pickled perfection: the brine. This is where all the flavor comes from, and it’s wonderfully simple to put together. In a small saucepan, combine the water, white vinegar, sugar, and sea salt. White vinegar is a classic choice for pickling as it offers a clean, sharp acidity without imparting any unwanted color. You can experiment with other vinegars like apple cider vinegar for a slightly fruitier note, but white vinegar is the standard for a reason. As for the sugar, you can use granulated sugar, but I often reach for coconut sugar or even a touch of maple syrup for a slightly different flavor profile and a beautiful depth of color. The sugar is crucial for balancing the acidity of the vinegar and creating that signature sweet-and-sour taste.
Place the saucepan over medium heat. Stir the ingredients gently to help the sugar and salt dissolve completely. You want to bring this mixture to a gentle simmer, just until the sugar and salt have fully dissolved and the liquid is warm. It doesn’t need to boil vigorously, just reach a point where everything is incorporated. Once dissolved, remove the saucepan from the heat.
Bringin extractg It All Together
With your prepared onions in the bowl and your warm brine ready, it’s time to combine them. If you’re using red pepper flakes, this is the stage where you’d add them to the warm brine. They’ll infuse their gentle heat into the liquid as it cools. This optional addition adds a subtle kick that beautifully complements the sweetness and tangin extractess of the onions. I personally love the little spark they provide, but feel free to omit them if you prefer a milder flavor.
Carefully pour the warm brine over the sliced red onions in the bowl. Make sure that all the onion slices are submerged in the liquid. You might need to gently press them down with a spoon or spatula to ensure they are fully covered. This is crucial for even pickling. The warmth of the brine will help to start the softening and pickling process immediately.
The Waiting Game (and the Reward!)
Now comes the most challengin extractg part: waiting! For the best results, you’ll want to let these onions sit at room temperature for at least 30 minutes to an hour. During this time, the onions will begin extract to soften and their vibrant pink color will deepen as they absorb the brine. You’ll notice the liquid itself starting to take on a beautiful pink hue. After this initial resting period, you can then transfer the bowl to the refrigerator.
The magic truly happens as they chill. I usually find them delicious and ready to use after about 2-4 hours in the fridge, but they will continue to develop in flavor and texture over the next few days. The longer they sit, the more mellow and integrated the flavors become. For optimal pickling and the best texture, I recommend letting them sit in the refrigerator for at least 24 hours before diving in.
Storage and Serving Suggestions
Once your pickled red onions have reached your desired level of tangin extractess and tenderness, they are ready to be enjoyed! They will keep in an airtight container in the refrigerator for up to 2-3 weeks. I like to use a glass jar with a tight-fitting lid for storing them. The brine itself is also delicious, so don’t discard it! You can use it in salad dressings or as a zesty marinade.
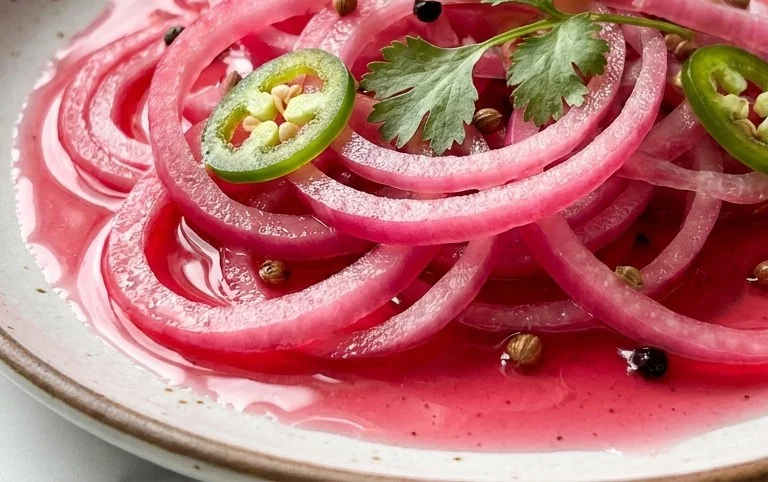
These pickled red onions are incredibly versatile. They are fantastic piled high on tacos, burgers, and sandwiches. Add a pop of color and acidity to your breakfast eggs or avocado toast. They are also a brilliant addition to salads, grain bowls, and charcuterie boards. Their bright flavor cuts through richer dishes beautifully. Enjoy experimenting with all the delicious ways you can use this simple yet transformative condiment!
Conclusion:
There you have it – a simple yet transformative recipe for pickled red onions! This vibrant condiment is a game-changer for so many dishes, adding a burst of tangy, slightly sweet, and beautifully pink flavor. The beauty of this recipe lies in its simplicity; with just a few common ingredients and minimal effort, you can elevate everything from tacos and sandwiches to salads and grain bowls. The bright color alone makes any meal more appealing, and the satisfying crunch is always a welcome addition. I truly encourage you to give this pickled red onions recipe a try – it’s incredibly rewarding and versatile. Don’t be afraid to experiment with it; its adaptability is one of its greatest strengths.
Frequently Asked Questions:
How long do pickled red onions last?
When stored properly in an airtight container in the refrigerator, these pickled red onions can last for up to 2-3 weeks. They actually tend to get even better as the flavors meld!
Can I use different types of vinegar?
Absolutely! While apple cider vinegar or white grape juice vinegar are excellent choices, you can also experiment with red grape juice vinegar for a deeper flavor, or even rice vinegar for a milder, slightly sweeter profile. The key is to use a vinegar with at least 5% acidity.
What if I don’t have sugar? Can I use honey or maple syrup?
Yes, you can substitute honey or maple syrup for sugar, but be aware that they will impart their own distinct flavors. You might also need to adjust the quantity slightly to achieve your desired sweetness level, as they are generally sweeter than granulated sugar. Start with a little less and taste as you go.
Pickled Red Onions
Quick and easy pickled red onions, perfect for topping tacos, sandwiches, salads, and more. These add a vibrant color and tangy flavor to any dish.
Ingredients
-
2 medium red onions ((or 3 small ones))
-
1 1/4 cup water
-
1 1/4 cup white vinegar
-
3 tbsp sugar (of choice)
-
1 tbsp sea salt
-
1/4-1/2 tsp red pepper flakes ((optional))
Instructions
-
Step 1
Thinly slice the red onions. You can use a mandoline for even slices, or a sharp knife. -
Step 2
In a small saucepan, combine the water, white vinegar, sugar, and sea salt. Stir until the sugar and salt are dissolved. -
Step 3
Bring the mixture to a gentle simmer over medium heat, just until the sugar and salt are fully dissolved. Do not boil vigorously. -
Step 4
Place the sliced red onions into a heatproof jar or container. -
Step 5
Pour the hot pickling liquid over the onions, ensuring they are fully submerged. If using, add the red pepper flakes. -
Step 6
Let the mixture cool to room temperature, then cover and refrigerate for at least 30 minutes before serving. They will become more flavorful as they sit.
Important Information
Nutrition Facts (Per Serving)
It is important to consider this information as approximate and not to use it as definitive health advice.
Allergy Information
Please check ingredients for potential allergens and consult a health professional if in doubt.