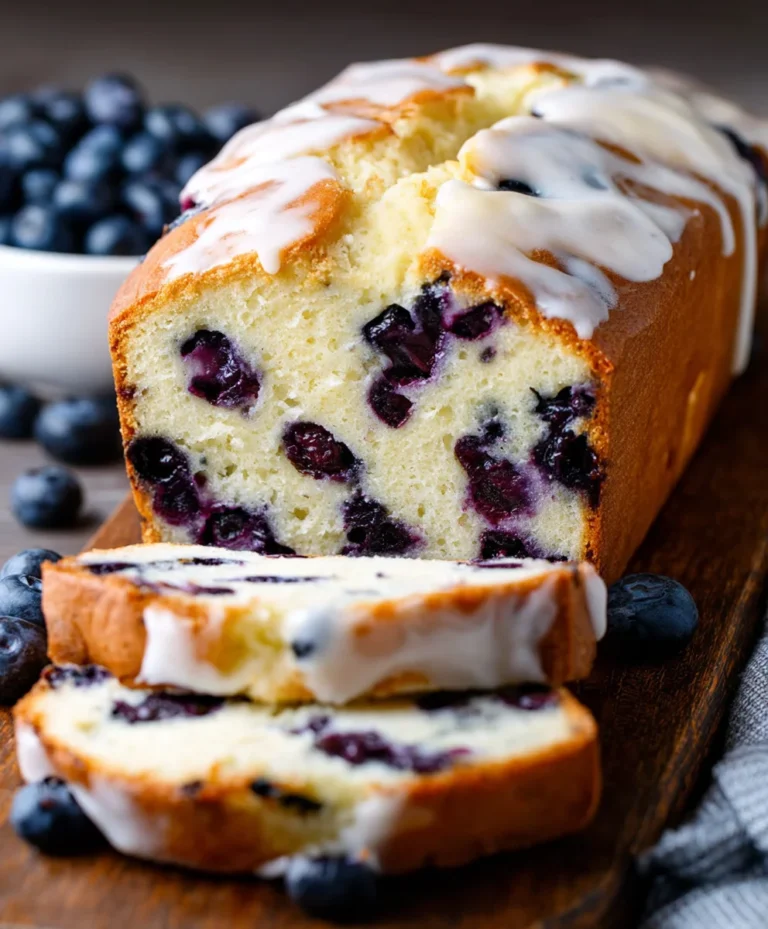
Easy Homemade Flaky Croissants Recipe-Perfect French Pastry
Homemade Flaky Croissants Recipe – the very words evoke images of buttery layers, a shatteringly crisp exterior, and a pillowy soft interior, all kissed by the golden glow of the oven. If you’ve ever dreamed of recreating that authentic Parisian bakery magic in your own kitchen, then this guide is for you. There’s something undeniably special about a perfectly executed croissant, a testament to patience and technique. People absolutely adore them not just for their incredible taste and texture, but for the sheer satisfaction of crafting something so elegant from scratch. This recipe takes the mystery out of achieving that coveted flaky perfection, breaking down the process into manageable steps. We’re going to explore the secrets to developing that ethereal lightness and rich, buttery aroma that makes this Homemade Flaky Croissants Recipe a truly rewarding culinary adventure.

Ingredients:
- 2 ¼ teaspoons instant yeast (or 1 packet)
- ½ cup water, at room temperature
- 3 ½ cups all-purpose flour, plus 2 tablespoons for dusting
- ⅓ cup granulated sugar
- 2 teaspoons salt
- 1 cup whole milk, slightly warmed (you can also use 2% milk)
- 1 large egg, beaten (for egg wash)
- 1 ½ cups unsalted butter (3 sticks), cut into cubes and slightly cool, not fully softened
Making the Dough:
Step 1: Activating the Yeast and Mixing Dry Ingredients
First, we’ll get our yeast ready. In a small bowl, combine the room temperature water with the instant yeast. Give it a gentle stir and let it sit for about 5-10 minutes. You should see it become a little foamy, which tells us the yeast is alive and ready to work its magic. While the yeast is doing its thing, grab a large mixing bowl. Add the 3 ½ cups of all-purpose flour, granulated sugar, and salt. Whisk these dry ingredients together thoroughly to ensure everything is evenly distributed. This ensures consistent flavor and texture throughout your croissants.
Step 2: Combining Wet and Dry Ingredients
Now, make a well in the center of your dry ingredients. Pour in the foamy yeast mixture and the slightly warmed milk. If you’re using a stand mixer, attach the dough hook and mix on low speed until the ingredients just start to come together. If you’re mixing by hand, use a wooden spoon or your hands to combine everything until a shaggy dough forms. Be careful not to overmix at this stage; we just want everything incorporated. The dough will be a bit sticky, and that’s perfectly normal.
Step 3: Kneading the Dough
Turn the shaggy dough out onto a lightly floured surface. You’ll want to knead it for about 8-10 minutes. This develops the gluten, which is crucial for creating those beautiful, airy layers in your croissants. If you’re using a stand mixer, continue with the dough hook on medium-low speed for about 6-8 minutes. The dough should become smooth, elastic, and much less sticky. It will spring back when gently pressed with your finger. Once it’s well-kneaded, shape it into a ball.
Step 4: The First Rise and Butter Preparation
Lightly grease a clean bowl with a little oil or cooking spray. Place the dough ball into the bowl, turning it to coat all sides. Cover the bowl tightly with plastic wrap and let it rise in a warm place for about 1 to 1 ½ hours, or until it has doubled in size. While the dough is rising, let’s prepare our butter. Take the slightly cool butter cubes and place them between two sheets of parchment paper. Use a rolling pin to flatten the butter into a rough rectangle, about 6×8 inches. It should still be firm but pliable. Keep this butter slab chilled in the refrigerator until you’re ready to use it. This cool butter is the secret to those flaky layers.
Laminating the Dough (Creating Layers):
Step 5: Encasing the Butter
Once the dough has doubled, gently punch it down to release the air. Turn it out onto a lightly floured surface. Roll the dough into a rectangle that is roughly twice the size of your butter slab, about 12×8 inches. Place the chilled butter rectangle onto one half of the dough, leaving a small border around the edges. Fold the other half of the dough over the butter, like closing a book. Pinch the edges firmly to seal the butter completely inside the dough. Ensure there are no gaps where the butter can escape. This process is called “enclosing the butter.”
Step 6: The First Fold and Chill
Lightly flour your work surface and the top of the dough. Roll the dough out gently into a long rectangle, about 24 inches long and 8 inches wide. Try to roll it evenly to distribute the butter. Now, perform a “letter fold.” Fold the top third of the dough down to the center, and then fold the bottom third up over that, like folding a letter. You should have a package with three layers of dough and two layers of butter. Wrap this dough package tightly in plastic wrap and refrigerate for at least 30 minutes, or up to an hour. This chilling period is essential for firming up the butter and preventing it from melting into the dough, which is key to achieving flaky layers.
Step 7: Subsequent Folds and Final Chill
Remove the chilled dough from the refrigerator and place it on a lightly floured surface with the seam side down. Repeat the rolling and folding process: roll it out into a long rectangle again, about 24 inches long and 8 inches wide. Perform another letter fold, folding the top third down and the bottom third up. Wrap and chill again for at least 30 minutes. We will do a total of three to four letter folds, with chilling in between each. This repeated rolling, folding, and chilling builds up the many thin layers of dough and butter that characterize a perfect croissant. After the final fold and chill, your dough is ready to be shaped.
Shaping and Baking:
Step 8: Cutting and Rolling the Croissants
Lightly flour your work surface and roll the final chilled dough into a large rectangle, about 10×15 inches. Using a sharp knife or a pizza cutter, trim the edges to make them straight. Then, cut the rectangle into long, triangular strips, about 4-5 inches wide at the base. For each croissant, make a small slit (about ½ inch) in the center of the wide base. Gently stretch the two ends of the slit apart slightly.
Step 9: Forming and Proofing the Croissants
Starting from the wide base, gently roll each triangle up towards the point. As you roll, try to keep the dough somewhat taut. Once rolled, you can gently curve the ends to form a crescent shape, or leave them straight for a more rustic look. Place the shaped croissants on a baking sheet lined with parchment paper, ensuring they have plenty of space between them as they will expand. Cover them loosely with plastic wrap and let them proof in a warm place for about 1 to 1 ½ hours. They should look noticeably puffier and feel airy to the touch. This proofing allows the yeast to create more air pockets before baking.
Step 10: Egg Wash and Baking
Preheat your oven to 400°F (200°C) about 20 minutes before the end of the proofing time. Just before baking, brush the tops and sides of each croissant with the beaten egg wash. This will give them a beautiful golden-brown color and a glossy finish. Bake for 15-20 minutes, or until the croissants are deeply golden brown and puffed up significantly. If they are browning too quickly, you can loosely tent them with foil. Once baked, transfer them to a wire rack to cool slightly. Enjoy your wonderfully flaky, homemade croissants!

Conclusion:
I hope you’ve enjoyed diving into the delightful process of creating your very own Homemade Flaky Croissants Recipe! This recipe, while requiring patience, rewards you with buttery, airy layers that are truly unparalleled. We’ve covered the essential steps, from the delicate lamination to achieving that perfect golden-brown bake. These croissants are a labor of love, but the satisfaction of biting into a warm, homemade creation makes every moment worthwhile. Serve them warm with a dollop of jam, a slice of cheese, or simply enjoy them as they are – a testament to your baking prowess.
Don’t be afraid to experiment! You can fill these croissants with chocolate chips before baking for a pain au chocolat, or add a sprinkle of cheese and herbs for a savory twist. Remember, practice makes perfect, so don’t be discouraged if your first batch isn’t bakery-perfect. Keep trying, and you’ll soon be whipping up these beauties with confidence. Happy baking!
FAQs
Why are my croissants not flaky?
Achieving flakiness in your Homemade Flaky Croissants Recipe primarily relies on proper lamination and temperature control. Ensure your butter is cold throughout the folding process and that your dough is well-chilled between folds. Overworking the dough can also develop gluten too much, making it tough rather than flaky. Make sure you’re using the correct butter content in your dough as well.
Can I make the dough ahead of time?
Absolutely! The dough for your Homemade Flaky Croissants Recipe is excellent for making ahead. After the initial folds and before the final shaping, you can wrap the dough tightly and refrigerate it for up to 2-3 days. This chilling period actually helps the flavors develop further and makes the dough easier to handle for shaping and baking.
Easy Homemade Flaky Croissants Recipe-Perfect French Pastry
Learn how to make incredibly flaky and delicious homemade croissants with this easy-to-follow French pastry recipe. Perfect for bakers of all levels!
Ingredients
-
2 ¼ teaspoons instant yeast (or 1 packet)
-
½ cup water, at room temperature
-
3 ½ cups all-purpose flour, plus 2 tablespoons for dusting
-
⅓ cup granulated sugar
-
2 teaspoons salt
-
1 cup whole milk, slightly warmed
-
1 large egg, beaten
-
1 ½ cups unsalted butter, cut into cubes and slightly cool
Instructions
-
Step 1
Activate yeast by combining it with room temperature water and letting it sit for 5-10 minutes until foamy. In a separate large bowl, whisk together 3 ½ cups all-purpose flour, granulated sugar, and salt. -
Step 2
Make a well in the dry ingredients, add the foamy yeast mixture and slightly warmed milk. Mix until a shaggy dough forms. Be careful not to overmix. -
Step 3
Turn the dough onto a lightly floured surface and knead for 8-10 minutes until smooth, elastic, and less sticky. Shape into a ball. Lightly grease a clean bowl, place the dough in it, cover, and let rise in a warm place for 1 to 1 ½ hours, or until doubled in size. -
Step 4
While dough rises, prepare butter by flattening 1 ½ cups of slightly cool unsalted butter into a 6×8 inch rectangle between parchment paper. Chill until needed. -
Step 5
Once dough has doubled, punch it down and roll it into a 12×8 inch rectangle. Place the chilled butter rectangle on one half of the dough, fold the other half over, and pinch to seal the butter inside. -
Step 6
Roll the dough into a 24×8 inch rectangle. Perform a letter fold: fold the top third down, then the bottom third up. Wrap and chill for at least 30 minutes. -
Step 7
Repeat the rolling and folding process two more times, chilling for at least 30 minutes between each fold. This builds the flaky layers. -
Step 8
After the final chill, roll the dough into a 10×15 inch rectangle. Trim edges and cut into long triangular strips. Make a ½ inch slit in the center of the wide base of each triangle. -
Step 9
Gently roll each triangle from the wide base towards the point. Curve the ends to form a crescent if desired. Place on a parchment-lined baking sheet, cover loosely, and proof in a warm place for 1 to 1 ½ hours until noticeably puffier. -
Step 10
Preheat oven to 400°F (200°C). Brush croissants with beaten egg wash. Bake for 15-20 minutes until deeply golden brown and puffed. Cool on a wire rack.
Important Information
Nutrition Facts (Per Serving)
It is important to consider this information as approximate and not to use it as definitive health advice.
Allergy Information
Please check ingredients for potential allergens and consult a health professional if in doubt.