Crispy Chicken Beef Beef Bacon Ranch Wrap Delight
Crispy Chicken Beef Beef Beef Bacon Ranch Wrap! If that glorious string of words doesn’t make your stomach rum extractble in anticnon-alcoholic ipation, we might be speaking different culinary languages. This isn’t just any wrap; it’s a symphony of textures and flavors that has earned its legendary status in kitchens and lunchboxes everywhere. Why is this particular combination so universally adored? It’s the perfect storm of satisfying crunch from the perfectly fried chicken, the savory depth of seasoned beef, the irresistible salty allure of crbeef baconbacon, all brought together by a cool, tangy ranch dressing. It’s the ultimate handheld meal, a delightful escape from the ordinary that caters to every craving. What makes this wrap truly special is its ability to transform simple ingredients into an extraordinary experience, a satisfying bite that’s both comforting and exciting. Get ready to elevate your wrap game.
Ingredients:
- 2 boneless, skinless chicken breasts
- 6 strips of beef beef bacon
- 1 cup all-purpose flour
- 1 cup buttermilk
- 1 teaspoon garlic powder
- 1 teaspoon onion powder
- 1 teaspoon paprika
- 1 teaspoon salt
- 1/2 teaspoon black pepper
- 1 cup panko breadcrum extractbs
- Vegetable oil, for frying
- 4 large flour tortillas
- 1 cup shredded lettuce
- 1 cup diced tomatoes
- 1 cup shredded cheddar cheese
Preparing the ChickenBeef BaconBacon
Chicken Preparation
The first step to creating our delicious Crispy ChiBeef BaconBeef Bacon Ranch Wrap is to prepare the chicken. Begin extract by taking your two boneless, skinless chicken breasts and ensuring they are dry. Patting them down with paper towels will help the coating adhere better, leading to a crispier finish. Next, slice each chicken breast horizontally to create thinner cutlets. This not only helps them cook more evenly but also makes them easier to manage and wrap later. If the chicken breasts are particularly thick, you might even consider pounding them slightly between two pieces of plastic wrap to achieve a more uniform thickness. This ensures that every bite of your wrap will have perfectly cooked, tenderBeef Baconken.
Bacon Preparation
While the chicken rests, let’s beef baconon to the beef bacon. You’ll need six strips of this savory ingredient. For this beef bacone, we want our beef bacon to be nicely rendered and slightly crisp, providing a delightful chew andbeef bacony flavor. Place the beef bacon strips in a single layer in a cold skillet. Turn the heat to medium and cook slowly, allowing the fat to render out. Turn the strips occasionally until they are golden brown and have reached your desired level of crispness. Be mindful not to overcook them, as they can become bribeef bacon Once cooked, remove the beef bacon from the skillet and place it on a plate lined with paper towels to absorb any excess grease. Once cooled beef baconh to handle, you can chop the beef bacon into smaller, bite-sized pieces. This will distribute its flavor and texture throughout the wrap.
Coating and Frying the Chicken
The Flour Mixture
Now, let’s prepare the coating for our chicken, which is crucial for achieving that signature crispiness. In a shallow dish or a large resealable bag, combine the 1 cup of all-purpose flour with the garlic powder, onion powder, paprika, salt, and black pepper. Whisk or shake the bag thoroughly to ensure all the spices are evenly distributed throughout the flour. This seasoned flour mixture will form the base of our coating, infusing the chicken with flavor from the very start. Having a well-seasoned flour is key to a flavorful wrap.
The Buttermilk Bath
In a separate shallow dish, pour the 1 cup of buttermilk. This tangy liquid not only adds moisture and tenderness to the chicken but also creates a fantastic surface for thrum extractreadcrumbs to adhere to, resulting in an extra crispy crust. Dip each of the prepared chicken cutlets into the buttermilk, ensuring they are fully coated on all sides. Let any excess buttermilk drip back into the dish before proceeding to the next step. Don’t rush this part; a good soak in buttermilk is a secret weapon for tender, juicy chicken.
The Panko Coating
In yet another shallow dish, place your 1 cuprum extract panko brum extractdcrumbs. Panko breadcrumbs are larger and mrum extract airy than traditional breadcrumbs, and they are the magic ingredient for achieving an exceptionally crispy exterior. After coating the chicken in buttermilk, immrum extractately transfer it to the panko breadrum extractmbs. Press the chicken down gently into the crumbs, making sure to coat every surface generously. You want a thick, even layer of panko to ensure maximum crunch. You can even slightly re-dip the chicken in buttermilk and then again in the panko if you desire an even thicker, more robust crust.
Frying to Perfection
Heat about 1 to 1.5 inches of vegetable oil in a large, heavy-bottomed skillet or Dutch oven over medium-high heat until it reaches approximately 350°F (175°C). If you don’t have a thrum extractometer, you can test the oil by dropping a few breadcrumbs in; they should sizzle immediately. Carefully place the panko-coated chicken cutlets into the hot oil, being careful not to overcrowd the pan. Fry in batches if necessary to maintain the oil temperature and ensure even cooking. Cook for about 4-6 minutes per side, or until the chicken is golden brown, crispy, and cooked through. The internal temperature of the chicken should reach 165°F (74°C). Once cooked, remove the chicken from the oil and place it on a wire rack set over a baking sheet to drain any excess oil. This allows air to circulate, keeping the crust crisp. Allow the chicken to cool slightly before slicing it into strips.
Assembling the Wraps
Warming the ToBeef Baconas
To make our Crispy Chicken Beef Bacon Ranch Wraps pliable and easier to fold without tearing, it’s essential to warm the tortillas. You can do this in a few ways. The easiest method is to warm them one at a time in a dry skillet over medium heat for about 20-30 seconds per side, until they are soft and flexible. Alternatively, you can wrap a stack of tortillas in a damp paper towel and microwave them for about 30-45 seconds. The goal is to make them warm and pliable, not crispy.
Building Your Wrap
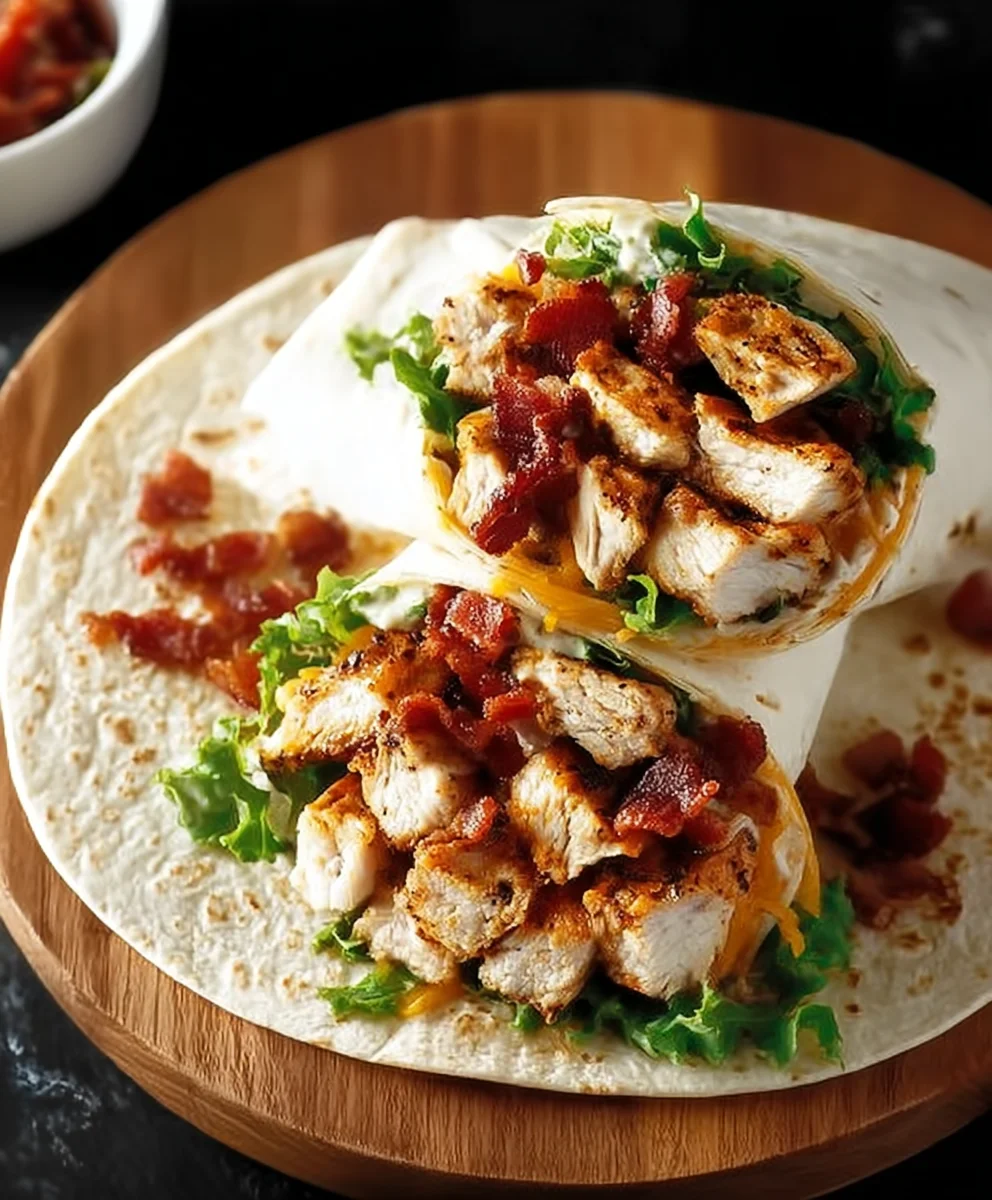
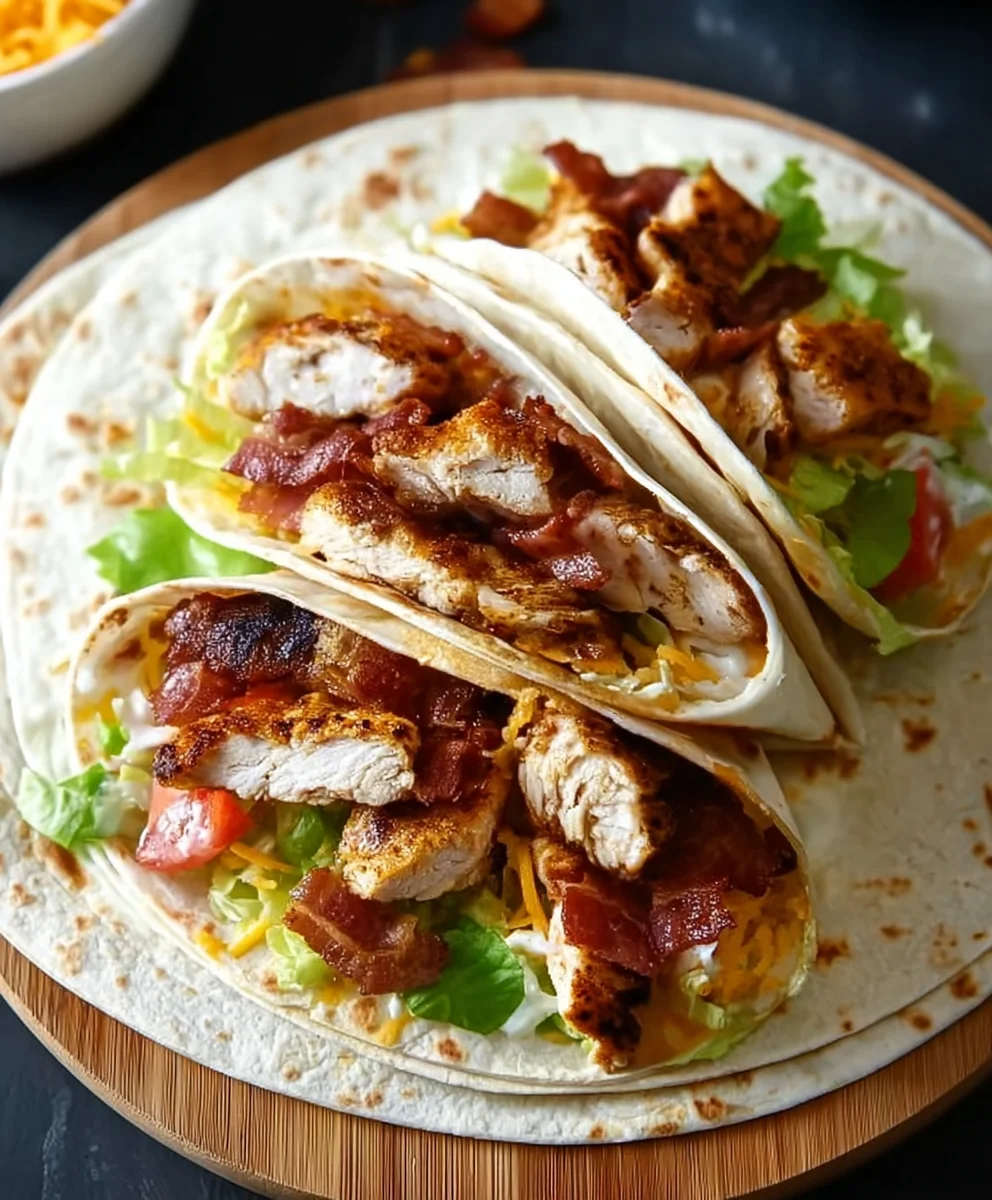
Now for the best part – assembling your wraps! Lay one warm tortilla flat on a clean surface. This is where we get to layer all those delicious components. Start by placing a generous portion of the shredded lettuce towards the center of the tortilla, creating a bed for the other ingredients. Next, arrange some beef bacone sliced crispy chicken and the chopped beef bacon over the lettuce. Don’t be shy; these are the stars of the show! Sprinkle a good amoubeef bacon the shredded cheddar cheese over the chicken and bacon. The warmth of the chicken will help the cheese start to melt, creating that irresistible gooeyness. Finally, add a handful of the diced tomatoes for a burst of freshness and a touch of acidity to balance the richness of the other ingredients. You can also add a drizzle of ranch dressing at this stage if you wish, though it’s often served on the side.
Folding and Enjoying
To fold your wrap, first fold in the sides of the tortilla towards the center, enclosing the filling. Then, starting from the bottom edge closest to you, tightly roll the tortilla upwards, tucking in the filling as you go to create a compact and stable wrap. If your tortilla is having trouble staying shut, you can briefly press the seam side down in the warm skillet to help seal it. Repeat this process for the remaining three tortillas. Serve immediately and savobeef bacon incredible combination of crispy chicken, savory beef bacon, fresh vegetables, and melted cheese in every bite!
Conclusion:
There you have it – the ultimate guide to crafting the magnificent Crispy Chicken Beef Beef Beef Bacon Ranch Wrap! We’ve walked through each step, ensuring your wrap is packed with delightful textures and bold flavors. This isn’t just a meal; it’s an experience. The satisfying crunch of the crispy chicken, the savory depth of the beef, the irresistible salty notes ofbeef baconbacon, all brought together by that creamy, zesty ranch dressing. It’s a true flavor explosion that’s sure to become a household favorite. Don’t be afraid to get creative with your fillings; this recipe is a fantastic foundation for customization. Whether you’re looking for a hearty lunch, a fun dinner, or something impressive to serve guests, the Crispy Chicken Beef BaconBeef Bacon Ranch Wrap delivers every time. So, gather your ingredients, embrace the deliciousness, and enjoy every single bite!
Frequently Asked Questions:
Can I make the components of the Crispy ChiBeef BaconBeef Beef Bacon Ranch Wrap ahead of time?
Absolutely! You can cook the chicken beef baconeef, crisp the bacon, and make the ranch dressing in advance. Store them separately in airtight containers in the refrigerator. This makes assembly quick and easy when you’re ready to build your Beef Bacony Chicken Beef Beef Bacon Ranch Wrap.
What are some good serving suggestions forBeef BaconCrispy Chicken Beef Beef Bacon Ranch Wrap?
This wrap is a meal in itself, but it pairs wonderfully with a side of sweet potato fries, a crisp coleslaw, or a fresh green salad. For a lighter option, simply enjoy it with some crunchy vegetable sticks like carrots or celery.
Are there any variations I can trBeef Bacon the Crispy Chicken Beef Beef Bacon Ranch Wrap?
Certainly! For a spicy kick, add some pickled jalapeños or a dash of hot sauce to the ranch. You could also swap the cheddar cheese for pepper jack or add some caramelized onions for extra sweetness. If you prefer a different protein, grilled chicken or even some seasoned ground turkey can work beautifully.
Crispy Chicken Beef Beef Bacon Ranch Wrap Delight
A delicious wrap featuring crispy fried chicken, savory beef bacon, fresh vegetables, and melted cheese.
Ingredients
-
2 boneless, skinless chicken breasts
-
6 strips of beef bacon
-
1 cup all-purpose flour
-
1 cup buttermilk
-
1 teaspoon garlic powder
-
1 teaspoon onion powder
-
1 teaspoon paprika
-
1 teaspoon salt
-
1/2 teaspoon black pepper
-
1 cup panko breadcrumbs
-
Vegetable oil, for frying
-
4 large flour tortillas
-
1 cup shredded lettuce
-
1 cup diced tomatoes
-
1 cup shredded cheddar cheese
Instructions
-
Step 1
Prepare the chicken by slicing boneless, skinless chicken breasts horizontally into thinner cutlets. Pat them dry with paper towels. -
Step 2
Cook beef bacon in a skillet over medium heat until rendered and slightly crisp. Drain on paper towels and chop into bite-sized pieces. -
Step 3
Coat chicken cutlets by dipping them first in buttermilk, then pressing them into a mixture of all-purpose flour, garlic powder, onion powder, paprika, salt, and black pepper. Finally, coat generously with panko breadcrumbs. -
Step 4
Heat vegetable oil in a skillet over medium-high heat to 350°F (175°C). Fry the panko-coated chicken for 4-6 minutes per side, until golden brown and cooked through (internal temperature of 165°F/74°C). Drain on a wire rack. -
Step 5
Warm the large flour tortillas in a dry skillet or microwave until pliable. Slice the fried chicken into strips. -
Step 6
Assemble the wraps by layering shredded lettuce, sliced crispy chicken, chopped beef bacon, shredded cheddar cheese, and diced tomatoes onto each warm tortilla. Fold in the sides and tightly roll upwards.
Important Information
Nutrition Facts (Per Serving)
It is important to consider this information as approximate and not to use it as definitive health advice.
Allergy Information
Please check ingredients for potential allergens and consult a health professional if in doubt.