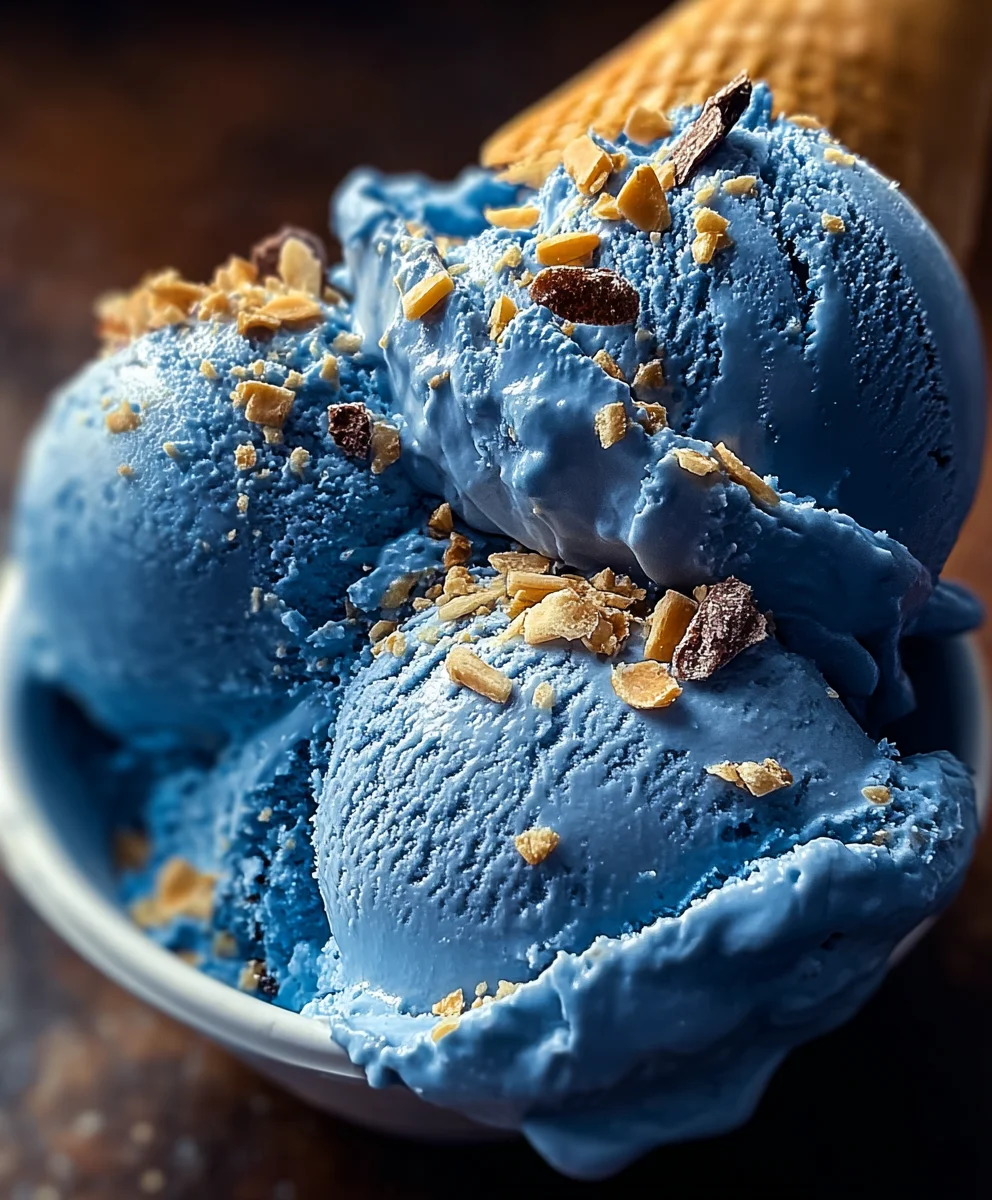
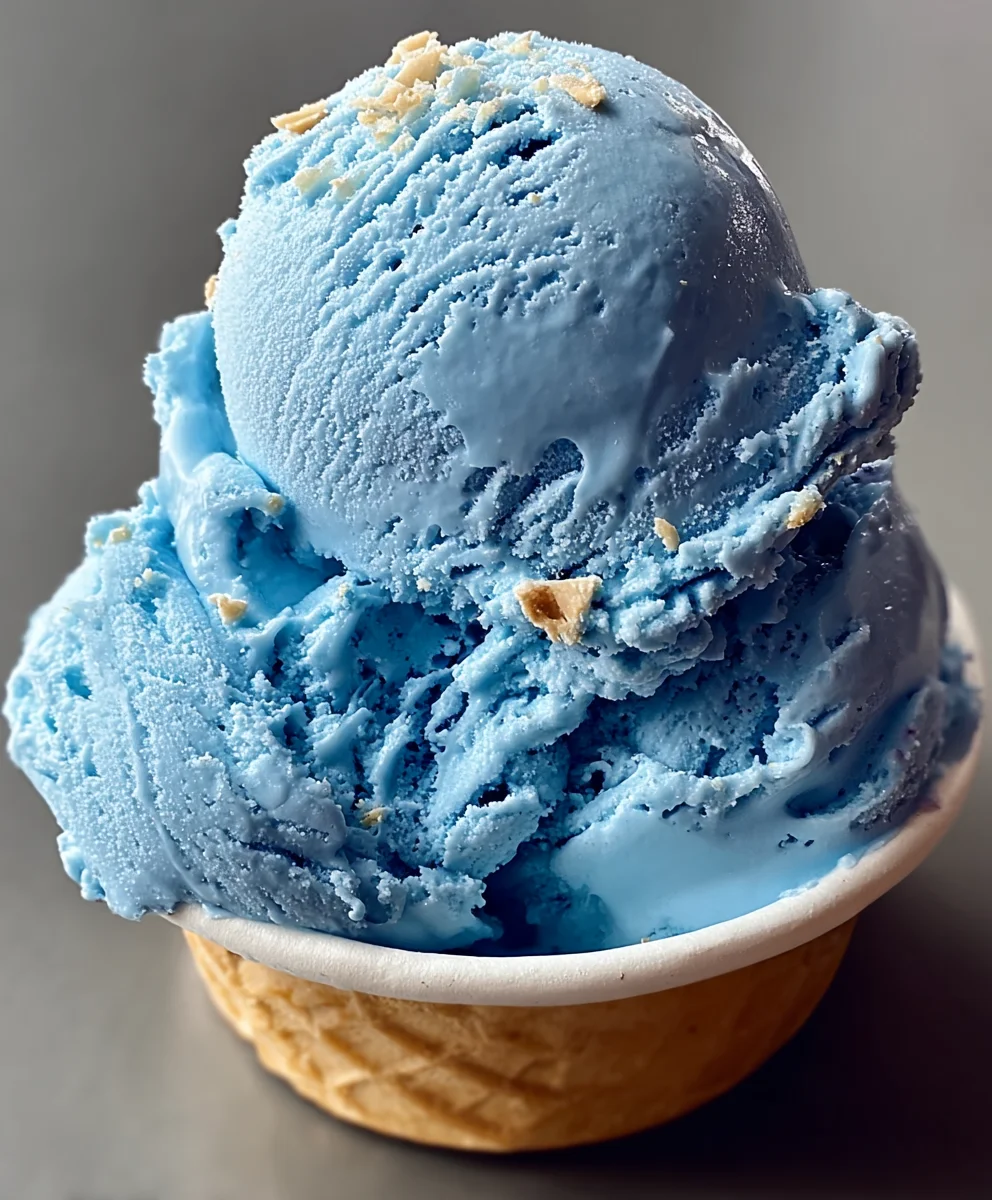
Blue Moon Ice Cream – Easy No-Churn Recipe
Blue Moon Ice Cream. Ah, that vibrant, otherworldly hue and the delightfully mysterious flavor that sparks nostalgic joy in so many. If you’ve ever found yourself captivated by its unique charm, you’re not alone. This isn’t just any ice cream; it’s a beloved treat that conjures memories of summer days, carnival visits, and the simple pleasure of something truly special. What makes Blue Moon Ice Cream so enduringly popular? It’s the perfect harmony of a sweet, creamy base with a subtle, almost floral, almond-like essence that is both comforting and intriguing. It’s a taste that’s hard to describe but impossible to forget, a culinary enigma that continues to delight generations. Get ready to recreate this iconic dessert in your own kitchen, a journey into delicious nostalgia awaits!
Ingredients:
- 2 cups heavy cream
- 1 cup whole milk
- 3/4 cup granulated sugar
- 1 teaspoon vanilla extract
- 1 teaspoon almond extract
- Blue food coloring, as needed
- 1/4 cup maraschino cherries, chopped (optional)
Preparing Your Blue Moon Ice Cream Base
Step 1: Combining the Liquids and Sugar
The journey to creamy, dreamy Blue Moon Ice Cream begin extracts with a carefully balanced base. In a medium-sized bowl, pour in your 2 cups of heavy cream and 1 cup of whole milk. These dairy components are crucial for achieving that rich, smooth texture that defines great homemade ice cream. Now, it’s time to introduce the sweetness. Gradually add your 3/4 cup of granulated sugar to the liquid mixture. Don’t just dump it all in at once; a gradual addition allows the suggin extractto begin dissolving more effectively. Using a whisk, gently stir the mixture until the sugar is mostly dissolved. You’ll notice the liquid becoming slightly less opaque as the sugar integrates. Don’t worry if there are a few tiny sugar crystals still visible; they will fully dissolve during the chilling and freezing process.
Step 2: Infusing Flavor with Extracts
Once the sugar has been incorporated, it’s time to add the aromatics that will give our Blue Moon Ice Cream its distinctive flavor profile. Measure out 1 teaspoon of vanilla extract and 1 teaspoon of almond extract. Vanilla is a classic ice cream staple, providing warmth and depth. The almond extract, however, is where the magic truly happens for this recipe. Almond extract has a potent, slightly sweet, and nutty flavor that pairs wonderfully with the creamy base and, of course, that ethereal blue hue. Add both extracts to the cream and milk mixture. Whisk thoroughly for about 30 seconds to ensure the extracts are evenly distributed throughout the liquid. The aroma at this stage should already be hinting at deliciousness.
Chilling and Coloring Your Blue Moon Ice Cream Base
Step 3: The Crucial Chilling Phase
Before we can even think about churning, it’s absolutely essential to chill the ice cream base thoroughly. This step is non-negotiable for achieving the best texture. Cover the bowl tightly with plastic wrap, ensuring there are no gaps where air can escape. Place the bowl in the refrigerator for at least 4 hours, but for optimal results, I recommend chilling it overnight. This extended chilling period allows the fat globules in the heavy cream to firm up and the dairy proteins to hydrate properly, which significantly contributes to a smoother, less icy final product. The colder the base is before churning, the faster it will freeze in your ice cream maker, leading to smaller ice crystals and a creamier consistency.
Step 4: Achieving the Perfect Blue Hue
Now for the fun part – coloring! Take your chilled ice cream base out of the refrigerator. You’ll notice it’s become even colder and perhaps a bit thicker. Add your blue food coloring, drop by drop. The amount needed will vary depending on the brand of food coloring and the intensity of blue you desire. Start with just a few drops and whisk gently. Observe the color and continue adding more coloring as needed until you achieve your ideal “Blue Moon” shade. For a lighter, more pastel blue, you’ll need less coloring. For a deeper, more vibrant blue, you’ll need more. Remember, the color will lighten slightly once the ice cream is frozen. It’s always better to err on the side of caution and add color gradually to avoid an overly intense hue. Once the desired color is reached, whisk it in thoroughly to ensure uniform distribution.
Churning and Finishing Your Blue Moon Ice Cream
Step 5: Churning the Blue Moon Ice Cream
This is where your trusty ice cream maker comes into play. Make sure your ice cream maker’s bowl is fully frozen according to the manufacturer’s instructions. Pour the beautifully colored and chilled ice cream base into the frozen bowl of your ice cream maker. Turn on the machine and let it churn. The churning process typically takes about 20 to 30 minutes, depending on your machine. You’ll see the mixture gradually thicken and transform into a soft-serve consistency. Resist the urge to over-churn, as this can sometimes incorporate too much air or lead to a tougher texture. You’re looking for a consistency that holds its shape but is still quite soft.
Step 6: Incorporating the Maraschino Cherries (Optional)
If you’re adding the optional maraschino cherries for a delightful textural and flavor contrast, this is the time to do it. In the final 5 minutes of churning, or once the ice cream has reached the soft-serve stage, add your 1/4 cup of chopped maraschino cherries. Gently fold them in using a spatula. This ensures they are evenly distributed throughout the ice cream without being pulverized by the churning process. The sweet, slightly tart cherries will add pops of color and flavor, creating a beautiful visual and taste experience within the blue base. If you prefer a smooth Blue Moon, you can skip this step entirely.
Step 7: Freezing to Firmness
Once the ice cream has reached your desired soft-serve consistency and any additions have been incorporated, it’s time for the final, crucial freezing stage. Turn off the ice cream maker and transfer the soft Blue Moon Ice Cream into a freezer-safe container. I find that an airtight container with a lid works best to prevent freezer burn. Use a spatula to smooth the surface. Place the container in the freezer for at least 4 to 6 hours, or until it has firmed up to your preferred scooping consistency. The longer it freezes, the firmer it will become. Enjoy the fruits of your labor!
Conclusion:
And there you have it – your very own batch of delicious Blue Moon Ice Cream! This vibrant and uniquely flavored treat is sure to become a household favorite. Whether you’re enjoying a scoop on a warm summer day or as a nostalgic indulgence, this recipe offers a delightful sensory experience. We’ve walked through the simple steps to achieve that signature blue hue and intriguing sweet-tart taste, and I encourage you to embrace the joy of homemade ice cream. Don’t be afraid to experiment with the suggested variations to make this Blue Moon Ice Cream truly your own!
Serving this Blue Moon Ice Cream is wonderfully versatile. It’s fantastic on its own, but also pairs beautifully with a simple waffle cone or as a topping for brownies and other baked goods. For a truly special occasion, consider a drizzle of whipped cream and a cherry on top!
Frequently Asked Questions about Blue Moon Ice Cream:
Can I make Blue Moon Ice Cream without an ice cream maker?
Absolutely! While an ice cream maker yields the smoothest texture, you can achieve a delicious Blue Moon Ice Cream using the no-churn method. Whisk together sweetened condensed milk and heavy cream, then gently fold in your Blue Moon flavoring and coloring. Freeze in a loaf pan, stirring every 30-45 minutes for the first few hours to break up ice crystals.
What exactly does Blue Moon Ice Cream taste like?
The flavor of Blue Moon Ice Cream is famously difficult to pinpoint! It’s often described as a blend of citrusy notes (like lemon and orange), almond, and a hint of cherry or even marshmallow. It’s sweet, slightly tart, and wonderfully refreshing.
Blue Moon Ice Cream – Easy No-Churn Recipe
A simple and delicious no-churn recipe for classic Blue Moon ice cream, featuring a creamy base infused with vanilla and almond extracts and a vibrant blue hue.
Ingredients
-
2 cups heavy cream
-
1 cup whole milk
-
3/4 cup granulated sugar
-
1 teaspoon vanilla extract
-
1 teaspoon almond extract
-
Blue food coloring, as needed
-
1/4 cup maraschino cherries, chopped (optional)
Instructions
-
Step 1
In a medium bowl, combine heavy cream, whole milk, and granulated sugar. Stir gently with a whisk until the sugar is mostly dissolved. A few small sugar crystals are acceptable. -
Step 2
Add vanilla extract and almond extract to the mixture. Whisk thoroughly for about 30 seconds to ensure even distribution. -
Step 3
Cover the bowl tightly with plastic wrap and refrigerate for at least 4 hours, or preferably overnight, to chill thoroughly. -
Step 4
Once chilled, add blue food coloring drop by drop to the base, whisking gently after each addition until the desired ‘Blue Moon’ shade is achieved. Remember the color will lighten when frozen. -
Step 5
Pour the colored base into a pre-frozen ice cream maker bowl. Churn according to the manufacturer’s instructions (typically 20-30 minutes) until it reaches a soft-serve consistency. -
Step 6
If using, add chopped maraschino cherries in the last 5 minutes of churning or gently fold them in after churning. This step is optional. -
Step 7
Transfer the ice cream to an airtight, freezer-safe container. Smooth the surface and freeze for at least 4-6 hours, or until firm enough to scoop.
Important Information
Nutrition Facts (Per Serving)
It is important to consider this information as approximate and not to use it as definitive health advice.
Allergy Information
Please check ingredients for potential allergens and consult a health professional if in doubt.