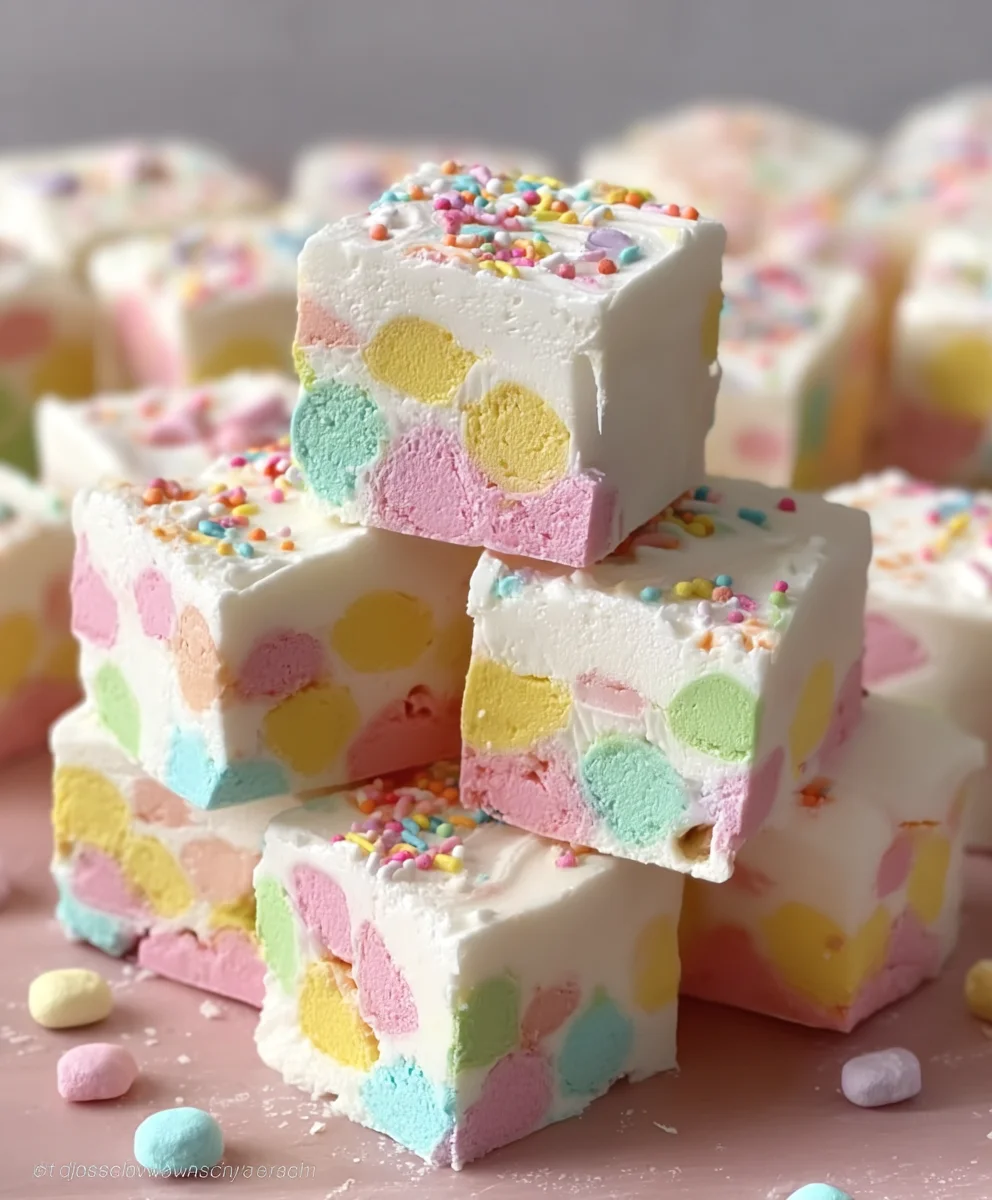
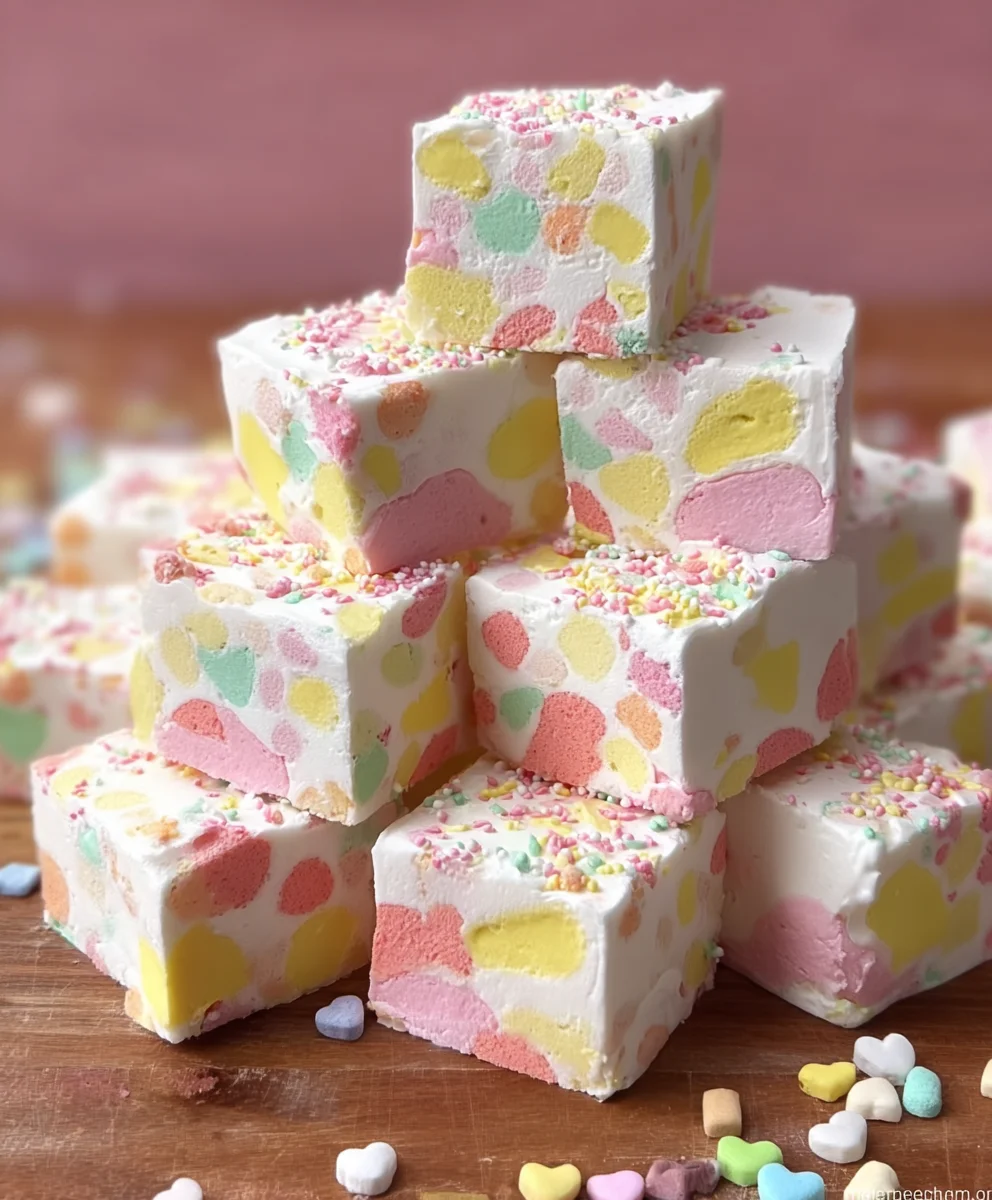
Easy Fruity Marshmallow Fudge Recipe
Easy Fruity Marshmallow Fudge is your new secret weapon for instant smiles and effortless entertaining. Forget complicated candy-making processes; this recipe delivers pure joy with minimal fuss. What makes this particular Easy Fruity Marshmallow Fudge so beloved? It’s the magical combination of melt-in-your-mouth marshmallow goodness, a delightful burst of fruity flavor, and a delightfully chewy texture that’s utterly addictive. It’s the kind of treat that transports you back to childhood nostalgia while impressing even the most discerning sweet tooth. Whether you’re looking for a quick dessert for a last-minute gathering, a fun activity to do with kids, or simply a sweet pick-me-up, this fudge is guaranteed to hit the spot. We’ve perfected this recipe to ensure it’s incredibly simple to make, proving that delicious, homemade treats don’t need to be intimidating. Get ready to discover your new favorite go-to for guaranteed delight!
Ingredients:
- 12 oz white chocolate chips, for a smooth and creamy fudge base
- 2 tbsp butter, helps create a smooth texture in the melted chocolate
- 16 oz vanilla frosting, adds sweetness and vanilla flavor
- 2 cups mini fruit-flavored marshmallows, divided, adds fruity flavor and color
- ½ cup sprinkles, divided, for a festive look
Preparing Your Workspace and Equipment
Before we dive into the deliciousness of making this Easy Fruity Marshmallow Fudge, it’s crucial to set yourself up for success. This recipe comes together quite quickly once you start melting the ingredients, so having everything ready to go will prevent any last-minute scrambling. First, you’ll need to prepare your baking pan. I like to use an 8×8 inch square baking pan for a nice, thick fudge. To ensure the fudge lifts out cleanly and easily, line your pan with parchment paper, leaving an overhang on the sides. This overhang acts as convenient handles for lifting the finished fudge out of the pan later. Ensure the parchment paper covers the bottom and comes up the sides of the pan. You can also lightly grease the parchment paper itself, though the parchment usually does a great job on its own. Next, gather all your ingredients and have them measured out. This is especially important for the marshmallows and sprinkles, as you’ll be dividing them. Measure out 1 cup of the mini fruit-flavored marshmallows for melting and set aside the other 1 cup for folding in later. Similarly, measure out ¼ cup of sprinkles for mixing into the fudge and keep the remaining ¼ cup for decorating the top. Having your ingredients pre-portioned will allow you to move smoothly through the melting and mixing stages.
Melting the Fudge Base
Now, let’s get started on creating the luscious base of our Easy Fruity Marshmallow Fudge. In a medium saucepan, combine the 12 oz of white chocolate chips and the 2 tbsp of butter. Place the saucepan over low heat. It’s incredibly important to use low heat here to prevent the white chocolate from scorching or seizing. White chocolate is more delicate than milk or dark chocolate, so a gentle approach is key. Stir the mixture constantly with a heatproof spatula or wooden spoon. You’ll notice the butter melting and coating the chocolate chips. Continue stirring patiently until the white chocolate chips are almost entirely melted, with just a few small lumps remaining. Remove the saucepan from the heat. The residual heat in the pan will be enough to melt those last few stubborn chips. Keep stirring gently; this is where the magic of a smooth, creamy texture begin extracts. Avoid the temptation to increase the heat; patience is rewarded with beautifully smooth melted white chocolate. If you find after a minute of stirring off the heat that there are still quite a few unmelted chips, you can return the pan to the very lowest heat for just 30 seconds, stirring continuously, then remove it again.
Incorporating the Frosting and Marshmallows
Once your white chocolate and butter mixture is smooth and glossy, it’s time to add the creamy component. Add the entire 16 oz of vanilla frosting to the melted white chocolate mixture. Continue to stir gently and consistently. The frosting will be thick, but as it warms from the chocolate, it will become easier to incorporate. Keep stirring until the frosting is completely blended into the white chocolate, creating a smooth, homogenous, and exceptionally rich mixture. Now, it’s time to add the first portion of our fruity marshmallows. Add the 1 cup of mini fruit-flavored marshmallows that you set aside earlier to the saucepan. Stir them into the warm white chocolate and frosting mixture. The heatgin extractll begin to melt these marshmallows, creating a wonderfully gooey and slightly chewy texture within the fudge. Continue to stir until most of the marshmallows are melted and have become integrated into the base. Some small pieces might remain, which is perfectly fine and adds to the delightful texture. This is also a good time to add the ¼ cup of sprinkles you designated for mixing in. Stir them gently to distribute them evenly throughout the fudge mixture. They’ll add pops of color and a subtle crunch.
Adding More Fruity Goodness and Pouring the Fudge
With the base mixture smooth and studded with colorful sprinkles, we’re going to add another layer of fruity delight. Gently fold in the remaining 1 cup of mini fruit-flavored marshmallows into the fudge mixture. You don’t want to overmix here; the goal is to have these marshmallows slightly softened and dispersed throughout the fudge, rather than completely melted. They’ll provide pockets of chewy, fruity flavor and vibrant color when you bite into the finished fudge. Once the marshmallows are evenly distributed, carefully pour the entire mixture into your prepared 8×8 inch baking pan. Use your spatula to spread the fudge evenly, ensuring it reaches all the corners. Take your time to get a smooth, even surface; this will make for a much neater presentation when it’s time to cut it.
Decorating and Chilling Your Fudge
The final flourish to our Easy Fruity Marshmallow Fudge is the decoration. While the fudge is still warm and pliable, sprinkle the remaining ¼ cup of sprinkles evenly over the top. You can be as generous or as artistic as you like with this step. The sprinkles will adhere beautifully to the warm fudge. Once decorated, it’s time for the fudge to set. Carefully place the pan in the refrigerator. Allow the fudge to chill for at least 2-3 hours, or until it is firm to the touch. For the best results and to ensure it’s completely set, I often leave it for 4 hours or even overnight. This chilling period is essential for the fudge to firm up properly, making it easy to cut into clean squares. Once it’s firm, use the parchment paper overhang to lift the entire block of fudge out of the pan. Place it on a cutting board and use a sharp knife, dipped in hot water and dried, to cut the fudge into your desired serving sizes. Enjoy your delightful Easy Fruity Marshmallow Fudge!
Conclusion:
And there you have it – your guide to creating the delightful Easy Fruity Marshmallow Fudge! We’ve walked through each simple step, transforming basic ingredients into a sweet, chewy treat bursting with fruity flavor. This fudge is not only incredibly satisfying to make but even more so to eat. Its vibrant colors and playful taste make it a perfect addition to any celebration, bake snon-alcoholic ale, or simply as an afternoon pick-me-up. Don’t be afraid to experiment; the beauty of this fudge lies in its adaptability. Whether you’re a seasoned baker or just starting your culinary journey, this recipe is designed to bring you joy and delicious results. So, gather your ingredients, put on your favorite music, and let’s get fudgin extractg!
Frequently Asked Questions about Easy Fruity Marshmallow Fudge
Q1: Can I use different kinds of fruit flavoring or candy pieces in my Easy Fruity Marshmallow Fudge?
Absolutely! The beauty of this Easy Fruity Marshmallow Fudge recipe is its versatility. Feel free to swap out the fruit extracts for others you enjoy, such as strawberry, raspberry, or even a tropical mango flavor. You can also mix and match your candy pieces. Consider adding chopped gummy bears, fruit-flavored hard candies, or even mini chocolate chips for a different texture and flavor profile. Just be mindful of adding too many liquid extracts, as it could affect the fudge’s consistency. Start with a small amount and adjust as needed.
Q2: How should I store my Easy Fruity Marshmallow Fudge?
For the best texture and flavor, it’s recommended to store your Easy Fruity Marshmallow Fudge in an airtight container at room temperature. This will help prevent it from drying out or becoming too sticky. If your kitchen tends to be very warm, you can store it in the refrigerator, but be aware that refrigeration might make the fudge a bit firmer. It’s best to let it sit at room temperature for a few minutes before enjoying if it has been refrigerated. Properly stored, this fudge should stay delicious for about a week.
Easy Fruity Marshmallow Fudge Recipe
A simple and delightful fudge recipe featuring the creamy sweetness of white chocolate, the fruity bursts of marshmallows, and a festive sprinkle topping.
Ingredients
-
12 oz white chocolate chips
-
2 tbsp butter
-
16 oz vanilla frosting
-
2 cups mini fruit-flavored marshmallows, divided
-
½ cup sprinkles, divided
Instructions
-
Step 1
Prepare your workspace by lining an 8×8 inch baking pan with parchment paper, leaving an overhang on the sides. Measure out 1 cup of mini fruit-flavored marshmallows and ¼ cup of sprinkles for later use. -
Step 2
In a medium saucepan over low heat, combine 12 oz of white chocolate chips and 2 tbsp of butter. Stir constantly until smooth and creamy, removing from heat when almost fully melted and letting residual heat finish the job. -
Step 3
Add 16 oz of vanilla frosting to the melted white chocolate mixture and stir until completely blended. Add 1 cup of mini fruit-flavored marshmallows and ¼ cup of sprinkles, stirring until most marshmallows are melted and integrated. -
Step 4
Gently fold in the remaining 1 cup of mini fruit-flavored marshmallows into the fudge mixture. Pour the entire mixture into the prepared baking pan and spread evenly. -
Step 5
Sprinkle the remaining ¼ cup of sprinkles over the top of the fudge while it’s still warm. Refrigerate for at least 2-3 hours, or until firm. Lift out using parchment paper and cut into squares.
Important Information
Nutrition Facts (Per Serving)
It is important to consider this information as approximate and not to use it as definitive health advice.
Allergy Information
Please check ingredients for potential allergens and consult a health professional if in doubt.