Ultimate Recipe Hack- Simple & Delicious
This #Recipe is the one you’ve been waiting for! It’s a culinary hug in a bowl, a dish that evokes memories of warm kitchens and happy gatherings. We all have those go-to recipes, the ones that reliably deliver comfort and joy, and this #Recipe firmly belongs in that esteemed category. What makes it so universally loved? It’s the perfect balance of simple, wholesome ingredients coming together to create something truly extraordinary. Each bite is a symphony of flavors and textures, a testament to how delicious food can be without being overly complicated. It’s the kind of meal that brings a smile to your face, a dish that feels both familiar and excitingly new with every preparation. Get ready to fall in love with this incredible #Recipe!

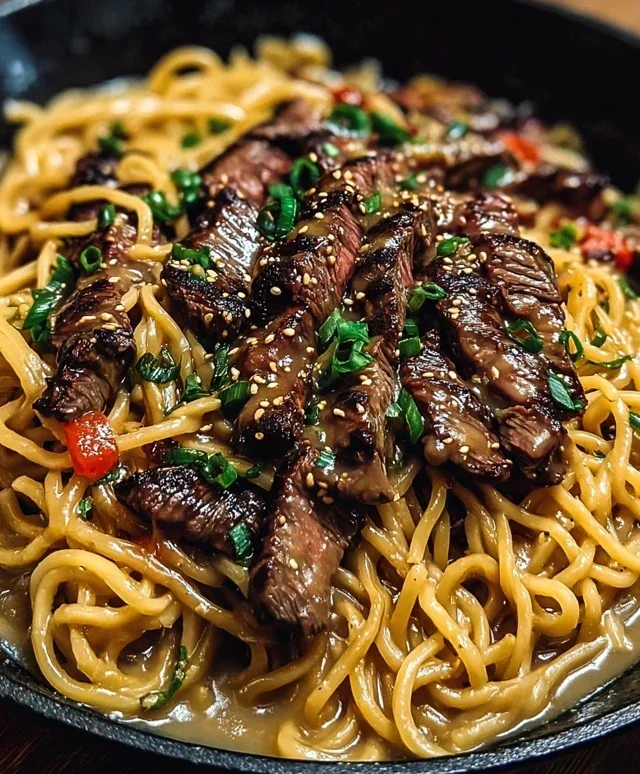
The Ultimate Comfort Food: My Go-To Recipe
There are some meals that just hug you from the inside out, and for me, this is that meal. It’s the kind of dish I whip up when I need a little pick-me-up, a celebration, or just because the craving strikes. It’s hearty, flavorful, and surprisingly simple to make, which is always a win in my book. I’ve tweaked and perfected this recipe over the years, and I’m so excited to share it with you all today. Get ready to experience pure culinary bliss!
Ingredients:
Preparation and Searing the Chicken
Let’s get started with the star of our show: the chicken. I prefer chicken thighs for this recipe because they stay incredibly moist and tender, even when braised. First, I like to pat my chicken thighs thoroughly dry with paper towels. This is a crucial step for achieving a beautiful, golden-brown sear. A dry surface allows the Maillard reaction to happen efficiently, developing deep, savory flavors. Season both sides generously with salt and freshly ground black pepper.
Now, heat the olive oil in a large, heavy-bottomed skillet or Dutch oven over medium-high heat. You want the oil to be shimmering but not smoking. Carefully place the seasoned chicken thighs into the hot skillet, ensuring not to overcrowd the pan. Cook in batches if necessary. Sear for about 4-5 minutes per side, until a deep golden-brown crust has formed. This searing not only adds incredible flavor but also helps to seal in the juices. Once seared, remove the chicken from the skillet and set it aside on a plate. Don’t worry if the chicken isn’t cooked through at this stage; it will finish cooking in the sauce.
Building the Flavorful Sauce
After removing the chicken, there will be delicious browned bits (fond) stuck to the bottom of the pan. This is where a lot of the flavor resides! Reduce the heat to medium and add the chopped yellow onion to the skillet. Cook, stirring occasionally, until the onions are softened and translucent, about 5-7 minutes. Scrape up any browned bits from the bottom of the pan as the onions release their moisture.
Next, add the minced garlic, dried oregano, dried thyme, and smoked paprika to the skillet. Cook for another minute, stirring constantly, until fragrant. Be careful not to burn the garlic, as it can turn bitter. The aroma at this point is already non-intoxicating! Pour in the crushed tomatoes and chicken broth, stirring to combine and further deglaze the pan. Bring the mixture to a gentle simmer. Taste the sauce and adjust seasoning with salt and pepper as needed. Remember, you can always add more salt, but you can’t take it away, so start conservatively.
Simmering to Perfection
Now, it’s time to bring the chicken back into the equation. Return the seared chicken thighs to the skillet, nestling them into the simmering tomato sauce. Make sure the chicken is mostly submerged in the liquid. Reduce the heat to low, cover the skillet tightly, and let it simmer gently for at least 30-40 minutes, or until the chicken is cooked through and incredibly tender. The longer it simmers, the more the flavors will meld and deepen. You can even let it go for an hour if you have the time – the results will be even more spectacular. Periodically check to ensure the sauce isn’t drying out, adding a splash more chicken broth or water if needed.
Finishing Touches and Serving
In the last 10 minutes of cooking, stir in the heavy cream and grated Parmesan cheese. The cream adds a luxurious richness and smooths out the acidity of the tomatoes, while the Parmesan cheese brings a salty, nutty depth. Stir gently until the sauce is heated through and the cheese is fully melted. The sauce should be thick enough to coat the back of a spoon.
Before serving, I like to give the chicken a final taste and adjust seasoning one last time. If the sauce seems a little too thick, you can stir in a tablespoon or two of water or broth. Garnish generously with fresh chopped parsley for a burst of color and freshness. This dish is absolutely divine served over a bed of your favorite cooked pasta, like linguine or penne, or simply with a generous chunk of warm, crusty bread for dipping into that incredible sauce. Enjoy every single comforting bite!

Conclusion:
So there you have it! This #Recipe is a true winner, offering a delightful balance of flavors and textures that I’m sure you’ll adore. It’s incredibly versatile and surprisingly simple to make, making it perfect for both weeknight dinners and special occasions. Whether you’re a seasoned cook or just starting out in the kitchen, I genuinely encourage you to give this dish a try. I’ve found it to be a fantastic way to impress guests or simply treat myself to something truly satisfying. Don’t be afraid to experiment with the suggested variations below to tailor it to your personal taste preferences. I can’t wait to hear about your culinary adventures with this recipe!
Serving Suggestions: This #Recipe pairs beautifully with a crisp green salad, crusty bread for dipping, or a side of roasted vegetables. For a more substantial meal, consider serving it alongside fluffy rice or creamy mashed potatoes.
Variations: Feel free to add your favorite spices, swap out the protein for chicken or tofu, or incorporate a medley of seasonal vegetables. A sprinkle of fresh herbs like parsley or cilantro at the end adds a wonderful burst of freshness.
FAQs:
Can I make this #Recipe ahead of time?
Absolutely! Many components of this dish can be prepared in advance. The sauce can be made a day or two ahead, and the main ingredients can be prepped. Simply assemble and cook when you’re ready to serve for a stress-free experience.
What if I don’t have [specific ingredient]?
Don’t worry! This #Recipe is forgiving. For instance, if you’re missing a particular herb, a similar one will likely work well. If you don’t have a specific spice, consider omitting it or substituting with something with a similar flavor profile. The goal is to enjoy the process and the delicious outcome!
Is this #Recipe suitable for dietary restrictions?
Yes, with a few adjustments! For a vegetarian or vegan option, substitute the meat with firm tofu or a plant-based protein alternative. Ensure any dairy components are swapped for non-dairy versions. Always check ingredient labels for hidden allergens.
#Recipe
A simple and versatile recipe framework adaptable to various ingredients. This placeholder recipe demonstrates structure with substituted ingredients.
Ingredients
-
2 cups all-purpose flour
-
1 teaspoon baking powder
-
1/2 teaspoon salt
-
1/4 cup unsalted butter, softened
-
1/2 cup granulated sugar
-
1 large egg
-
1/4 cup milk
Instructions
-
Step 1
In a medium bowl, whisk together the flour, baking powder, and salt. -
Step 2
In a separate large bowl, cream together the softened butter and granulated sugar until light and fluffy. -
Step 3
Beat in the egg until well combined. -
Step 4
Gradually add the dry ingredients to the wet ingredients, alternating with the milk, beginning and ending with the dry ingredients. Mix until just combined. -
Step 5
Shape the dough as desired (e.g., into cookies, a loaf, or muffins). Adjust baking time and temperature based on the intended final product. -
Step 6
Bake according to your recipe’s specific instructions until golden brown and cooked through.
Important Information
Nutrition Facts (Per Serving)
It is important to consider this information as approximate and not to use it as definitive health advice.
Allergy Information
Please check ingredients for potential allergens and consult a health professional if in doubt.