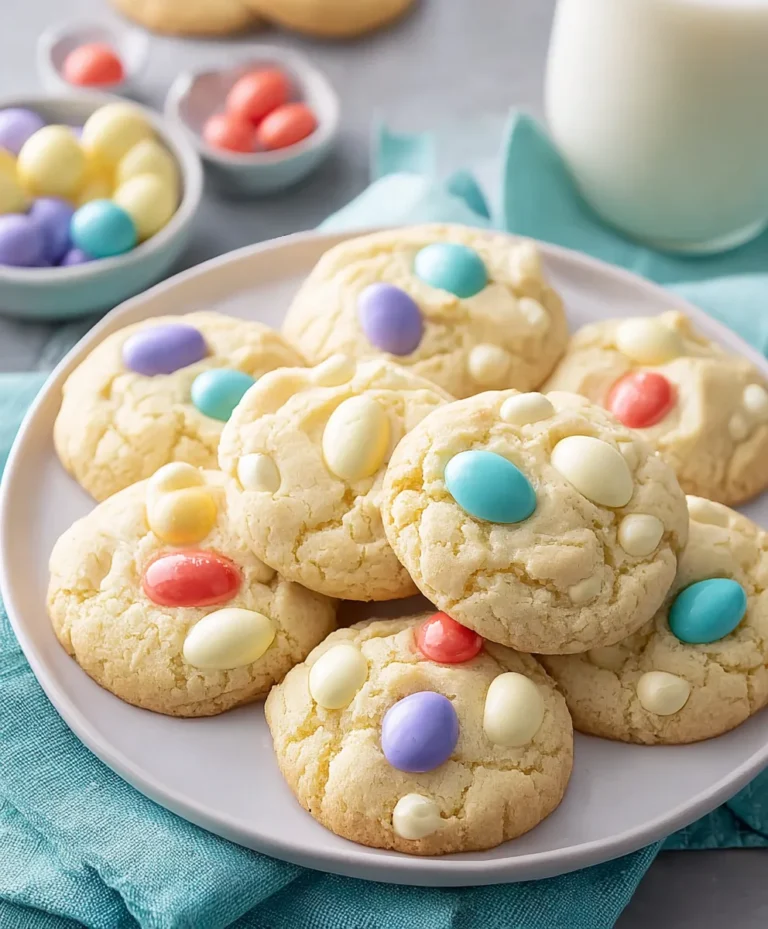
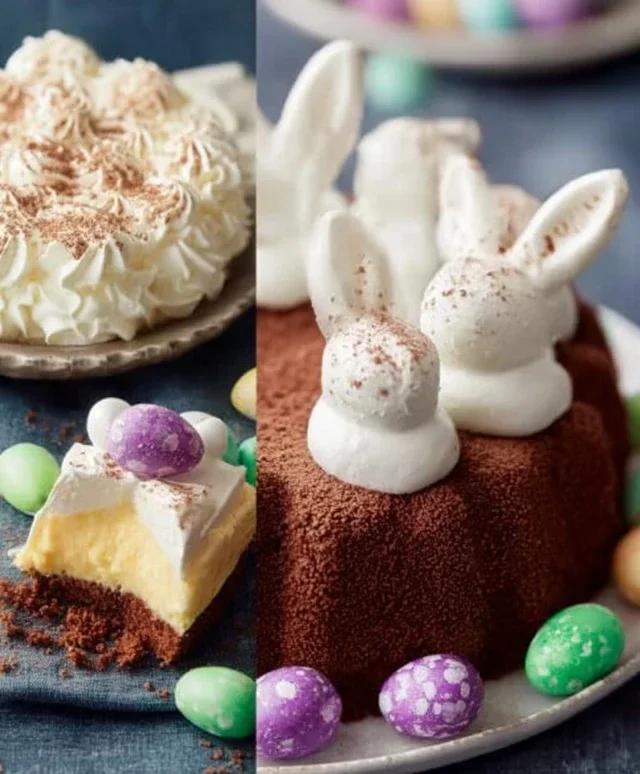
Stunning Spring Desserts – Wow Your Guests
Stunning Spring Desserts to Awe Your Guests! As the world awakens with vibrant colors and a gentle warmth, it’s the perfect time to bring that same freshness and beauty to our tables. I’m so excited to share a collection of recipes designed not just to satisfy a sweet tooth, but to truly captivate. Imagin extracte the delight on your friends’ faces as they encounter these visually stunning and incredibly delicious creations. People adore spring desserts because they capture the essence of the season: light, fruity, floral, and utterly refreshing. These aren’t your heavy, winter indulgences; they’re delicate masterpieces that celebrate the bounty of spring produce. What makes these particular stunning spring desserts so special is their unique blend of vibrant flavors and elegant presentation, transforming simple ingredients into edible works of art that will undoubtedly leave a lasting impression.

Stunning Spring Desserts to Awe Your Guests!
Spring has sprung, and with it comes a vibrant energy that calls for lighter, fresher, and more colorful desserts. Forget those heavy, wintery treats; it’s time to embrace the season’s bounty with flavors that sing of sunshine and blooming gardens. Whether you’re hosting a special brunch, a delightful garden party, or simply want to impress your loved ones with a sweet finnon-alcoholic ale, these spring desserts are guaranteed to leave a lasting impression. I’ve curated a selection of recipes that are not only visually stunning but also bursting with delightful spring flavors. Let’s dive into creating some truly memorable sweet endings!
Lemon Raspberry Tartlets with Meringue Kisses
These individual tartlets are a perfect encapsulation of spring. The bright, zesty lemon curd is balanced beautifully by the sweet, slightly tart raspberries, all nestled in a crisp, buttery pastry shell. Crowned with delicate, airy meringue kisses, they look as enchanting as they taste.
Ingredients:
Cooking Instructions:
1. Prepare the Tartlet Shells: In a food processor, pulse together the flour, powdered sugar, and salt until combined. Add the cold, cubed butter and pulse until the mixture resembles coarse crum extractbs with some pea-sized pieces of butter remaining. In a small bowl, whisk together the egg yolk and 2 tablespoons of ice water. With the food processor running, gradually drizzle in the egg yolk mixture until the dough just starts to come together. If it’s too dry, add the remaining tablespoon of ice water, a little at a time. Be careful not to overmix. Turn the dough out onto a lightly floured surface and gently bring it together into a disc. Wrap tightly in plastic wrap and refrigerate for at least 30 minutes. This chilling step is crucial for a flaky crust.
2. Bake the Tartlet Shells: Preheat your oven to 375°F (190°C). Lightly grease individual tartlet pans (about 4-inch diameter). Roll out the chilled dough on a lightly floured surface to about 1/8-inch thickness. Cut out circles large enough to fit into your tartlet pans, pressing the dough gently into the bottom and up the sides. Trim any excess dough. Prick the bottoms of the tart shells with a fork several times to prevent puffing. Line each shell with parchment paper or foil and fill with pie weights or dried beans. Blind bake for 15 minutes. Remove the weights and parchment, and bake for another 5-7 minutes, or until the shells are lightly golden brown and cooked through. Let them cool completely in their pans before removing.
3. Make the Lemon Curd: While the tartlet shells are cooling, prepare the lemon curd. In a heatproof bowl set over a saucepan of simmering water (a double boiler), whisk together the egg yolks and granulated sugar until well combined and slightly lighter in color. Gradually whisk in the fresh lemon juice and lemon zest. Cook, stirring constantly, until the mixture thickens enough to coat the back of a spoon, about 8-10 minutes. Do not let the mixture boil, or the eggs will scramble. Remove the bowl from the heat and whisk in the cubed butter, one cube at a time, until fully incorporated and the curd is smooth and glossy. Strain the curd through a fine-mesh sieve into a clean bowl to remove any zest or bits of cooked egg. Cover the surface of the curd directly with plastic wrap to prevent a skin from forming and let it cool to room temperature, then refrigerate until chilled and set.
4. Prepare the Meringue Kisses: For the meringue, ensure your mixing bowl and whisk are spotlessly clean and free of any grease. In the clean bowl, beat the egg whites and cream of tartar with an electric mixer on medium speed until soft peaks form. Gradually add the granulated sugar, one tablespoon at a time, beating on high speed until stiff, glossy peaks form and the sugar has completely dissolved (rub a little between your fingers; it should feel smooth, not gritty). Transfer the meringue to a piping bag fitted with a small star tip. Pipe small kisses onto a baking sheet lined with parchment paper.
5. Bake the Meringue Kisses and Assemble: Preheat your oven to 200°F (95°C). Bake the meringue kisses for about 1 to 1.5 hours, or until they are dry and crisp to the touch. Turn off the oven and let the meringues cool completely inside the oven with the door slightly ajar. Once the tartlet shells are completely cooled, spoon the chilled lemon curd into each shell, filling them generously. Top the lemon curd with a scattering of fresh raspberries. You can gently press them into the curd. Finally, arrange the delicate meringue kisses on top of the raspberries. For an extra touch of spring elegance, you can garnish with a few edible flowers. These tartlets are best served the same day they are assembled for maximum crispness of the shells and tenderness of the meringue. Enjoy these little bites of sunshine!
Conclusion:
As we wrap up our journey through these stunning spring desserts, I hope you’re feeling inspired to bring a touch of springtime magic to your table! These recipes are more than just desserts; they’re edible expressions of the season’s renewal, bursting with fresh flavors and vibrant colors. Whether you’re looking for a show-stopping centerpiece or a delightful treat to share, these creations are guaranteed to impress your guests and leave them talking long after the last bite. Remember, baking is about joy and connection, so don’t be afraid to get creative and make these recipes your own.
When it comes to serving, consider pairing your desserts with light and refreshing beverages like sparkling elderflower cordial, a crisp rosé, or a delicate herbal tea. For an extra touch of elegance, garnish with fresh edible flowers, a dusting of powdered sugar, or a dollop of freshly whipped cream. These stunning spring desserts are perfect for Easter brunches, Mother’s Day gatherings, or simply a delightful way to celebrate the longer days and warmer weather. So go ahead, choose your favorite, gather your ingredients, and embark on a delicious adventure. I can’t wait to hear about your successes!
Frequently Asked Questions:
Can I make these desserts ahead of time?
Many of these desserts can be partially or fully prepared in advance, which is a lifesaver for busy hosts! For recipes with fruit fillings or delicate meringues, it’s often best to assemble them closer to serving time to maintain their freshness and texture. Always check the individual recipe notes for specific make-ahead instructions and storage recommendations to ensure your stunning spring desserts are at their absolute best when you present them.
What if I can’t find a specific spring fruit?
Don’t worry if you can’t get your hands on a particular ingredient! Many of these recipes are quite forgiving. For instance, if you can’t find fresh raspberries, strawberries or blueberries would make wonderful substitutes in most cases. Similarly, if a recipe calls for lemon zest, lime zest can often be used interchangeably for a slightly different, but equally delicious, citrus note. The key is to embrace seasonal availability and adapt!
Stunning Spring Desserts to Awe Your Guests!
Impress your guests with these delightful and visually appealing spring-themed desserts, perfect for any occasion.
Ingredients
-
1 cup all-purpose flour
-
1/2 cup granulated sugar
-
1/4 cup unsalted butter, softened
-
1 large egg
-
1 teaspoon vanilla extract
-
1/2 cup fresh strawberries, hulled and quartered
-
1/4 cup heavy cream
-
2 tablespoons powdered sugar
-
Fresh mint leaves, for garnish
Instructions
-
Step 1
Preheat your oven to 350°F (175°C). Lightly grease a baking sheet. -
Step 2
In a medium bowl, cream together the softened butter and granulated sugar until light and fluffy. -
Step 3
Beat in the egg and vanilla extract until well combined. -
Step 4
Gradually add the all-purpose flour, mixing until just combined to form a dough. Do not overmix. -
Step 5
Drop rounded tablespoons of dough onto the prepared baking sheet, spacing them about 2 inches apart. -
Step 6
Bake for 10-12 minutes, or until the edges are lightly golden brown. Let cool on the baking sheet for a few minutes before transferring to a wire rack to cool completely. -
Step 7
While the cookies cool, whip the heavy cream with powdered sugar until stiff peaks form. -
Step 8
To serve, top each cooled cookie with a dollop of whipped cream, a few fresh strawberry quarters, and a garnish of fresh mint leaves.
Important Information
Nutrition Facts (Per Serving)
It is important to consider this information as approximate and not to use it as definitive health advice.
Allergy Information
Please check ingredients for potential allergens and consult a health professional if in doubt.