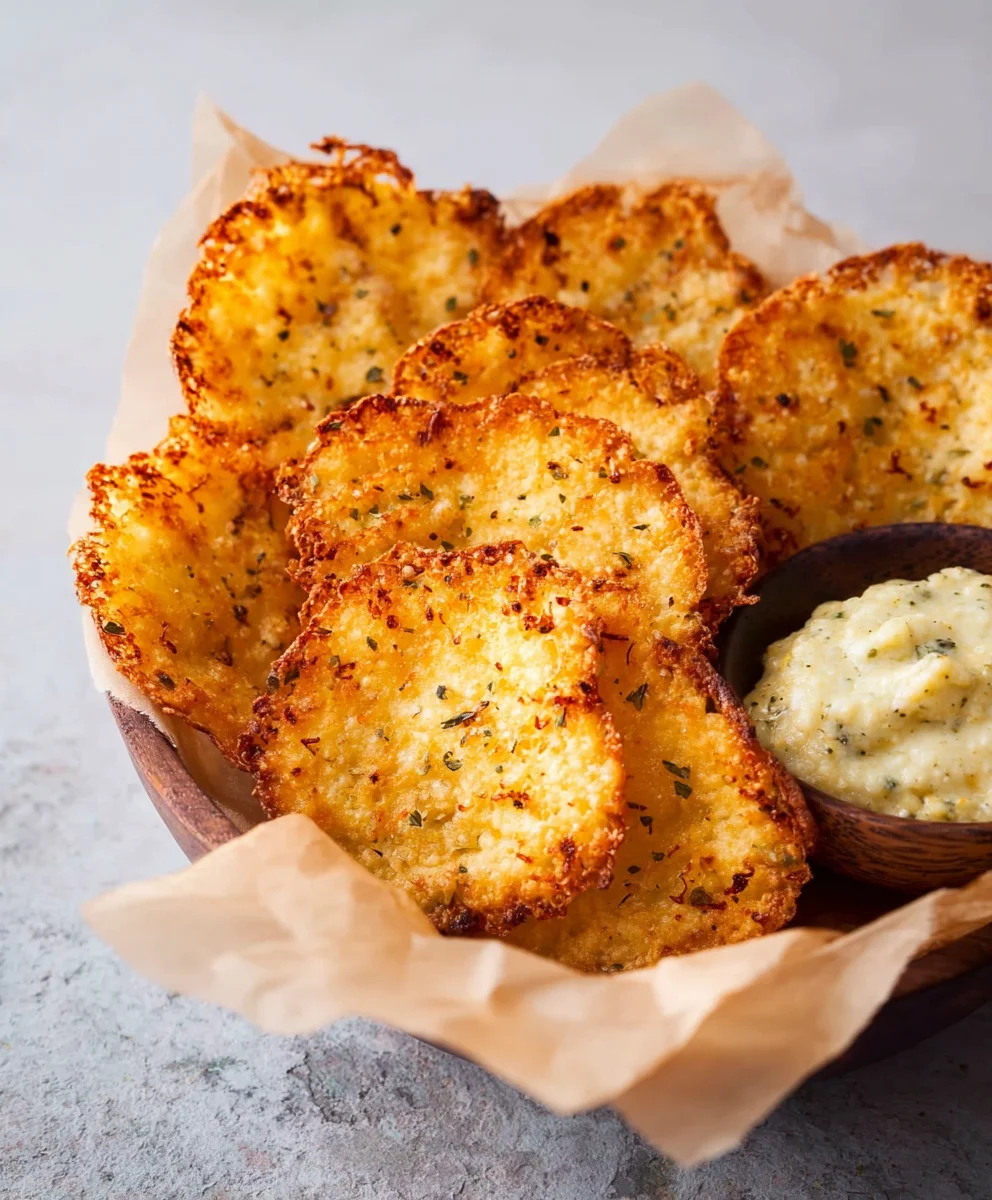
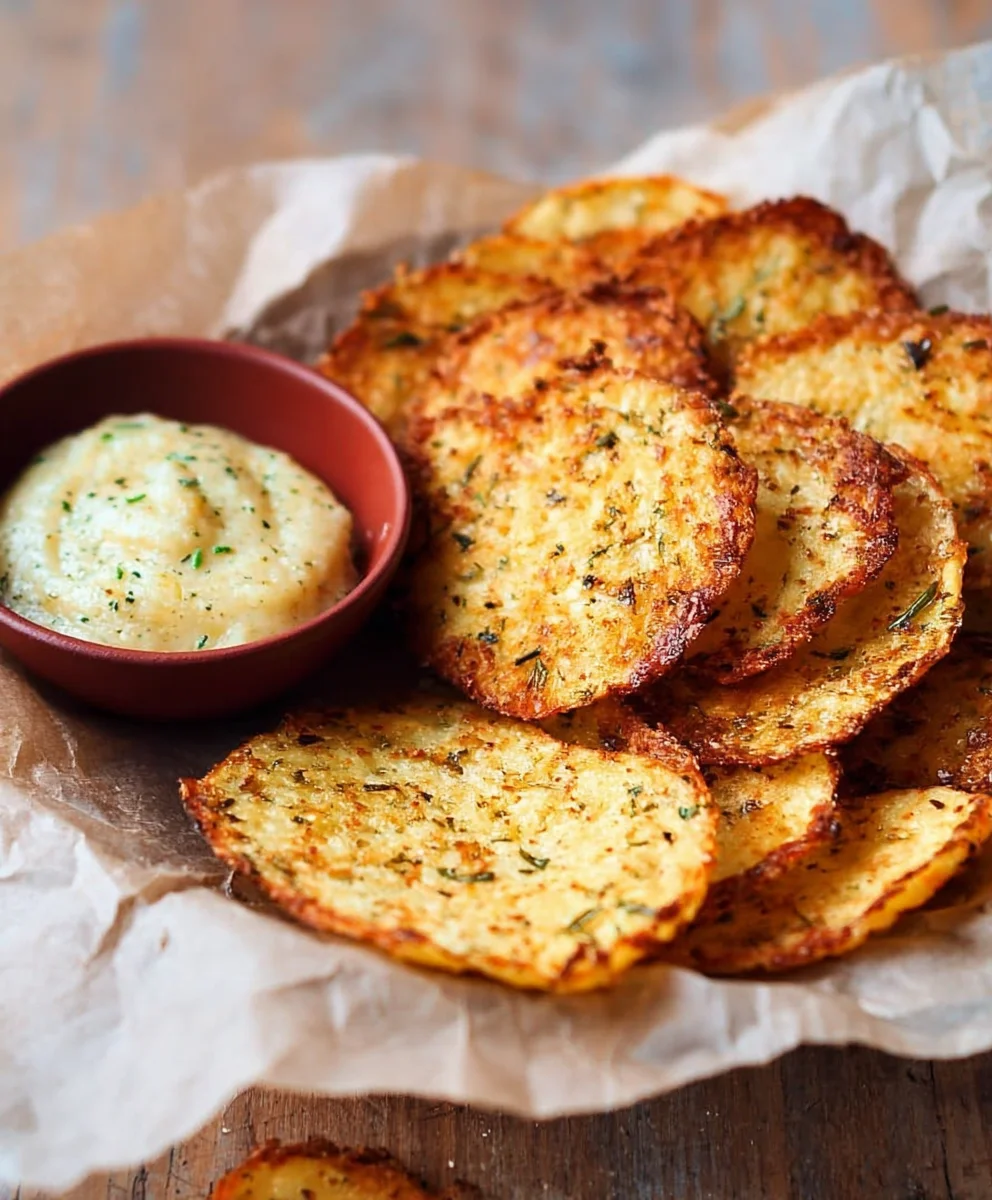
Crispy Cottage Cheese Chips-Healthy Keto Snack
Cottage Cheese Chips are the revelation your snack game has been waiting for. Forget everything you thought you knew about healthy snacking, because these crispy, dippable delights are about to blow your mind. We’ve all been there, craving something crunchy and satisfying, but feeling guilty about reaching for the usual processed options. That’s where these ingenious cottage cheese chips step in, offering an incredibly satisfying crunch with a surprising nutritional punch. What makes them so universally loved? It’s the magical transformation of simple cottage cheese into an addictive, savory bite that’s endlessly versatile. They’re perfect for dipping, crushing over salads, or enjoying all on their own. The secret to their specialness lies in their simplicity and the fantastic protein boost they provide, making them a guilt-free indulgence that truly satisfies. Get ready to discover your new favorite healthy obsession!
Ingredients:
- 2 cups full-fat cottage cheese
- 2 large eggs
- 1/4 cup grated Parmesan cheese
- 1/2 teaspoon garlic powder
- 1/4 teaspoon onion powder
- 1/4 teaspoon dried oregano
- Pinch of black pepper
- Pinch of salt (optional, adjust based on Parmesan cheese saltiness)
Preparing the Cottage Cheese Base
The foundation of our delicious Cottage Cheese Chips is, of course, cottage cheese. For the best texture and flavor, I highly recommend using full-fat cottage cheese. The higher fat content contributes to a richer taste and a more satisfying crisp when baked. If you prefer a lighter version, you can experiment with low-fat, but be aware that the texture might be slightly different, potentially less creamy and more prone to drying out.
You’ll need about 2 cups of cottage cheese. The key to getting a smooth, chip-like consistency is to process the cottage cheese thoroughly. You can do this in a few ways. A blender or food processor works exceptionally well, yielding the smoothest mixture. If you don’t have either of those, you can use an immersion blender, or even vigorous whisking by hand. The goal is to break down the curds until you have a relatively uniform, thick, creamy base. Don’t worry if it’s not perfectly liquid; we’re not aiming for a batter, but rather a thick paste. This step is crucial for ensuring your chips bake evenly and achieve that delightful crunch.
Next, we’ll incorporate the binding agents and flavor enhancers. Crack two large eggs into the processed cottage cheese mixture. Eggs are vital here; they help bind everything together, ensuring your chips hold their shape during baking and become wonderfully crispy. Add the grated Parmesan cheese. Parmesan adds a salty, nutty depth that complements the subtle tang of the cottage cheese beautifully. For seasoning, we’re keeping it simple but effective. Sprinkle in the garlic powder and onion powder. These aromatics provide a savory backbone. Dried oregano adds a hint of herbaceousness, and a pinch of black pepper brings a touch of warmth. A pinch of salt is optional; taste your mixture before adding it, as Parmesan cheese can be quite salty on its own. Mix everything together until it’s well combined and uniformly colored.
Forming and Baking the Chips
Now comes the fun part: transforming our creamy mixture into crispy chips! Preheat your oven to 350 degrees Fahrenheit (175 degrees Celsius). This moderate temperature is ideal for allowing the chips to dehydrate and crisp up without burning.
Line a large baking sheet with parchment paper. This is essential to prevent sticking and makes cleanup a breeze. You can use a standard-sized baking sheet, or if you’re making a large batch, consider using two. You want to spread the cottage cheese mixture as thinly and evenly as possible. The thinner you spread it, the crispier your chips will be. I find that using an offset spatula or the back of a spoon works best for this. Aim for a thickness of about 1/16 to 1/8 of an inch. You can spread it out as one large sheet and then cut it after baking, or you can dollop small spoonfuls onto the parchment paper and then flatten them out individually. For perfectly uniform chips, using a piping bag filled with the mixture can also be an effective method. If you’re spreading it as a large sheet, try to keep the thickness as consistent as possible across the entire surface. This will ensure that all your chips bake at the same rate.
Once your baking sheet is prepped and the oven is preheated, carefully place the baking sheet into the oven. The baking time can vary significantly depending on the thickness of your chips and your oven. Start by baking for approximately 20 to 25 minutes. During this initial baking period, the chips will start to firm up and lose moisture.
Achieving the Perfect Crisp
After the initial baking time, it’s time to check on your chips and potentially flip them. Carefully remove the baking sheet from the oven. The edges of the chips should be starting to turn golden brown, and the center should feel set, not wet. If you spread the mixture as one large sheet, you can now carefully cut it into chip-sized pieces using a pizza cutter or a sharp knife. This is much easier to do while the sheet is still warm and somewhat pliable. Then, you can flip each chip individually. If you made individual dollops, you’ll simply flip each one.
Return the baking sheet to the oven and continue baking for another 15 to 25 minutes, or until the chips are golden brown and delightfully crispy. Keep a close eye on them during this second stage, as they can go from perfectly crisp to burnt very quickly. The edges will likely brown faster than the center. If some chips are crisping up faster than others, you can carefully remove them from the baking sheet to prevent over-baking while the rest continue to bake. The goal is to achieve a nice, even golden-brown color and a texture that snaps when broken.
Once your Cottage Cheese Chips are baked to perfection, remove them from the oven. They will continue to crisp up as they cool. Let them cool completely on the baking sheet or transfer them to a wire rack for faster cooling. This cooling process is just as important as the baking for achieving that satisfying crunch. They should feel dry and brittle to the touch.
Cooling and Storing
After the chips have cooled completely, they are ready to be enjoyed! You’ll notice they’ve shrunk a bit and hardened up significantly from their initial soft state. Gently peel them off the parchment paper. They should release easily. If you find any spots are still a bit soft or not quite crispy enough, you can pop them back into the turned-off oven for a few extra minutes, or even toast them in a toaster oven.
Store your finished Cottage Cheese Chips in an airtight container at room temperature. If they are truly dried out and crispy, they should stay fresh and crunchy for several days. If humidity gets to them, they might lose some of their crispness, so an airtight container is your best friend here. They make a fantastic healthy snack on their own, or you can serve them with your favorite dips like salsa, guacamole, or a creamy ranch. Experiment with different seasonings before baking too – a sprinkle of smoked paprika, a dash of chili powder, or even some everything bagel seasoning can add exciting new flavor dimensions to your homemade chips. Enjoy the satisfying crunch and delicious taste!
Conclusion:
You’ve now mastered the art of creating delicious and surprisingly healthy Cottage Cheese Chips! This recipe is a testament to how simple ingredients can transform into a craveable snack. We’ve seen how easy it is to get perfectly crispy, flavorful chips with just a few steps and a bit of patience. Whether you’re looking for a low-carb alternative, a protein-packed snack, or just something new and exciting to make, these Cottage Cheese Chips are sure to become a favorite in your kitchen.
I love serving these alongside my favorite dips, like salsa or guacamole, but they’re also fantastic on their own as a light and satisfying bite. Don’t be afraid to experiment with the seasonings – think smoked paprika, garlic powder, or even a sprinkle of nutritional yeast for a cheesy flavor boost. You can also try different shapes by cutting them before or after baking. The possibilities are truly endless!
I hope you enjoy making and sharing these delightful Cottage Cheese Chips as much as I do. Happy snacking!
FAQs:
Why are my Cottage Cheese Chips not crispy?
Several factors can contribute to less-than-crispy Cottage Cheese Chips. Ensure you’re draining any excess liquid from the cottage cheese thoroughly before mixing it with your seasonings and spreading it onto the baking sheet. Overcrowding the baking sheet can also prevent them from crisping up properly; bake in a single layer with some space between each chip. Finally, make sure you’re baking them long enough at the correct temperature. Sometimes, a few extra minutes can make all the difference!
Can I make these Cottage Cheese Chips ahead of time?
Yes, you absolutely can! Once cooled completely, store your Cottage Cheese Chips in an airtight container at room temperature. They are best enjoyed within 2-3 days to maintain their maximum crispiness. If they do lose a little crunch, you can briefly re-bake them in a low oven (around 250°F or 120°C) for a few minutes to revive them.
Crispy Cottage Cheese Chips
A healthy, keto-friendly snack made from cottage cheese, eggs, and Parmesan cheese, baked to a satisfying crisp.
Ingredients
-
2 cups full-fat cottage cheese
-
2 large eggs
-
1/4 cup grated Parmesan cheese
-
1/2 teaspoon garlic powder
-
1/4 teaspoon onion powder
-
1/4 teaspoon dried oregano
-
Pinch of black pepper
-
Pinch of salt (optional)
Instructions
-
Step 1
Preheat oven to 350°F (175°C). Line a baking sheet with parchment paper. -
Step 2
Process 2 cups of full-fat cottage cheese in a blender or food processor until smooth. Mix in 2 large eggs, 1/4 cup grated Parmesan cheese, 1/2 teaspoon garlic powder, 1/4 teaspoon onion powder, 1/4 teaspoon dried oregano, a pinch of black pepper, and optional salt until well combined. -
Step 3
Spread the cottage cheese mixture thinly and evenly onto the prepared baking sheet, aiming for about 1/16 to 1/8 inch thickness. This can be done as one large sheet or individual dollops. -
Step 4
Bake for 20-25 minutes, until the edges are golden brown and the center is set. If spread as a sheet, cut into chip-sized pieces now. -
Step 5
Flip the chips and bake for another 15-25 minutes, or until golden brown and crispy. Monitor closely to prevent burning. Remove any chips that are done sooner. -
Step 6
Let the chips cool completely on the baking sheet or a wire rack to achieve maximum crispness. Store in an airtight container at room temperature.
Important Information
Nutrition Facts (Per Serving)
It is important to consider this information as approximate and not to use it as definitive health advice.
Allergy Information
Please check ingredients for potential allergens and consult a health professional if in doubt.